Inleiding
Upgrade your hard drive for more storage capacity.
Wat je nodig hebt
Video overzicht
-
-
Loosen the single Phillips screw in the center of the access door.
-
Remove the access door from your iMac.
-
-
Gereedschap gebruikt in deze stap:Heavy-Duty Suction Cups (Pair)$14.95
-
Stick two suction cups to opposing corners of the glass panel.
-
-
-
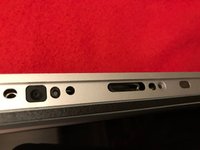
Remove the following 12 screws securing the front bezel to the rear case:
-
Eight 13 mm T8 Torx.
-
Four 25 mm T8 Torx.
-
-
-
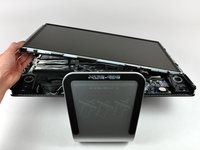
Place your hands at the top corners of the bezel (to the side) and lift the bezel 2-3cm from the body by working from the top. After this you can also disengage the bottom of the bezel (the memory modules will prevent the bottom of the bezel to detach first). When reassembling, start with the bottom of the bezel.
-
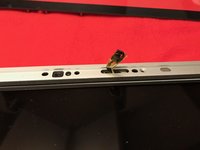
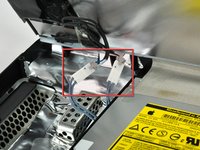
To fully detach the bezel: disconnect the microphone cable connector, removing tape as necessary.
-
To keep it attached, leave the microphone cable attached to the logic board, and place the bezel 'above' the chassis, with the microphone cable forming a hinge.
-
-
-
be sure to tuck the microphone cable and connector into the void next to the camera board.
-
Gently guide the microphone connector and cables through the ±1in long slot at the right of the iSight camera. Once the bezel is properly assembled, gently push the microphone connector and cable into the bezel through that slot.
-
-
-
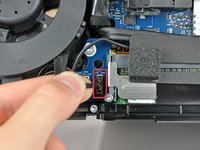
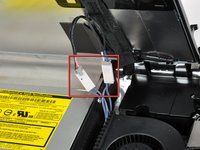
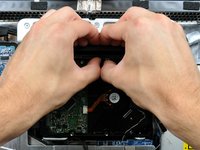
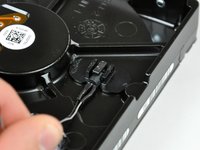
Pull the LCD temperature sensor connector straight up out of its socket on the logic board.
-
If necessary, de-route the LCD temperature sensor cable from behind the logic board.
-
-
-
-
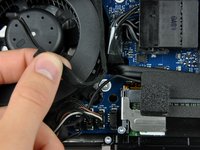
With the display panel still lifted, disconnect the four inverter cables.
-
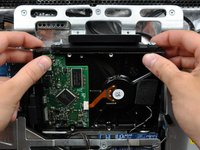
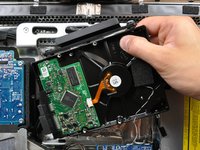
If you are replacing a hard drive and have an extra set of hands, it is possible to reach in and remove the drive without disconnecting anything but the LCD temp and display connector in the previous step with the LCD in its propped position.
-
-
-
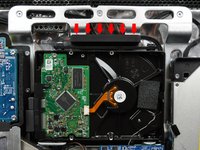
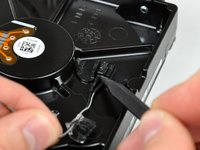
If necessary, remove the pieces of tape securing the hard drive/optical drive thermal sensor cables to your iMac.
-


To reassemble your device, follow these instructions in reverse order.
To reassemble your device, follow these instructions in reverse order.
Annuleren: ik heb deze handleiding niet afgemaakt.
887 andere personen hebben deze handleiding voltooid.

81 opmerkingen
Great instructions - used them for my 2134 model. Only difference is on Step 9 - see comments on that step.
Wonderful guide. I used it to replace a dead drive in my wife's 24" iMac. Installed a WD Caviar Black 2 TB. I'm jealous because her system now runs faster than mine ;-P.
Here is another reason to DIY this repair, while Apple's labor fee is reasonable, their warranty policy for repairs is not. If you have a new drive installed at the Apple store, your warranty on the drive is only 90 days. Worse yet, the drives are Apple branded, so you can't go to the hard drive manufacturer if the drive fails on day 91.
The two screws in step 8, page 3 are T7 - not T6. Apart from that, excellent guide!
When first starting with my OS (Snow Leopard) disk all I got was a whitish or gray screen, not even the mouse. So I started freaking out a bit. I couldn't get the key board to stay on so I kept pushing the keyboard power button while holding the option button and then the mouse arrow came up on the screen. After that the apple sign and then the install procedure started, so I was able to breathe again. So about five in the morning I was able to let it do it's thing and get some sleep. The next day I was able to restore from the external hard drive using Time Machine and so far my IMac 20" 7,1 #2133 is running super fast again probably better than when I got it brand new " if that's possible ". With your instructions on I fixit.com and your videos on YouTube it was pretty darn easy, even for someone like me who has never worked on a computer. The most I've done on a computer I installed a new program (Snow Leopard). Thank you, Tom D.