Inleiding
Are the lights of your Zerodate T26 mouse not functioning when the mouse is on and otherwise working? If so, here’s the guide on replacing your mouse's RGB lights. All you need is a plastic opening tool to gently pry the top, a Phillips #00 screwdriver to open the mouse, and a soldering iron to begin replacing. New LEDs can be purchased online.
Wat je nodig hebt
-
-
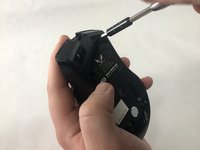
Remove the top shell of the mouse by using the iFixit opening tool to carefully pry the top shell apart from the bottom plate.
 Vraag FixBot
-
-
Gereedschap gebruikt in deze stap:Tweezers$4.99
-
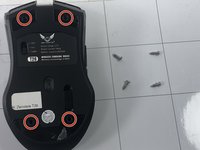
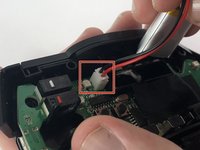
Remove the adhesive pads using precision tweezers or the iFixit opening tool.
-
-
-
-
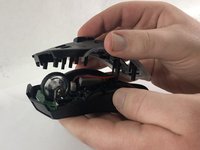
Carefully pull the middle shell apart from the bottom plate.
-
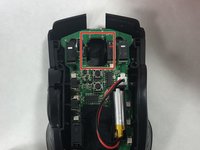
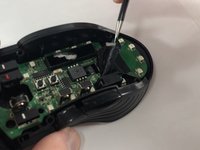
The circuit board should then be visible and attached to the bottom plate.
-
-
Gereedschap gebruikt in deze stap:Tweezers$4.99
-
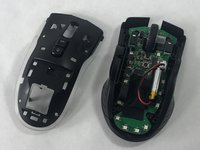
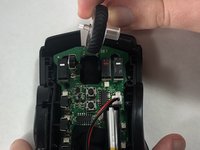
Disconnect the battery from the circuit board.
-
Use the precision tweezers to remove the tape from the circuit board.
-
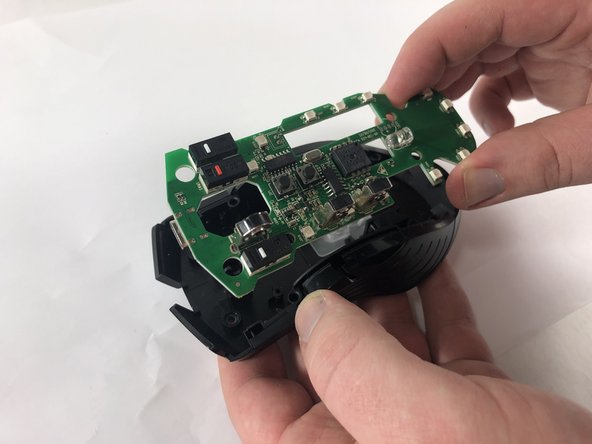
Carefully pull apart the circuit board from the bottom shell.
-
-
-
Desolder the LEDs from the circuit board and solder on the new LEDs following the soldering guide.
-


To reassemble your device, follow these instructions in reverse order.

Team

UMass Dartmouth, Team 2-3, Petersen Spring 2023 Lid van UMass Dartmouth, Team 2-3, Petersen Spring 2023
UMASSD-PETERSEN-S23S2G3
4 Leden
6 handleidingen geschreven