Inleiding
If you begin to notice that your battery doesn’t seem to be charging, or isn’t holding a charge like it used to, then it may be time to replace it. This guide will walk you through the steps to replace the battery in your Wacom Intuos Pro. Replacing the battery of your device should restore its charge capacity and lifespan to near new conditions.
Wat je nodig hebt
-
-
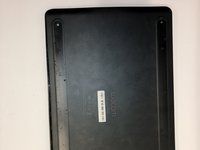
Orient the device so the bottom casing is facing upwards.
-
Use your fingers to gently pull on the rubber covers on the bottom of the device to remove them.
 Vraag FixBot
-
-
-
Remove the four 4mm screws from underneath the rubber feet using a Phillips #00 screwdriver.
-
The screws are located 40mm in from the edge, so it not necessary to completely remove the rubber if you prefer not to.
-
-
-
-
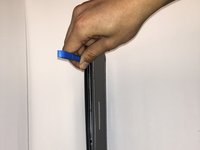
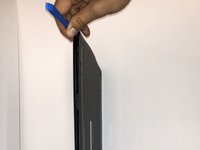
Insert the iFixit Opening Tool between the front and back cover of the device in order to snap and separate the type locks from around the edges.
-
Use the iFixit Opening Tool all the way around the edges until all the snaps have been released.
-
-
-
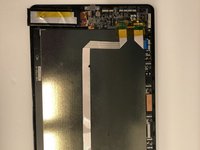
Remove the case backing from the rear of the device with your hands so the internal components are exposed.
-
-
-
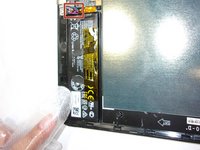
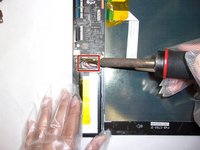
If not already done, desolder the three colored cables that connect the battery to the motherboard.
-
After desoldering the battery, carefully remove it.
-






To reassemble your device, follow these instructions in reverse order.
Annuleren: ik heb deze handleiding niet afgemaakt.
3 andere personen hebben deze handleiding voltooid.

Team

Embry-Riddle Aeronautical University, Team S6-G3, Watkins Spring 2020 Lid van Embry-Riddle Aeronautical University, Team S6-G3, Watkins Spring 2020
ERAU-WATKINS-S20S6G3
4 Leden
5 handleidingen geschreven
7Gids Commentaar
thank you so much. I plan to buy this wacom, however I had the doubt if better the old version that has extractable battery, but with this post, I can go for the new one
Has anyone got a lint to the replacement battery?
PTH-660 works fine without the battery, just remove it and use it with USB cable
Where can I find a replacement battery for this model?
