Deze vertaling is door een computer gegenereerd en is nog niet door iemand nagekeken. Spreek je deze taal? Bekijk het hier.
Inleiding
Gebruik deze handleiding om het dunne plastic input-board en de bijbehorende plastic omlijsting te vervangen. Een nieuw input-board zorgt voor nieuwe elektrische contactpunten voor elke knop, met uitzondering van de analoge sticks.
Wat je nodig hebt
-
-
-
Verwijder de vijf 7,2 mm kruiskopschroeven waarmee het achterpaneel aan de controller is bevestigd.
 Vraag FixBot
-
-
-
Druk op het achterpaneel tussen de analoge sticks en til de onderrand ervan iets op van de rest van de controller.
-
-
-
Duw het achterpaneel iets in de richting van de bovenrand van de controller om de voorrand van de #2 triggers vrij te maken.
-
Trek het achterpaneel weg van de rest van de controller; let daarbij op dat de #2 triggers er niet af springen.
-
-
-
-
-
Til de accu van het moederbord af voor voldoende ruimte om bij de accu-aansluiting te kunnen.
-
-
-
Gereedschap gebruikt in deze stap:Tweezers$4.99
-
Trek de (kabel)aansluiting van de accu voorzichtig uit het stopcontact op het moederbord.
-
-
-
-
-
Verwijder de enkele Phillips-schroef van 7,2 mm die het moederbord aan de voorkant bevestigt.
-
-
-
Schuif de houders van de trekkerknop een klein beetje weg van de voorklep.
-
Verwijder de #1 knop aan beide kanten.
-
-
-
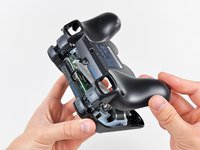
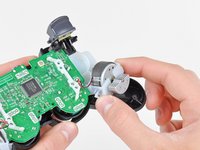
Trek de houders van de trilmotor weg van de voorplaat om de moederbordeenheid los te maken.
-
-
-
-
-
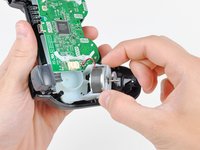
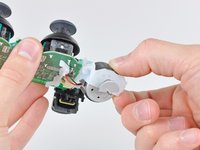
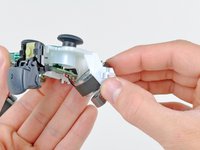
Duw de twee trilmotoren voorzichtig uit de omlijsting van het input-board.
-
-







Volg deze instructies in omgekeerde volgorde om je apparaat weer in elkaar te zetten.
Annuleren: ik heb deze handleiding niet afgemaakt.
26 andere personen hebben deze handleiding voltooid.

2Gids Commentaar
Will a repair guide be available for the newer Dualshock 3 controllers? Because they are vastly different and look to be cheaply made. The CECHZC2U A2 is the one I'm thinking of. I ask becase it's near impossible to find the older better made controllers like the one featured here.
I took my controller apart, which is the same model as the one in the pictures, to clean it because my shoulder buttons would go haywire.
When I separated the input board from the mobo, a little piece of gray foam fell from the input board, specifically from where all the contacts meet the mobo. I thought nothing of it so I cleaned the contacts and put it back together. When I went to use it, none of the buttons did anything, not even the PS button.
This is because the function that black piece of foam, which had disintegrated thus making all the insides of the controller really nasty, is to push the contacts of the input board against the ones on the mobo. So the controller wont work without it.
What I did was I cut a piece of tape and wedged it on the part of the input board that is behind the contacts of the input board. This pushed up against the input board’s contacts and made sure it was always making contact with the mobo. Then it worked just fine!
Sharing this in case someone else runs into this problem.
