Deze vertaling is door een computer gegenereerd en is nog niet door iemand nagekeken. Spreek je deze taal? Bekijk het hier.

Vervanging van de Nintendo GameCube-controllerjoystick

Sean Michel en 4 andere bijdragers
Voor het laatst geüpdatet op 29 jul 2026
Bekeken: 112K
Statistieken weergeven:
- Afgelopen 24 uur:
- 19
- Afgelopen 7 dagen:
- 144
- Afgelopen 30 dagen:
- 514
- Altijd:
- 111.744
Commentaar: 20
7 comments on steps, 13 guide comments.
Go to guide commentsVoltooid: 32 33
32 mensen hebben deze handleiding als "voltooid" gemarkeerd. Ben jij de volgende?
33 personen hebben deze handleiding als "voltooid" gemarkeerd. Een daarvan ben jij—lekker bezig!
Favorieten: 20 21
20 mensen hebben deze handleiding als favoriet gemarkeerd en volgen deze. Ben jij de volgende?
21 personen hebben deze handleiding als favoriet gemarkeerd (en blijven daarmee op de hoogte van meldingen)—een daarvan ben jij!
Uitgelichte studenten-handleiding
Deze handleiding is het resultaat van het harde werk van onze geweldige studenten, en de iFixit-werknemers vonden de gids uitzonderlijk cool.
Inleiding
Ga naar stap 1 ↓Deze handleiding leidt je door de stappen voor het verwijderen van de joystick. Dit komt goed van pas als je een haperende joystick hebt.
Wat je nodig hebt
Gereedschap


-
-
-
Plaats de controller (knoppen naar beneden) op een stevige ondergrond.
-
Verwijder de zes 9,2 mm Tri-wing Y0-schroeven die het achterpaneel op zijn plek houden.
 Vraag FixBot
-
-
-
-
-
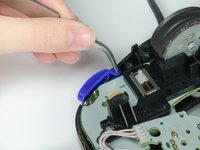
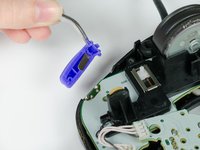
Pak de Z-knop bij het pinnetje vast met een pincet en til deze uit de controller.
-
-
-
-




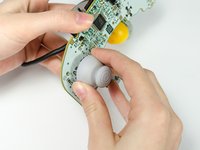
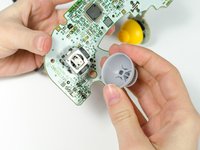
Volg deze instructies in omgekeerde volgorde om je apparaat weer in elkaar te zetten.
Annuleren: ik heb deze handleiding niet afgemaakt.
32 andere personen hebben deze handleiding voltooid.

Team

Cal Poly, Team 19-44, Regan Winter 2013 Lid van Cal Poly, Team 19-44, Regan Winter 2013
CPSU-REGAN-W13S19G44
4 Leden
108 handleidingen geschreven
13Gids Commentaar
Great guide, but I'm looking to buy replacement joysticks and I can't find them anywhere. Where would I find those?
When I removed the joystick it would come off. The plastic was stuck too hard to the joystick so I accidentally broke it in half. Is there anyway to glue it back together?
@Tyler Lovejoy - That's already part of the controller.
@Joe Freedman - Try Amazon.com
@Mattias Wirsenius - At this point it would be best to buy a new controller.
This guide is quite unhelpful; it tells you how to remove the stick but not how to repair it. My controller's joystick has sunken into the controller and stays slightly tilted if i move it to the right. Yet when I go to the "rogue joystick" portion of the troubleshooting guide, it tells me to repair the joystick if it's not correctly attached to the motherboard. Seriously, there needs to be a more in-depth guide if such repairs are possible.
without taking the controller completely apart, pull the joystick straight up with your hand
