Ga door naar hoofdinhoud

Turtle Beach Recon 200 Gen 2 Audio Repair

Wat je nodig hebt

  1. Turtle Beach Recon 200 Gen 2 Audio Repair, Turtle Beach Recon 200 Gen 2 Audio Repair: stap 1, afbeelding 1 van 2 Turtle Beach Recon 200 Gen 2 Audio Repair, Turtle Beach Recon 200 Gen 2 Audio Repair: stap 1, afbeelding 2 van 2
    • Before you begin, power off your headset and unplug it from the charging cable.

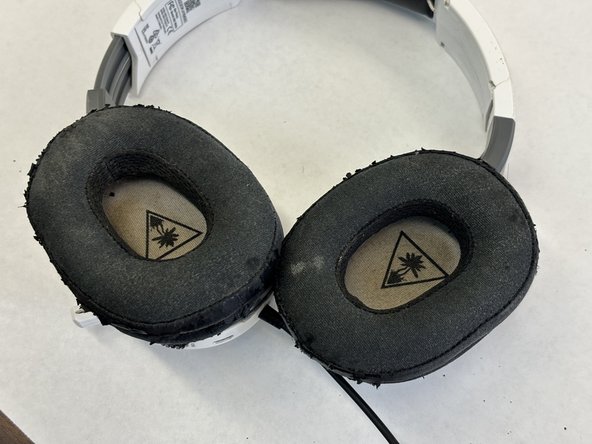
    • Place the headset on a flat surface.

    • Grab the outer layer of the cushion and gently pull each ear cup off the headset.

  2. Turtle Beach Recon 200 Gen 2 Audio Repair: stap 2, afbeelding 1 van 3 Turtle Beach Recon 200 Gen 2 Audio Repair: stap 2, afbeelding 2 van 3 Turtle Beach Recon 200 Gen 2 Audio Repair: stap 2, afbeelding 3 van 3
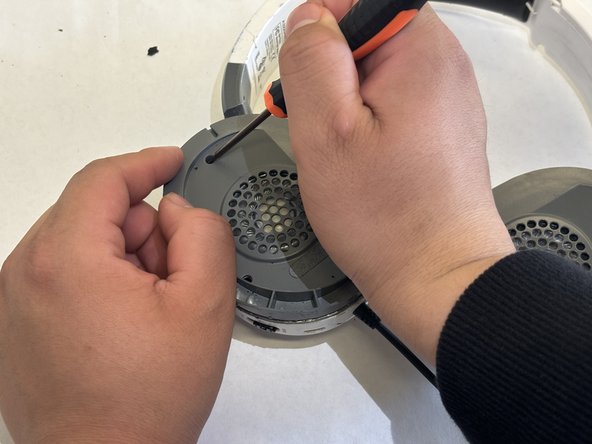
    • Use a Phillips #0 screwdriver to remove three screws from each speaker cover.

    • Use proper screwdriver practices. If you strip a screw, review this guide for tips on how to remove a stripped screw.

    • Place the screws in a secure area. You will need them for reassembly.

  3. Turtle Beach Recon 200 Gen 2 Audio Repair: stap 3, afbeelding 1 van 3 Turtle Beach Recon 200 Gen 2 Audio Repair: stap 3, afbeelding 2 van 3 Turtle Beach Recon 200 Gen 2 Audio Repair: stap 3, afbeelding 3 van 3
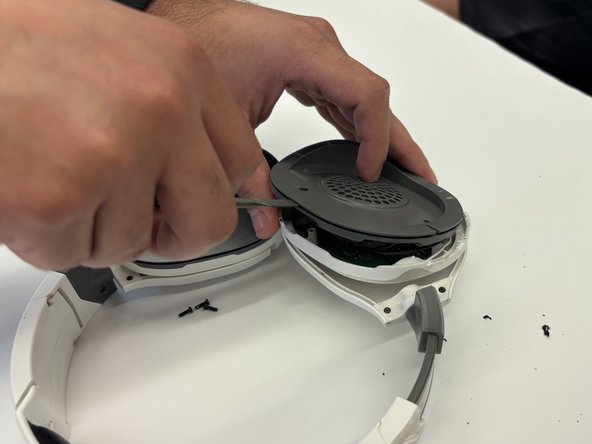
    • Use a spudger to gently pry the speakers from the headset.

    • The speaker is connected to the motherboard by a cable so do not pull the speaker off or it will rip the wire and further damage your headphones.

    • Do not push the prying tool inside the cups, or you could damage the internal components.

  4. Turtle Beach Recon 200 Gen 2 Audio Repair: stap 4, afbeelding 1 van 2 Turtle Beach Recon 200 Gen 2 Audio Repair: stap 4, afbeelding 2 van 2
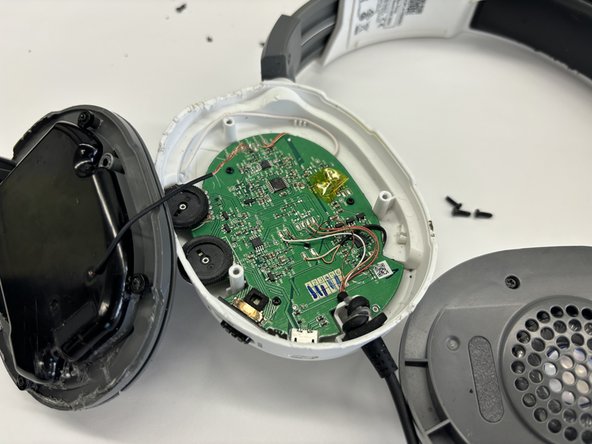
    • Set the speaker to the side without pulling the wires or cables.

    • Check if any dust has gotten into the headset.

    • If so, use a dust blower and/or ESD safe cleaning brush to clean off the dust.

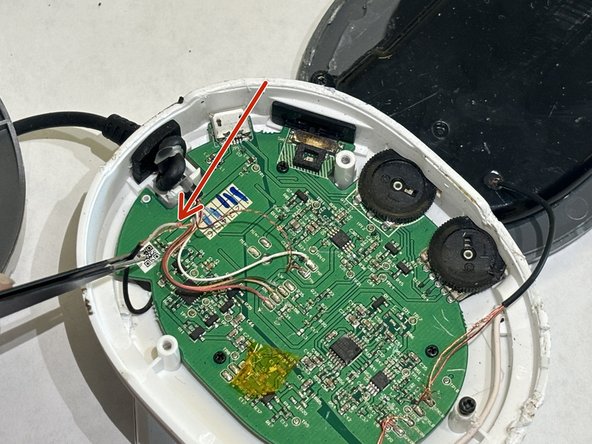
    • If a wire is broken or ripped, use tweezers to hold it and identity where the wire is meant to be.

    • Do not attempt to rip or pull any damaged or exposed wire(s).

  5. Turtle Beach Recon 200 Gen 2 Audio Repair: stap 5, afbeelding 1 van 2 Turtle Beach Recon 200 Gen 2 Audio Repair: stap 5, afbeelding 2 van 2
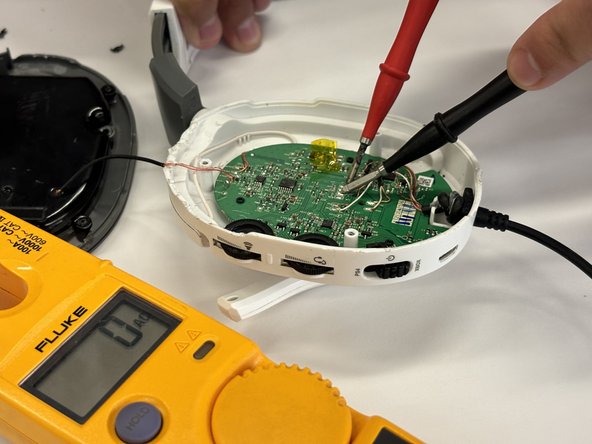
    • Use the multimeter to check for any outage or shortage of current.

    • Check any and every wire and pins you think are faulty that could be the cause of the issue.

    • Most multimeter devices have sharp points, be careful when checking for current. Touch the surface as lightly as possible.

  6. Turtle Beach Recon 200 Gen 2 Audio Repair: stap 6, afbeelding 1 van 2 Turtle Beach Recon 200 Gen 2 Audio Repair: stap 6, afbeelding 2 van 2
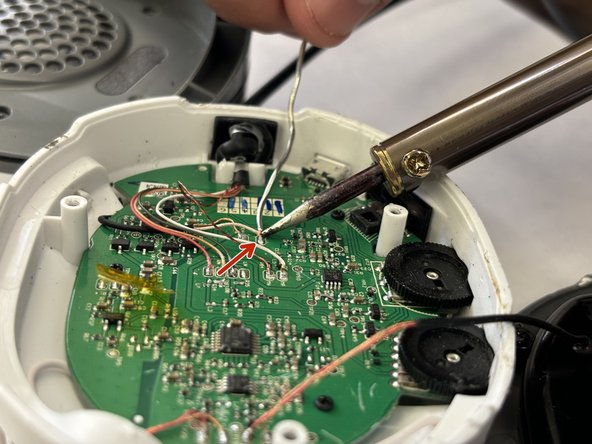
    • Use a soldering iron to re-solder any wires that have detached from the motherboard.

    • Keep your hands as steady as possible and ensure that the wires are attached to the correct solder joint.

    • The solder might release an odd smell. If possible, wear a mask to avoid inhaling fumes.

    • The end point of the soldering kit will be very hot, do not touch it with your bare hands.

  7. Turtle Beach Recon 200 Gen 2 Audio Repair: stap 7, afbeelding 1 van 3 Turtle Beach Recon 200 Gen 2 Audio Repair: stap 7, afbeelding 2 van 3 Turtle Beach Recon 200 Gen 2 Audio Repair: stap 7, afbeelding 3 van 3
    • Test the headset to ensure everything is working. Plug the headset into any device with a AUX input.

    • Test the audio on a low volume setting and slowly raise it to full volume.

    • Replace the speakers.

    • Make sure they are is sitting correctly on the headset so you can replace the screws without a problem.

Conclusie

To reassemble your device, follow these instructions in reverse order.

Één andere persoon heeft deze handleiding voltooid.

David Valadez

Lid sinds: 03/05/24

157 Reputatie

1 Handleiding geschreven

Team

0 opmerkingen

Voeg opmerking toe

Weergavestatistieken:

Afgelopen 24 uren: 4

Afgelopen 7 dagen: 10

Afgelopen 30 dagen: 28

Altijd: 70