Ga door naar hoofdinhoud

Start the motor for the drain valve in Jura Z models

Wat je nodig hebt

  1. Start the motor for the drain valve in Jura Z models, Opening the Jura Z series housing: stap 1, afbeelding 1 van 1
    • Unplug the machine from the power outlet

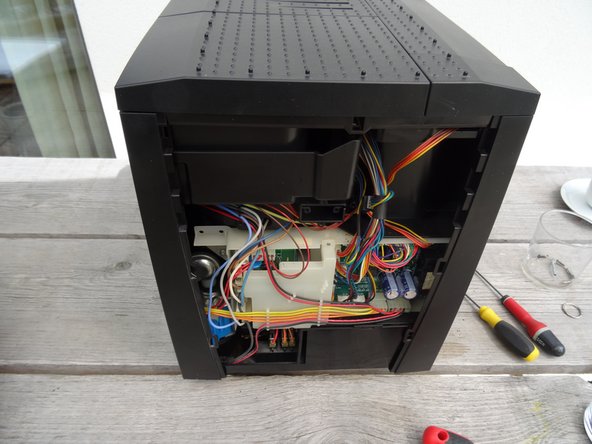
    • Remove all attachments: water tank, drip tray, aroma lid

  2. Start the motor for the drain valve in Jura Z models: stap 2, afbeelding 1 van 3 Start the motor for the drain valve in Jura Z models: stap 2, afbeelding 2 van 3 Start the motor for the drain valve in Jura Z models: stap 2, afbeelding 3 van 3
    • Turn the machine so the back is facing toward the front.

    • The Jura sign must be removed. Turn it a few millimeters counterclickwise.

    • If this becomes difficult use a suction cup to assist.

    • Remove the Jura sign.

  3. Start the motor for the drain valve in Jura Z models: stap 3, afbeelding 1 van 2 Start the motor for the drain valve in Jura Z models: stap 3, afbeelding 2 van 2
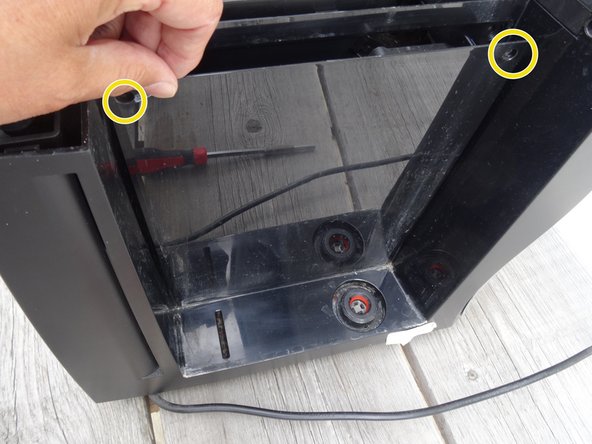
    • Behind the Jura sign are two screws with an oval head. They have to be removed.

    • These screws have an oval head that makes them look like rivets (picture 2). You need to use a special bit for their removal. If the right bit is not available, it could be done with a pair of needle nose pliers. Jura wants to keep us out of our own machines!!!!

  4. Start the motor for the drain valve in Jura Z models: stap 4, afbeelding 1 van 2 Start the motor for the drain valve in Jura Z models: stap 4, afbeelding 2 van 2
    • Push the back down a bit and then remove it.

  5. Start the motor for the drain valve in Jura Z models: stap 5, afbeelding 1 van 1
    • Pull the right side panel- as seen looking to the frontpanel - backwards and take it off.

    • Sometimes it gets a bit stuck and may require a bit more of a pull.

  6. Start the motor for the drain valve in Jura Z models: stap 6, afbeelding 1 van 3 Start the motor for the drain valve in Jura Z models: stap 6, afbeelding 2 van 3 Start the motor for the drain valve in Jura Z models: stap 6, afbeelding 3 van 3
    • In this step, you should remove the screws of the left side panel. The side panel can only be removed after removing the top cover.

    • Remove the Torx T15 screw on the front wall of the side panel.

    • In the side part there is a lid over the brew group. The lid is fastened at the top with two oval head screws. Remove those to remove the lid.

    • With the cover removed the brew group becomes visible

  7. Start the motor for the drain valve in Jura Z models: stap 7, afbeelding 1 van 3 Start the motor for the drain valve in Jura Z models: stap 7, afbeelding 2 van 3 Start the motor for the drain valve in Jura Z models: stap 7, afbeelding 3 van 3
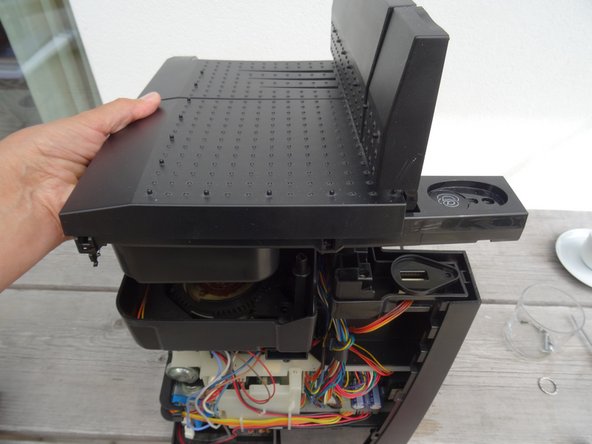
    • This step shows how to remove the top cover

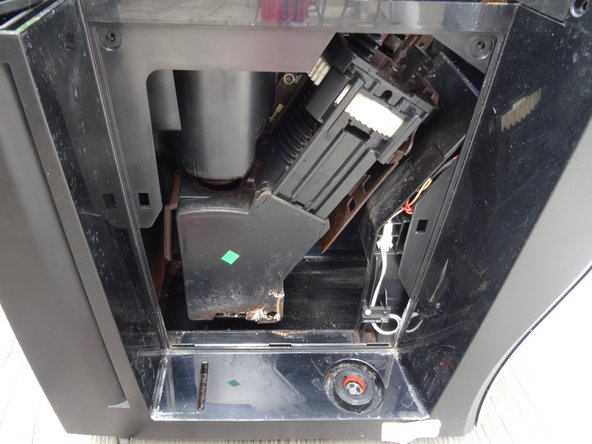
    • Remove the powder tray and all coffee beans.

    • The cover is fastened with three Torx T15 screws. Those are easily visible under the covers as well as the small cover on the left back side.

    • Remove the two Phillips screws on the bean container and remove the bean container.

    • Lift the cover upwards.

    • If it is stuck, use a plastic opening tool to carefully pry it open.

    • The lid of the bean container is held in place by a small, strong magnet that loosely rests. It is either in the green marked recess, or it remains hanging on the bean container. Make sure it is not lost!

  8. Start the motor for the drain valve in Jura Z models: stap 8, afbeelding 1 van 2 Start the motor for the drain valve in Jura Z models: stap 8, afbeelding 2 van 2
    • Pull the left side panel backwards to take it off.

    • For some repairs it is not necessary to remove the left side panel.

  9. Start the motor for the drain valve in Jura Z models, Motor for the drain valve: stap 9, afbeelding 1 van 2 Start the motor for the drain valve in Jura Z models, Motor for the drain valve: stap 9, afbeelding 2 van 2
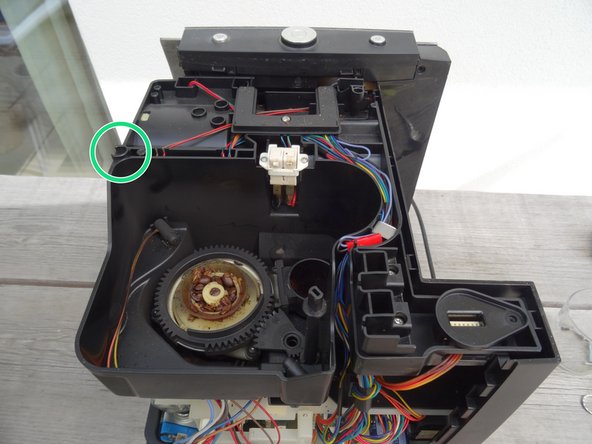
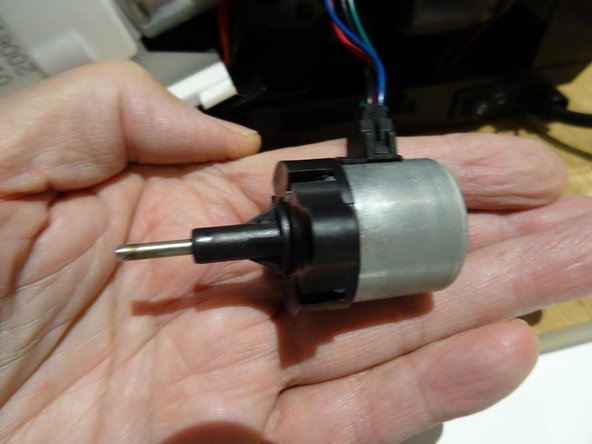
    • The drainage motor on the Z6 and following models is fixed with two Torx T15 screws. Unscrew them and pull out the motor.

    • Leave the cables connected to the motor for the time being. Trigger a flushing process and observe whether the pin moves back and forth. If not, the gearbox is blocked. You may be able to get it going with the following steps.

  10. Start the motor for the drain valve in Jura Z models: stap 10, afbeelding 1 van 3 Start the motor for the drain valve in Jura Z models: stap 10, afbeelding 2 van 3 Start the motor for the drain valve in Jura Z models: stap 10, afbeelding 3 van 3
    • The gearbox (the black plastic part) is attached to the metal engine block with four metal tabs. Straighten the tabs with a small screwdriver.

    • Pull the gearbox off the engine block.

  11. Start the motor for the drain valve in Jura Z models: stap 11, afbeelding 1 van 1
    • Turn the armature of the motor while holding the pin. Check whether the pin moves back and forth.

    • This probably solves the blockage. Grease the worm (and the pin) again a little. Position the worm so that it protrudes about 3 mm.

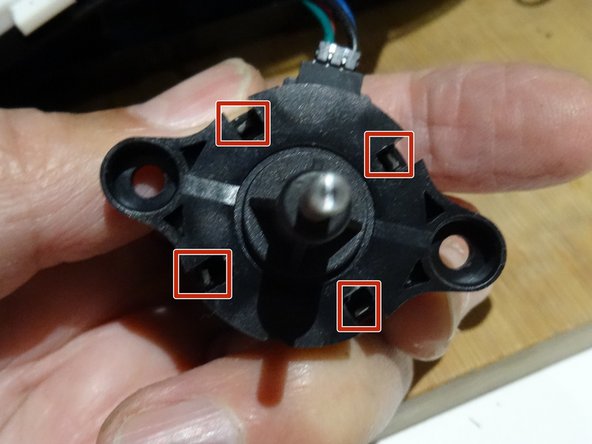
    • Reassemble the motor and bend the retaining tabs on the metal housing until it is tight.

Conclusie

To reassemble your device, follow these instructions in reverse order.

Één andere persoon heeft deze handleiding voltooid.

Met dank aan deze vertalers:

de en

100%

Deze vertalers helpen ons de wereld te repareren! Wil je bijdragen?
Begin met vertalen ›

VauWeh

Lid sinds: 10/19/15

203.187 Reputatie

246 handleidingen geschreven

Team

Repair is War on Entropy Lid van Repair is War on Entropy

Community

25 Leden

1.116 handleidingen geschreven

3 opmerkingen

The issue is likely a seized bearing. So when at step 11. Pull off the black cylinder and spray a penetrating lubricant (silicone spray) onto the bearing you can now see. The middle section should spin freely with no resistance.

D Wish - Antwoord

Having serviced a E8 brewgroup and still no coffee I bought a new brewgroup and still no coffee but at least I can sell my old serviced group - this little hack on motor has proved this was the culprit. - it working again but coffee is weak but at least I have a clue to fix properly and not spend the £300 Jura and or other “experts” wanted to look at it plus the parts

David Pinnington - Antwoord

Congratulations! If the coffee becomes weak, you should check the grinder. How many cups does the counter show? After more than 10000 cups, it may be worn out.

VauWeh -

Voeg opmerking toe

Weergavestatistieken:

Afgelopen 24 uren: 2

Afgelopen 7 dagen: 34

Afgelopen 30 dagen: 120

Altijd: 1,269