Ga door naar hoofdinhoud
Word lid van de reparatiegemeenschap - Account aanmaken

RCA RCT6272W23 Display Replacement

Wat je nodig hebt

  1. RCA RCT6272W23 Display Replacement, Case: stap 1, afbeelding 1 van 2 RCA RCT6272W23 Display Replacement, Case: stap 1, afbeelding 2 van 2
    • Use a Phillips #00 screwdriver to remove both 4.1 mm screws at the top of the device which hold it together.

    Vraag FixBot

    Voeg opmerking toe

  2. RCA RCT6272W23 Display Replacement: stap 2, afbeelding 1 van 2 RCA RCT6272W23 Display Replacement: stap 2, afbeelding 2 van 2
    • Press the plastic opening tool into the space between the front and back portions of the case.

    • Run it along the perimeter of the device to unhook the plastic tabs.

    • Gently pull both sides apart.

    • The speaker is connected to the back cover, so be careful when separating.

    Vraag FixBot

    Voeg opmerking toe

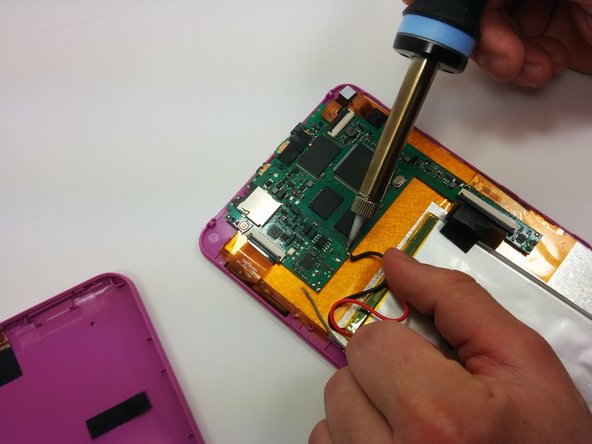
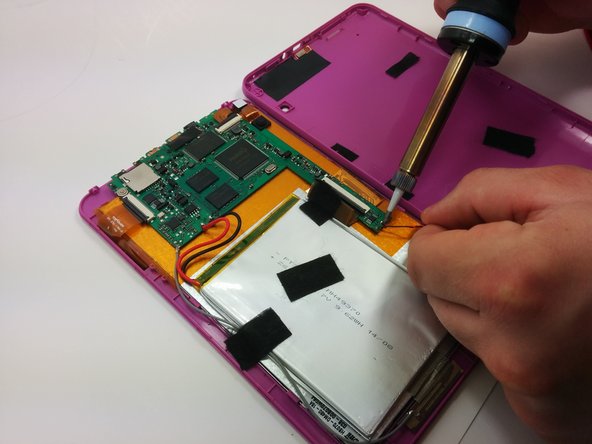
  3. RCA RCT6272W23 Display Replacement, Motherboard: stap 3, afbeelding 1 van 3 RCA RCT6272W23 Display Replacement, Motherboard: stap 3, afbeelding 2 van 3 RCA RCT6272W23 Display Replacement, Motherboard: stap 3, afbeelding 3 van 3
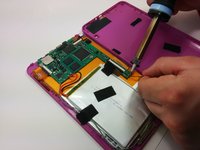
    • Use a soldering iron to remove the soldered connections on the motherboard

    • For your safety and to ensure a correct repair, be sure to exercise caution when using the soldering iron.

    • For more information about soldering, check out this guide.

    Vraag FixBot

    Voeg opmerking toe

  4. RCA RCT6272W23 Display Replacement: stap 4, afbeelding 1 van 1
    • Use a philips #00 screwdriver to unscrew the three 4.064mm screws which attach the motherboard to the front of the device.

    Vraag FixBot

    Voeg opmerking toe

  5. RCA RCT6272W23 Display Replacement: stap 5, afbeelding 1 van 2 RCA RCT6272W23 Display Replacement: stap 5, afbeelding 2 van 2
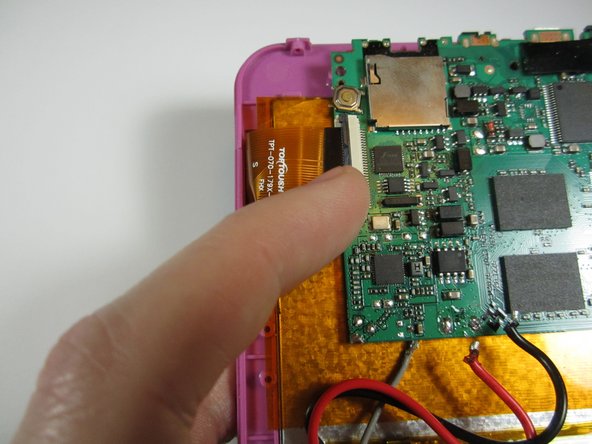
    • Use your fingers to pop the three black tabs up to release the flat plastic data transfer cables.

    Vraag FixBot

    Voeg opmerking toe

  6. RCA RCT6272W23 Display Replacement: stap 6, afbeelding 1 van 1
    • Pull up the motherboard from the rest of the body.

    Vraag FixBot

    Voeg opmerking toe

  7. RCA RCT6272W23 Display Replacement, Display: stap 7, afbeelding 1 van 1
    • Using a plastic opening tool, pry the battery off of the rest of the body.

    • The battery is attached to the display with double sided tape. It may be best to have a new strip of double sided tape to reattach the battery.

    Vraag FixBot

    Voeg opmerking toe

  8. RCA RCT6272W23 Display Replacement: stap 8, afbeelding 1 van 3 RCA RCT6272W23 Display Replacement: stap 8, afbeelding 2 van 3 RCA RCT6272W23 Display Replacement: stap 8, afbeelding 3 van 3
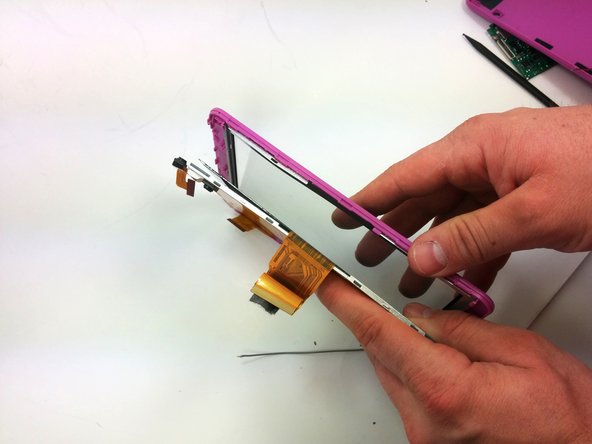
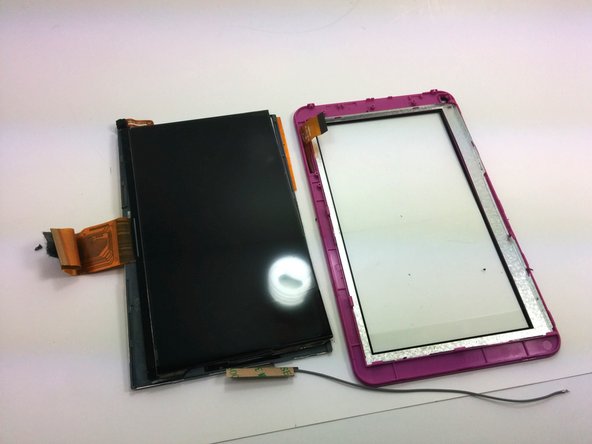
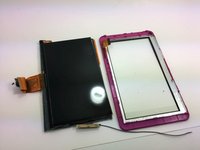
    • Using a spudger, separate the display surface from the front cover.

    • Be careful not to break the tabs that hold the display screen in place.

    • A second spudger may be necessary to help hold the position of the display screen.

    Vraag FixBot

    Voeg opmerking toe

Conclusie

To reassemble your device, follow these instructions in reverse order.

Annuleren: ik heb deze handleiding niet afgemaakt.

4 andere personen hebben deze handleiding voltooid.

Ross Pennala

Lid sinds: 03/19/15

214 Reputatie

1 Handleiding geschreven

Team

Michigan Tech, Team 1-5, Lauer Spring 2015 Lid van Michigan Tech, Team 1-5, Lauer Spring 2015

MTU-LAUER-S15S1G5

2 Leden

12 handleidingen geschreven

0Gids Commentaar

Voeg opmerking toe

Weergavestatistieken:

Afgelopen 24 uren: 0

Afgelopen 7 dagen: 3

Afgelopen 30 dagen: 24

Altijd: 2,614