Ga door naar hoofdinhoud

Nintendo WaveBird Wireless Controller Buttons Replacement

Wat je nodig hebt

  1. Nintendo WaveBird Wireless Controller Buttons Replacement, Batteries: stap 1, afbeelding 1 van 2 Nintendo WaveBird Wireless Controller Buttons Replacement, Batteries: stap 1, afbeelding 2 van 2
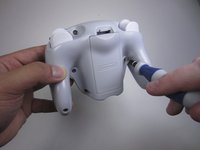
    • Pull down on the battery cover release lever and pull back to remove the cover.

  2. Nintendo WaveBird Wireless Controller Buttons Replacement: stap 2, afbeelding 1 van 1
    • Remove both batteries from the device.

  3. Nintendo WaveBird Wireless Controller Buttons Replacement, Front Panel: stap 3, afbeelding 1 van 2 Nintendo WaveBird Wireless Controller Buttons Replacement, Front Panel: stap 3, afbeelding 2 van 2
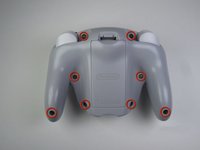
    • Remove the eight 9 mm screws from the back panel using the Tri-point Y1 screwdriver.

    • During reassembly, firmly hold the panels of the controller together while replacing the screws so the panels do not separate.

  4. Nintendo WaveBird Wireless Controller Buttons Replacement: stap 4, afbeelding 1 van 2 Nintendo WaveBird Wireless Controller Buttons Replacement: stap 4, afbeelding 2 van 2
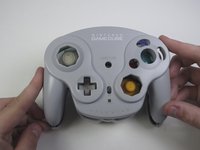
    • Carefully turn over the controller and place it on a flat surface.

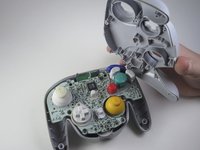
    • Slowly separate the top panel from the bottom panel.

    • The buttons are loose and may fall off the motherboard.

    • Once separated, set aside the top panel.
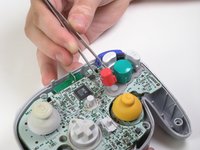
    • During reassembly, make sure the front panel lines up with the buttons so they slide back into place.

  5. Nintendo WaveBird Wireless Controller Buttons Replacement, Buttons: stap 5, afbeelding 1 van 3 Nintendo WaveBird Wireless Controller Buttons Replacement, Buttons: stap 5, afbeelding 2 van 3 Nintendo WaveBird Wireless Controller Buttons Replacement, Buttons: stap 5, afbeelding 3 van 3
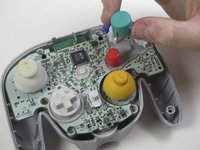
    • Use tweezers to remove the buttons.

    • It may be easier to remove the A button off of the pad by lifting it with your fingers.

    • During reassembly, make sure all buttons are in their respective sockets so they match up with the front panel.

Conclusie

To reassemble your device, follow these instructions in reverse order.

5 andere personen hebben deze handleiding voltooid.

Douglas

Lid sinds: 04/15/13

53 Reputatie

1 Handleiding geschreven

Team

Cal Poly, Team 10-40, Amido Spring 2013 Lid van Cal Poly, Team 10-40, Amido Spring 2013

CPSU-AMIDO-S13S10G40

4 Leden

37 handleidingen geschreven

0 opmerkingen

Voeg opmerking toe

Weergavestatistieken:

Afgelopen 24 uren: 1

Afgelopen 7 dagen: 6

Afgelopen 30 dagen: 22

Altijd: 3,289