Ga door naar hoofdinhoud
Word lid van de reparatiegemeenschap - Account aanmaken

Nintendo WaveBird Wireless Controller Buttons Replacement

Wat je nodig hebt

  1. Nintendo WaveBird Wireless Controller Buttons Replacement, Batteries: stap 1, afbeelding 1 van 2 Nintendo WaveBird Wireless Controller Buttons Replacement, Batteries: stap 1, afbeelding 2 van 2
    • Pull down on the battery cover release lever and pull back to remove the cover.

    Vraag FixBot
  2. Nintendo WaveBird Wireless Controller Buttons Replacement: stap 2, afbeelding 1 van 1
    • Remove both batteries from the device.

    Vraag FixBot
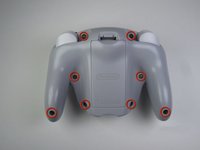
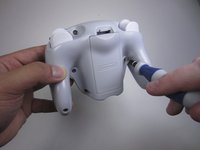
  3. Nintendo WaveBird Wireless Controller Buttons Replacement, Front Panel: stap 3, afbeelding 1 van 2 Nintendo WaveBird Wireless Controller Buttons Replacement, Front Panel: stap 3, afbeelding 2 van 2
    • Remove the eight 9 mm screws from the back panel using the Tri-point Y1 screwdriver.

    • During reassembly, firmly hold the panels of the controller together while replacing the screws so the panels do not separate.

    Vraag FixBot
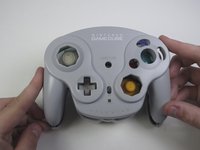
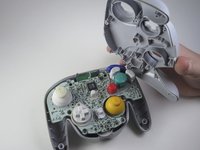
  4. Nintendo WaveBird Wireless Controller Buttons Replacement: stap 4, afbeelding 1 van 2 Nintendo WaveBird Wireless Controller Buttons Replacement: stap 4, afbeelding 2 van 2
    • Carefully turn over the controller and place it on a flat surface.

    • Slowly separate the top panel from the bottom panel.

    • The buttons are loose and may fall off the motherboard.

    • Once separated, set aside the top panel.

    • During reassembly, make sure the front panel lines up with the buttons so they slide back into place.

    Vraag FixBot
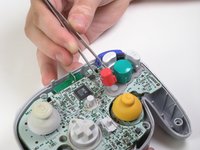
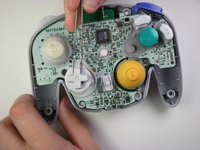
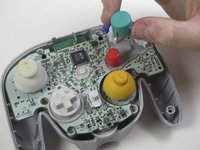
  5. Nintendo WaveBird Wireless Controller Buttons Replacement, Buttons: stap 5, afbeelding 1 van 3 Nintendo WaveBird Wireless Controller Buttons Replacement, Buttons: stap 5, afbeelding 2 van 3 Nintendo WaveBird Wireless Controller Buttons Replacement, Buttons: stap 5, afbeelding 3 van 3
    Gereedschap gebruikt in deze stap:
    Tweezers
    $4.99
    • Use tweezers to remove the buttons.

    • It may be easier to remove the A button off of the pad by lifting it with your fingers.

    • During reassembly, make sure all buttons are in their respective sockets so they match up with the front panel.

    Vraag FixBot
Conclusie

To reassemble your device, follow these instructions in reverse order.

6 andere personen hebben deze handleiding voltooid.

Douglas

Lid sinds: 04/15/13

62 Reputatie

1 Handleiding geschreven

Team

Cal Poly, Team 10-40, Amido Spring 2013 Lid van Cal Poly, Team 10-40, Amido Spring 2013

CPSU-AMIDO-S13S10G40

4 Leden

37 handleidingen geschreven

0Gids Commentaar

Voeg opmerking toe

Weergavestatistieken:

Afgelopen 24 uren: 1

Afgelopen 7 dagen: 16

Afgelopen 30 dagen: 102

Altijd: 4,163