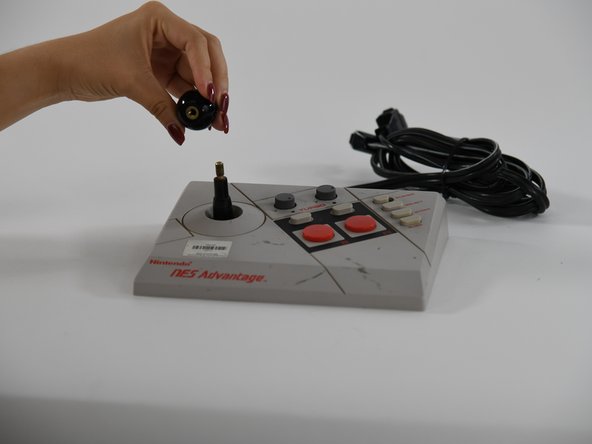
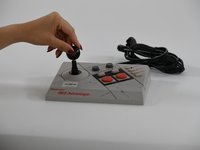
Ga door naar hoofdinhoud
Word lid van de reparatiegemeenschap - Account aanmaken

Nintendo NES Advantage Joystick Spring Replacement

Wat je nodig hebt

  1. Nintendo NES Advantage Joystick Spring Replacement, Back Panel: stap 1, afbeelding 1 van 1
    • Remove the four sticky pads from the bottom of the device.

    • If the pads are stuck, use a spudger to remove them.

    Vraag FixBot

    Voeg opmerking toe

  2. Nintendo NES Advantage Joystick Spring Replacement: stap 2, afbeelding 1 van 2 Nintendo NES Advantage Joystick Spring Replacement: stap 2, afbeelding 2 van 2
    • Remove the six 8 mm screws from the bottom of the device with a Phillips #0 screwdriver.

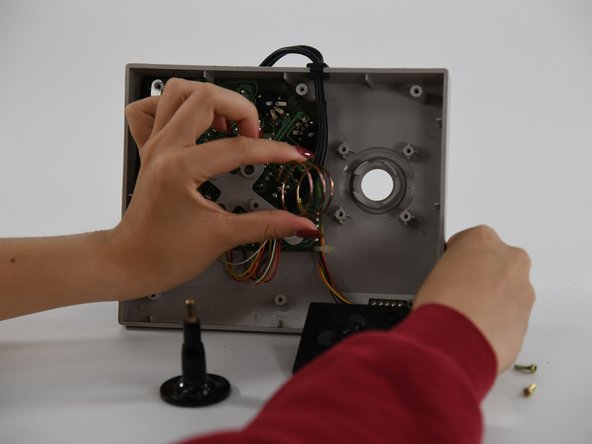
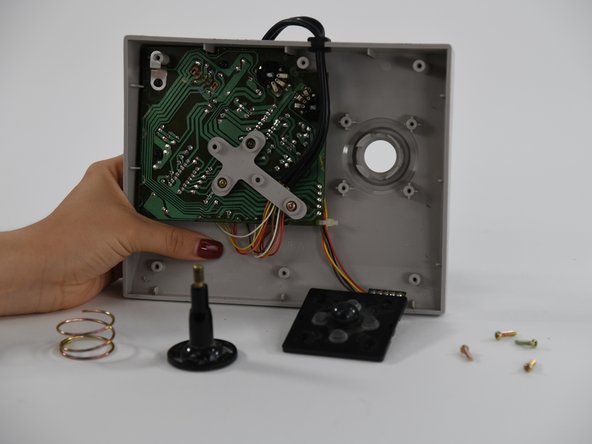
    • Use your hands to pull the back panel away from the controller.

    Vraag FixBot

    Voeg opmerking toe

  3. Nintendo NES Advantage Joystick Spring Replacement, Joystick Panel: stap 3, afbeelding 1 van 1
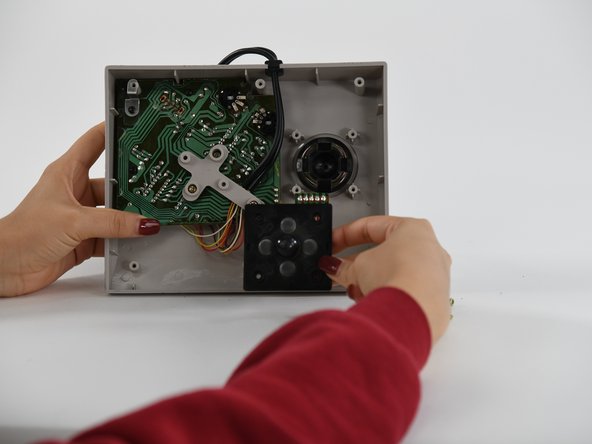
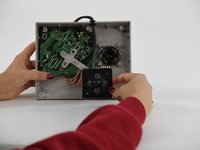
    • Remove the four 12 mm screws from the small square panel on the right with a Phillips #0 screwdriver.

    • While removing the last (fourth) screw, apply downward pressure on the panel. This will make it easier to remove the last screw because of the joystick spring on the other side of this panel.

    Vraag FixBot

    Voeg opmerking toe

  4. Nintendo NES Advantage Joystick Spring Replacement: stap 4, afbeelding 1 van 2 Nintendo NES Advantage Joystick Spring Replacement: stap 4, afbeelding 2 van 2
    • Remove the small square panel.

    • This panel is connected with wires to the main circuit board. To replace the joystick panel, you will need to desolder the wires. To learn more about soldering, refer to our Hoe moet je (de-)solderen? guide.

    Vraag FixBot

    Voeg opmerking toe

  5. Nintendo NES Advantage Joystick Spring Replacement, Joystick: stap 5, afbeelding 1 van 2 Nintendo NES Advantage Joystick Spring Replacement, Joystick: stap 5, afbeelding 2 van 2
    • Using your hands, unscrew the ball on top of the joystick.

    Vraag FixBot

    Voeg opmerking toe

  6. Nintendo NES Advantage Joystick Spring Replacement: stap 6, afbeelding 1 van 1
    • Pull the joystick through the back of the NES Advantage Gamepad.

    Vraag FixBot

    Voeg opmerking toe

  7. Nintendo NES Advantage Joystick Spring Replacement, Joystick Spring: stap 7, afbeelding 1 van 3 Nintendo NES Advantage Joystick Spring Replacement, Joystick Spring: stap 7, afbeelding 2 van 3 Nintendo NES Advantage Joystick Spring Replacement, Joystick Spring: stap 7, afbeelding 3 van 3
    • Using your fingers, pull the spring up and off.

    Vraag FixBot

    Voeg opmerking toe

Conclusie

To reassemble your device, follow these instructions in reverse order.

Annuleren: ik heb deze handleiding niet afgemaakt.

Danielle Guthrie

Lid sinds: 09/06/22

97 Reputatie

1 Handleiding geschreven

0Gids Commentaar

Voeg opmerking toe

Weergavestatistieken:

Afgelopen 24 uren: 1

Afgelopen 7 dagen: 8

Afgelopen 30 dagen: 21

Altijd: 571