Ga door naar hoofdinhoud
Word lid van de reparatiegemeenschap - Account aanmaken

Nikon Coolpix P4 Flash Bulb Replacement

Wat je nodig hebt

  1. Nikon Coolpix P4 Flash Bulb Replacement, Battery: stap 1, afbeelding 1 van 1
    • Flip the camera upside down (have the side with the buttons facing away from you)

    • Look for the side with the triangle icon with three lines in it, this is the battery door. Add pressure and slide this door slightly until it clicks and pops open.

    Vraag FixBot

    Voeg opmerking toe

  2. Nikon Coolpix P4 Flash Bulb Replacement: stap 2, afbeelding 1 van 1
    • Once the door clicks, you can open it to reveal the slots holding the memory card and the battery.

    • Focusing on the larger slot, this holds the battery. Push the orange tab away from the slot, this will eject the old battery if one was previously inside.

    • Once this slot is open, you can place the new battery inside.

    • Make sure to close the orange tab to secure it in place!

    Vraag FixBot

    Voeg opmerking toe

  3. Nikon Coolpix P4 Flash Bulb Replacement, LCD Screen: stap 3, afbeelding 1 van 1
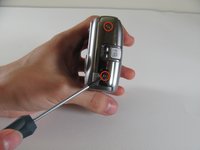
    • Remove the four 2.2 mm screws located on the bottom of the camera.

    Vraag FixBot

    Voeg opmerking toe

  4. Nikon Coolpix P4 Flash Bulb Replacement: stap 4, afbeelding 1 van 2 Nikon Coolpix P4 Flash Bulb Replacement: stap 4, afbeelding 2 van 2
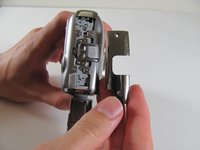
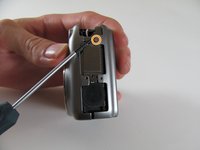
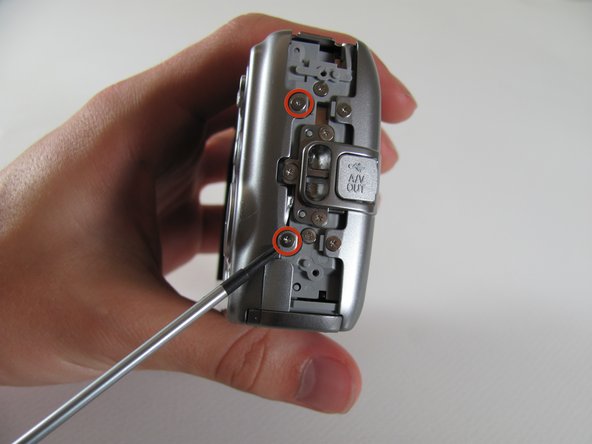
    • Remove the two 2.9 mm screws from the side panel.

    • Remove the side panel.

    Vraag FixBot

    Voeg opmerking toe

  5. Nikon Coolpix P4 Flash Bulb Replacement: stap 5, afbeelding 1 van 3 Nikon Coolpix P4 Flash Bulb Replacement: stap 5, afbeelding 2 van 3 Nikon Coolpix P4 Flash Bulb Replacement: stap 5, afbeelding 3 van 3
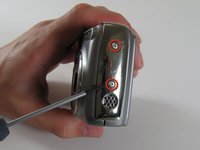
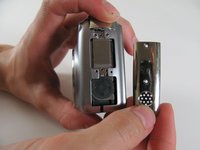
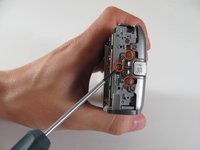
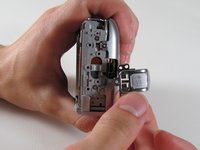
    • Remove the two 5 mm screws from the right side panel.

    • Remove the panel from the right side.

    • Remove the single 2.1 mm screw set underneath the panel.

    Vraag FixBot

    Voeg opmerking toe

  6. Nikon Coolpix P4 Flash Bulb Replacement: stap 6, afbeelding 1 van 1
    • Remove the two 4.8 mm screws attaching the back panel to the body on the left side.

    Vraag FixBot

    Voeg opmerking toe

  7. Nikon Coolpix P4 Flash Bulb Replacement: stap 7, afbeelding 1 van 1
    • Gently pull off the back cover.

    Vraag FixBot

    Voeg opmerking toe

  8. Nikon Coolpix P4 Flash Bulb Replacement: stap 8, afbeelding 1 van 2 Nikon Coolpix P4 Flash Bulb Replacement: stap 8, afbeelding 2 van 2
    • Remove the three 4.8 mm screws from the A/V out tab on the left side.

    • Remove the tab.

    Vraag FixBot

    Voeg opmerking toe

  9. Nikon Coolpix P4 Flash Bulb Replacement: stap 9, afbeelding 1 van 1
    • Remove the two 4.6 mm screws attaching the front panel to the body on the left side.

    Vraag FixBot

    Voeg opmerking toe

  10. Nikon Coolpix P4 Flash Bulb Replacement: stap 10, afbeelding 1 van 1
    • Flip up the front panel.

    • Potential for device damage. There should be wires still attaching the panel to the body. DO NOT TRY TO PULL OFF COMPLETELY.

    Vraag FixBot

    Voeg opmerking toe

  11. Nikon Coolpix P4 Flash Bulb Replacement: stap 11, afbeelding 1 van 1
    • Remove the 2.2 mm screw.

    • Remove the 2.9 mm screw.

    • Remove the 2.1 mm screw.

    Vraag FixBot

    Voeg opmerking toe

  12. Nikon Coolpix P4 Flash Bulb Replacement: stap 12, afbeelding 1 van 1
    • Carefully pull the orange LCD connector up and out of the port.

    • Be careful to pull vertically while pushing the black tab upwards

    Vraag FixBot

    Voeg opmerking toe

  13. Nikon Coolpix P4 Flash Bulb Replacement: stap 13, afbeelding 1 van 1
    • Remove the 3.1 mm screw below the LCD.

    Vraag FixBot

    Voeg opmerking toe

  14. Nikon Coolpix P4 Flash Bulb Replacement: stap 14, afbeelding 1 van 1
    • Carefully pull out the plug connecting the LCD to the motherboard.

    Vraag FixBot

    Voeg opmerking toe

  15. Nikon Coolpix P4 Flash Bulb Replacement: stap 15, afbeelding 1 van 1
    • Remove the LCD from the camera body.

    Vraag FixBot

    Voeg opmerking toe

  16. Nikon Coolpix P4 Flash Bulb Replacement, Motherboard: stap 16, afbeelding 1 van 1
    • Remove the two screws on the opposite sides of the flash.

    Vraag FixBot

    Voeg opmerking toe

  17. Nikon Coolpix P4 Flash Bulb Replacement: stap 17, afbeelding 1 van 1
    • Remove the two 2.9 mm screws on the right side of the camera.

    Vraag FixBot

    Voeg opmerking toe

  18. Nikon Coolpix P4 Flash Bulb Replacement: stap 18, afbeelding 1 van 1
    • Remove the four screws on the bottom of the camera.

    Vraag FixBot

    Voeg opmerking toe

  19. Nikon Coolpix P4 Flash Bulb Replacement: stap 19, afbeelding 1 van 1
    • Remove the seven 2.8 mm screws from the back of the camera.

    Vraag FixBot

    Voeg opmerking toe

  20. Nikon Coolpix P4 Flash Bulb Replacement: stap 20, afbeelding 1 van 1
    • Detach the cable that connects the lens to the left side of the motherboard.

    • Firmly grasp the base of the cable and gently pull it from the socket.

    Vraag FixBot

    Voeg opmerking toe

  21. Nikon Coolpix P4 Flash Bulb Replacement: stap 21, afbeelding 1 van 1
    • Remove the right panel.

    Vraag FixBot

    Voeg opmerking toe

  22. Nikon Coolpix P4 Flash Bulb Replacement: stap 22, afbeelding 1 van 1
    • Remove the 2.8 mm screw from the top of the camera.

    Vraag FixBot

    Voeg opmerking toe

  23. Nikon Coolpix P4 Flash Bulb Replacement: stap 23, afbeelding 1 van 1
    • Remove the three 2.8 mm screws from the motherboard.

    • Detach the orange tab with the foam on top.

    • It should click out of place.

    Vraag FixBot

    Voeg opmerking toe

  24. Nikon Coolpix P4 Flash Bulb Replacement: stap 24, afbeelding 1 van 1
    • Remove the motherboard by pulling it up and out of the port.

    Vraag FixBot

    Voeg opmerking toe

  25. Nikon Coolpix P4 Flash Bulb Replacement: stap 25, afbeelding 1 van 1
    • Carefully remove the tab that connects the flash to the motherboard from the port by gently pulling the connector to the right and out of its port.

    Vraag FixBot

    Voeg opmerking toe

  26. Nikon Coolpix P4 Flash Bulb Replacement: stap 26, afbeelding 1 van 1
    • Fully remove the motherboard from the camera body.

    Vraag FixBot

    Voeg opmerking toe

  27. Nikon Coolpix P4 Flash Bulb Replacement, Lens: stap 27, afbeelding 1 van 1
    • Locate the orange plug on the right side of the lens.

    • Carefully snap the plug out of place.

    • This piece is meant to snap in and out of place easily!

    Vraag FixBot

    Voeg opmerking toe

  28. Nikon Coolpix P4 Flash Bulb Replacement: stap 28, afbeelding 1 van 1
    • Once the orange piece detaches, gently pull up the flash unit from its place in the camera.

    • The flash unit will still be attached to the camera by a separate cord.

    Vraag FixBot

    Voeg opmerking toe

  29. Nikon Coolpix P4 Flash Bulb Replacement: stap 29, afbeelding 1 van 1
    • Remove the lens from the rest of the camera.

    Vraag FixBot

    Voeg opmerking toe

  30. Nikon Coolpix P4 Flash Bulb Replacement, Flash Bulb: stap 30, afbeelding 1 van 1
    • Remove the tab connecting the flash to the motherboard by gently pulling the connector sideways out of its port, away from flash unit.

    • Unsolder red and black wires.

    • Remove the flash unit.

    Vraag FixBot

    Voeg opmerking toe

Conclusie

To reassemble your device, follow these instructions in reverse order.

Annuleren: ik heb deze handleiding niet afgemaakt.

Luke Baumann

Lid sinds: 04/13/11

128 Reputatie

5 handleidingen geschreven

Team

Cal Poly, Team 8-5, Regan Spring 2011 Lid van Cal Poly, Team 8-5, Regan Spring 2011

CPSU-REGAN-S11S8G5

4 Leden

10 handleidingen geschreven

0Gids Commentaar

Voeg opmerking toe

Weergavestatistieken:

Afgelopen 24 uren: 1

Afgelopen 7 dagen: 6

Afgelopen 30 dagen: 38

Altijd: 4,008