Ga door naar hoofdinhoud

Motorola Moto Z2 Play Battery Replacement

Wat je nodig hebt

  1. Motorola Moto Z2 Play Battery Replacement, Screen Removal: stap 1, afbeelding 1 van 1
    • Power off your phone before you complete any replacement steps.

  2. Motorola Moto Z2 Play Battery Replacement: stap 2, afbeelding 1 van 1
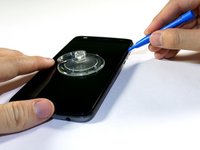
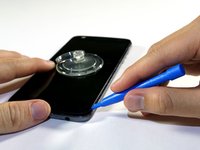
    • Heat the edges of your Motorola Moto Z2 Play screen for two to three minutes with a heat gun. You adjust the heat gun to 85 degrees centigrade, and be careful not to hold the heat gun on one position for too long; to avoid damaging, or "hotspotting" the LCD. The screen should be very warm, but not painful, to the touch. Reheat as necessary.

    • If screen is cracked put strong adhesive tape across the screen in order to avoid breaking the screen further and receiving cuts.

    • If you don’t have access to a heat gun, a hair dryer can be used.

  3. Motorola Moto Z2 Play Battery Replacement: stap 3, afbeelding 1 van 1
    • Place suction cup in the middle of the screen and press down.

  4. Motorola Moto Z2 Play Battery Replacement: stap 4, afbeelding 1 van 3 Motorola Moto Z2 Play Battery Replacement: stap 4, afbeelding 2 van 3 Motorola Moto Z2 Play Battery Replacement: stap 4, afbeelding 3 van 3
    • Pry the screen by wedging the plastic opening tool under the screen at the charging port.

    • Work your way around the screen with the plastic opening tool.

    • When you pry near the top-right and bottom-right corners, be careful not to pry too far, or you risk damaging the display cable.

    • Complete these steps carefully because the screen is delicate and can easily crack. If the screen begins to resist prying, reheat the adhesive with your heat gun.

  5. Motorola Moto Z2 Play Battery Replacement: stap 5, afbeelding 1 van 3 Motorola Moto Z2 Play Battery Replacement: stap 5, afbeelding 2 van 3 Motorola Moto Z2 Play Battery Replacement: stap 5, afbeelding 3 van 3
    Gereedschap gebruikt in deze stap:
    Plastic Cards
    $2.99
    Koop
    • Use a suction cup to lift up screen from left to right.

    • If you don’t have a suction cup, wedge a spudger or a small plastic card under the screen and lift slowly.

    • Failure to lift screen from left to right can cause damage to interior wires of your phone.

  6. Motorola Moto Z2 Play Battery Replacement: stap 6, afbeelding 1 van 3 Motorola Moto Z2 Play Battery Replacement: stap 6, afbeelding 2 van 3 Motorola Moto Z2 Play Battery Replacement: stap 6, afbeelding 3 van 3
    • Identify ribbon connector at the top right of the phone.

    • Pry the black locking bar up gently with a plastic opening tool.

    • Remove the ribbon wires by pulling them out of the connector with a tweezer.

    • The locking bar is the small black bar located on the digitizer’s ZIF connector.

    • Be sure to push the locking bar back down using a spudger after you put the ribbon wire back in since the lock does not lock automatically.

  7. Motorola Moto Z2 Play Battery Replacement: stap 7, afbeelding 1 van 3 Motorola Moto Z2 Play Battery Replacement: stap 7, afbeelding 2 van 3 Motorola Moto Z2 Play Battery Replacement: stap 7, afbeelding 3 van 3
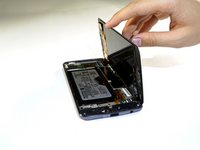
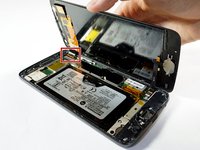
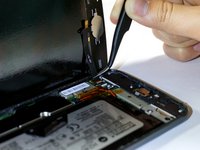
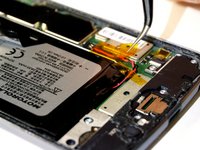
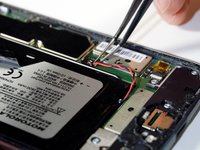
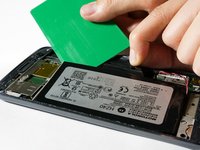
    • Identify the ribbon cable, located at the bottom right of the phone.

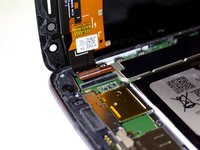
    • If present, remove kapton (orange) tape covering the cable connector.

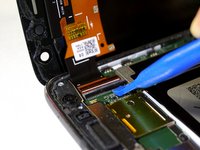
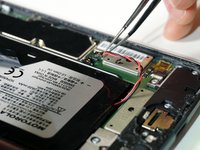
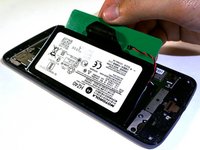
    • Flip up the small locking flap on the ZIF connector and use tweezers to slide the cable straight out of its socket.

    • Excessive force is not needed.

  8. Motorola Moto Z2 Play Battery Replacement: stap 8, afbeelding 1 van 1
    • Lift the screen from the phone to completely detach.

    • If screen doesn't detach, go back to step 7 and 8 to make sure the bar is unlocked and ribbon connector is fully detached.

    • During reassembly, you may need to apply or replace the display adhesive on your display assembly. Use our display adhesive application guide to apply the adhesive and reseal your device.

  9. Motorola Moto Z2 Play Battery Replacement, Battery: stap 9, afbeelding 1 van 2 Motorola Moto Z2 Play Battery Replacement, Battery: stap 9, afbeelding 2 van 2
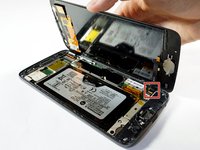
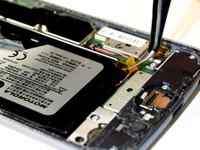
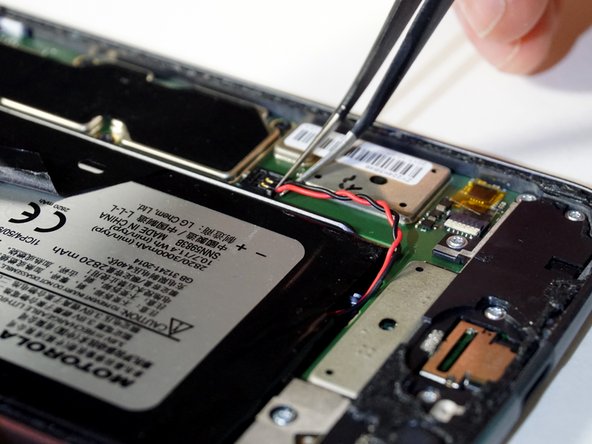
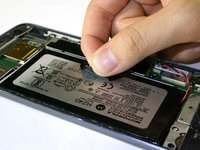
    • Remove the orange tape, located at the bottom right of the phone, using tweezers.

    • Do not discard tape.

  10. Motorola Moto Z2 Play Battery Replacement: stap 10, afbeelding 1 van 2 Motorola Moto Z2 Play Battery Replacement: stap 10, afbeelding 2 van 2
    • Detach the red and black battery wire by lifting up with tweezers.

  11. Motorola Moto Z2 Play Battery Replacement: stap 11, afbeelding 1 van 2 Motorola Moto Z2 Play Battery Replacement: stap 11, afbeelding 2 van 2
    • Peel back the black tape that is located on the battery.

    • Make sure you pull back gently so you can reuse the tape with reassembly.

  12. Motorola Moto Z2 Play Battery Replacement: stap 12, afbeelding 1 van 3 Motorola Moto Z2 Play Battery Replacement: stap 12, afbeelding 2 van 3 Motorola Moto Z2 Play Battery Replacement: stap 12, afbeelding 3 van 3
    • Lift the black tape and slide a card under the battery.

    • Align the card parallel and under the battery.

    • Wedge the card further under the battery.

    • Lift the card up to assist in removing the battery from the adhesive.

  13. Motorola Moto Z2 Play Battery Replacement: stap 13, afbeelding 1 van 1
    • Lift to remove the battery from the device completely.

Conclusie

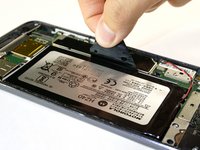
To reassemble your device, follow these instructions in reverse order.

After completing this guide, calibrate your newly-installed battery.

37 andere personen hebben deze handleiding voltooid.

mitch miller

Lid sinds: 01/24/18

2.055 Reputatie

8 handleidingen geschreven

Team

Cal Poly, Team S19-G5, Livingston Winter 2018 Lid van Cal Poly, Team S19-G5, Livingston Winter 2018

CPSU-LIVINGSTON-W18S19G5

4 Leden

30 handleidingen geschreven

11 opmerkingen

Awesome guide! where can someone get a replacement battery in Canada?

xbddd777 - Antwoord

Great instructions, clear and concise.

thank you

David Wyatt - Antwoord

so now that I've heated the adhesive to get the screen off do I need to apply new adhesive? or simply reheat it?

eli Factotum - Antwoord

Hi Eli,

The most ideal option would be to replace the adhesive. This ensures the best chance for your phone to stay sealed. You can re-use the existing adhesive and it may work well enough for awhile.

Arthur Shi -

What type/brand adhesive do you recommend for this screen instead of trying to reuse the old adhesive. Typical 3M strips?

Jason - Antwoord

Voeg opmerking toe

Weergavestatistieken:

Afgelopen 24 uren: 4

Afgelopen 7 dagen: 39

Afgelopen 30 dagen: 148

Altijd: 36,562