Inleiding
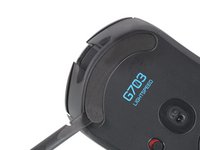
Gebruik deze handleiding om de muisvoetjes aan de onderkant van de draadloze Logitech G703-gamemuis te verwijderen en vervangen.
Het is mogelijk om de voetjes op een nette manier te verwijderen, maar als een van de voetjes scheurt, moet je die vervangen.
Wat je nodig hebt
-
-
Schuif de aan-uitschakelaar in de OFF-positie.
-
Koppel alle aangesloten kabels los.
-
-
-
Verwarm een iOpener en leg deze gedurende een minuut op de voetjes om de lijm eronder te verwarmen.
-
-
-
-
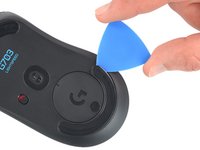
Schuif een punt van een openingsplectrum onder de rand van de onderste muisvoet en zorg dat je plectrum onder beide lagen van de voet schuift.
-
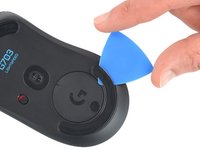
Schuif je plectrum rustig verder onder de voet tot je die vast kunt pakken.
-
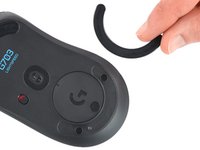
Trek de voet verder los en verwijder 'm.
-
Herhaal deze stappen om ook de bovenste muisvoet te verwijderen.
-
-
-
Schuif je het platte einde van je spudger onder een rand van de lijmlaag. Verwarm de lijm meer als de lijmlaag nog te stevig vastzit.
-
Trek de lijmlaag los.
-
Gebruik je een spudger om de lijmresten op voorzichtige wijze te verwijderen.
-
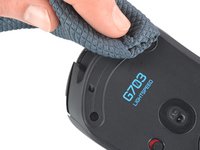
Gebruik je wat isopropylalcohol en een microvezeldoek om de oppervlakken grondig schoon te maken en de laatste lijmresten te verwijderen. Laat de oppervlakken drogen voor je verdergaat.
-
Verwijder je de folie van de nieuwe voetjes en bevestig je ze. Als je de oude voetjes opnieuw gebruikt, kun je de lijm wat verwarmen voordat je ze bevestigt.
-


Volg bovenstaande instructies in omgekeerde volgorde om je toestel weer in elkaar te zetten.
Breng je e-afval naar een door R2 of e-Stewards gecertificeerd recyclepunt.
Ging je reparatie niet helemaal volgens plan? Bezoek dan ons antwoordenforum voor hulp bij het oplossen van je probleem.
Annuleren: ik heb deze handleiding niet afgemaakt.
Één andere persoon heeft deze handleiding voltooid.
Met dank aan deze vertalers:
100%

Thomas Keulemans helpt ons de wereld te repareren! Doe je mee?
Begin met vertalen ›

