Inleiding
Follow this guide to replace the trackpad (aka ClickPad) in your Lenovo ThinkPad T16 Gen 3 laptop.
Lenovo sometimes refers to this part as a "ClickPad," and several vendors (i.e. Chicony, Sunrex, Transimage) produce their own variants. Keep this in mind when purchasing a replacement.
You may need a replacement "sponge" for your new trackpad. Lenovo's part number for this is 5M21L98590. Use the original trackpad as a reference for sponge position.
Wat je nodig hebt
-
-
Completely shut down your laptop (don't just put it in sleep mode) and disconnect all cables.
-
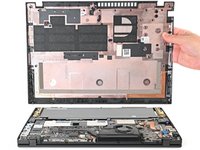
Flip the laptop upside-down, and rotate it so the screen hinge faces towards you.
-
-
-
Use a Phillips screwdriver to fully loosen the seven captive screws securing the base cover.
-
-
-
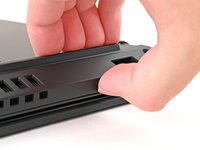
Insert your fingernail or an opening pick into the gap between the base cover and keyboard deck, next to one of the screen hinges.
-
Pry up the base cover until the clips unfasten.
-
-
-
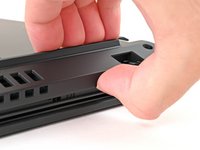
Grasp the base cover along the screen hinge edge and lift slowly to unfasten the remaining clips.
-
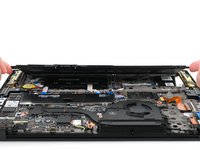
Lift and remove the base cover.
-
-
-
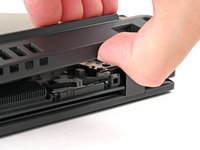
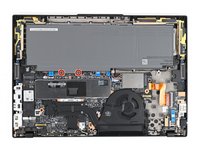
Use a Phillips screwdriver to fully loosen the two captive screws securing the battery connector.
-
-
-
Lift the edge of the battery with the connector to disconnect it.
-
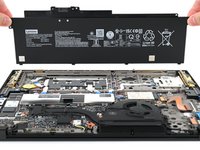
Remove the battery
-
Slide the plastic tabs on the long edge of the battery into their recesses in the frame.
-
Lower the battery into place so the connector goes over its socket.
-
-
-
-
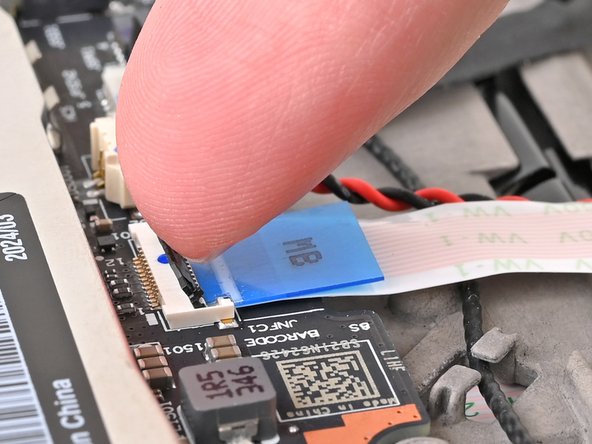
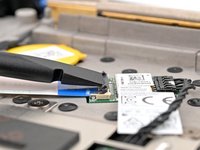
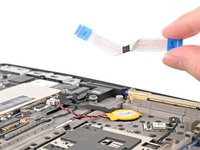
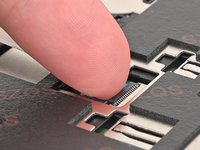
Use your fingernail or the flat end of a spudger to flip up the locking flap on the NFC cable ZIF connector (labeled "JNFC1").
-
Use your fingers or tweezers to gently pull the cable by its plastic pull tab out of its socket.
-
-
-
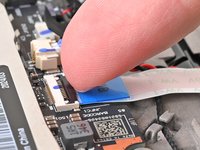
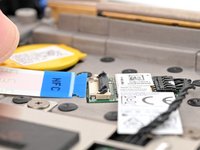
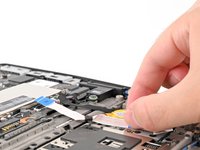
Use the flat end of a spudger to lift the trackpad cable press connector straight up and out of its socket on the NFC reader board.
-
-
-
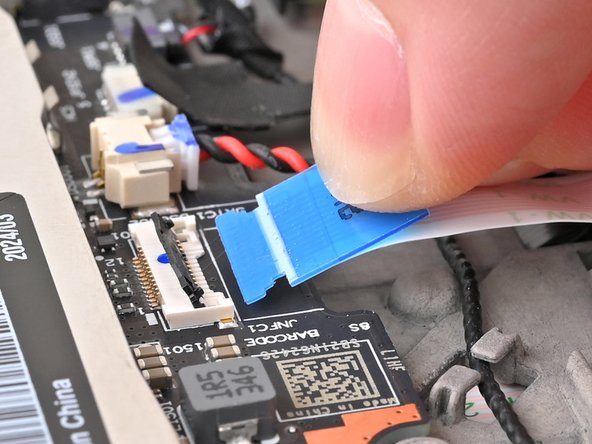
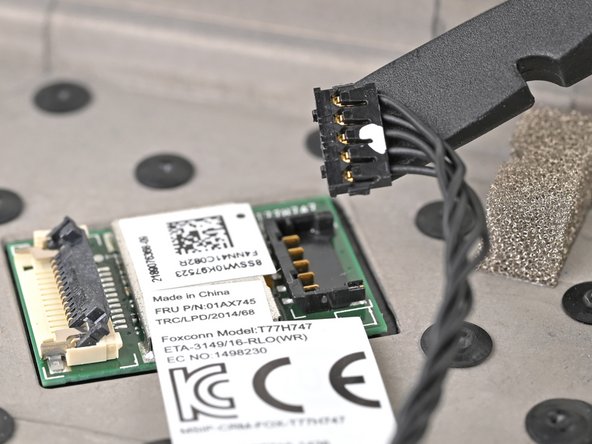
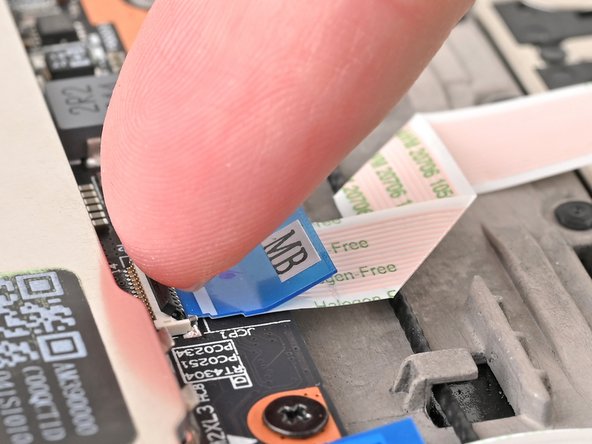
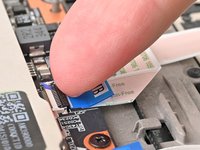
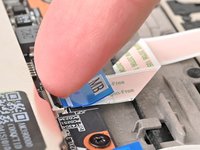
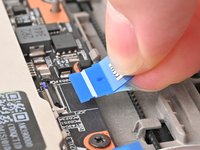
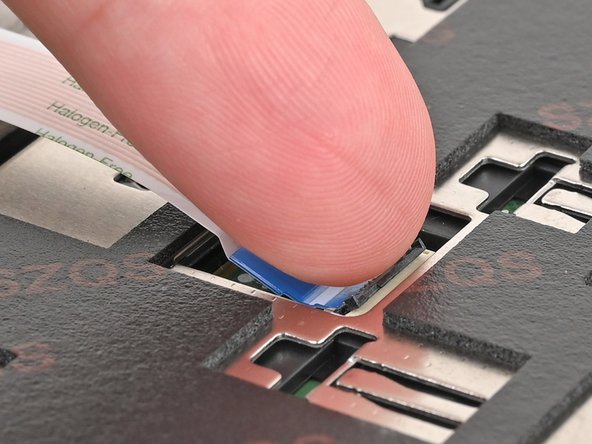
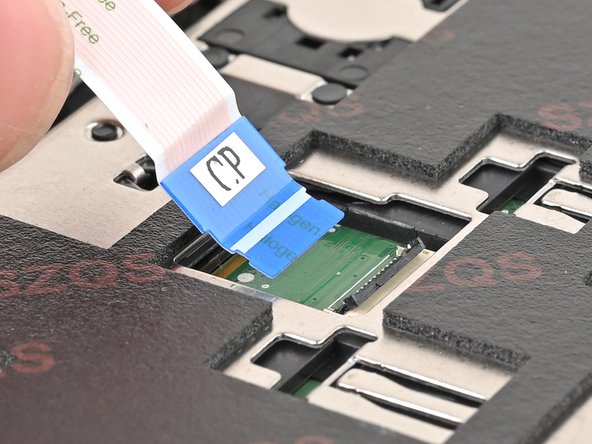
Use your fingernail or the flat end of a spudger to flip up the locking flap on the trackpad cable ZIF connector (labeled "JCP1").
-
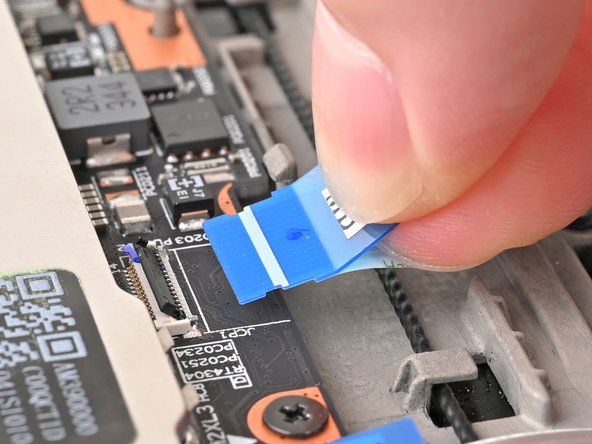
Use tweezers or your fingers to gently pull the cable by its plastic pull tab out of its socket.
-
-
-
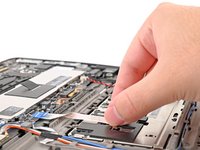
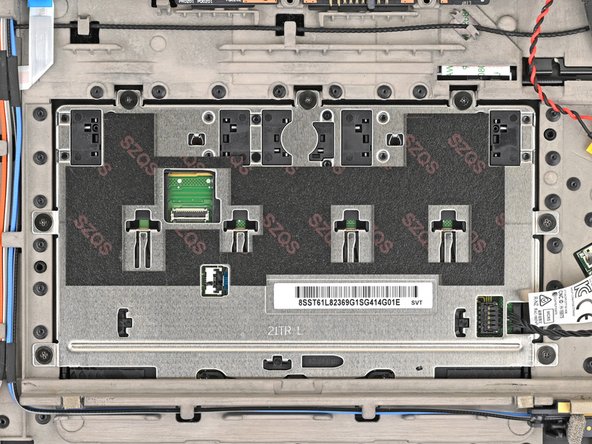
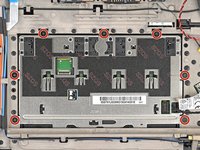
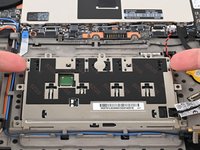
Use a Phillips screwdriver to remove the seven 2.5 mm‑long screws securing the trackpad to the frame.
-
-
-
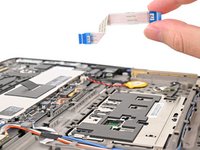
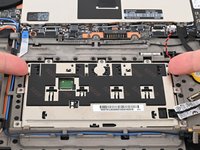
Use your fingers to slightly lift the trackpad by its edges near the motherboard and slide the opposite edge out from its recess.
-


Compare your new replacement part to the original part—you may need to transfer remaining components or remove adhesive backings from the new part before you install it. If a replacement sponge is required, use the original trackpad as a reference for application.
To reassemble your device, follow these instructions in reverse order.
Take your e-waste to an R2 or e-Stewards certified recycler.
Repair didn’t go as planned? Try some basic troubleshooting, or ask our Answers community for help.

