Ga door naar hoofdinhoud

Lenovo Legion 5 15ACH6H Left SSD Replacement

Wat je nodig hebt

  1. Lenovo Legion 5 15ACH6H Left SSD Replacement, Back cover removal: stap 1, afbeelding 1 van 2 Lenovo Legion 5 15ACH6H Left SSD Replacement, Back cover removal: stap 1, afbeelding 2 van 2
    • Use a Phillips screwdriver to remove the following ten screws securing the back cover to frame:

    • Six 12.5 mm PH1 screws

    • Four 4.7 mm PH1 screws

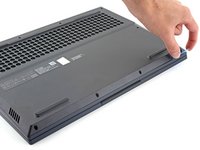
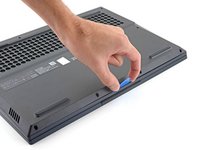
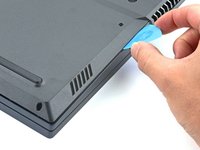
  2. Lenovo Legion 5 15ACH6H Left SSD Replacement, Release the front clips: stap 2, afbeelding 1 van 3 Lenovo Legion 5 15ACH6H Left SSD Replacement, Release the front clips: stap 2, afbeelding 2 van 3 Lenovo Legion 5 15ACH6H Left SSD Replacement, Release the front clips: stap 2, afbeelding 3 van 3
    • Insert the rounded edge of an opening pick between the back cover and the frame in the lower right corner.

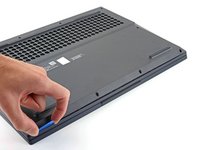
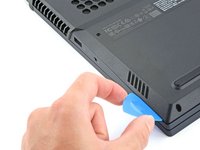
  3. Lenovo Legion 5 15ACH6H Left SSD Replacement: stap 3, afbeelding 1 van 3 Lenovo Legion 5 15ACH6H Left SSD Replacement: stap 3, afbeelding 2 van 3 Lenovo Legion 5 15ACH6H Left SSD Replacement: stap 3, afbeelding 3 van 3
    • Angle the pick to about 30˚.

    • Slide the pick along the front edge to release the clips securing the back cover to the frame.

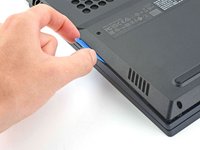
  4. Lenovo Legion 5 15ACH6H Left SSD Replacement, Release the left clips: stap 4, afbeelding 1 van 2 Lenovo Legion 5 15ACH6H Left SSD Replacement, Release the left clips: stap 4, afbeelding 2 van 2
    • Insert the edge of an opening pick between the back cover and the frame on the right edge.

    • Angle the pick to about 30˚ and slide down the left edge to release the clips.

  5. Lenovo Legion 5 15ACH6H Left SSD Replacement, Release the right clips: stap 5, afbeelding 1 van 2 Lenovo Legion 5 15ACH6H Left SSD Replacement, Release the right clips: stap 5, afbeelding 2 van 2
    • Repeat the same procedure on the left edge to release the clips.

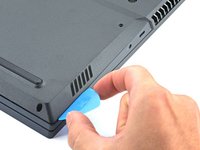
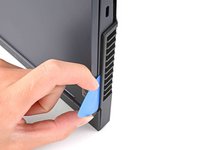
  6. Lenovo Legion 5 15ACH6H Left SSD Replacement, Release the right vent clips: stap 6, afbeelding 1 van 3 Lenovo Legion 5 15ACH6H Left SSD Replacement, Release the right vent clips: stap 6, afbeelding 2 van 3 Lenovo Legion 5 15ACH6H Left SSD Replacement, Release the right vent clips: stap 6, afbeelding 3 van 3
    • Position the laptop vertically so you can easily access the plastic vents.

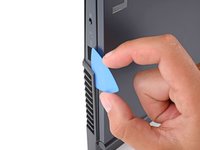
    • Slide the rounded edge of an opening pick between the frame and the plastic vents on the left side near the USB-C port.

    • Rotate the pick so that it is positioned on top of the plastic vents.

  7. Lenovo Legion 5 15ACH6H Left SSD Replacement: stap 7, afbeelding 1 van 2 Lenovo Legion 5 15ACH6H Left SSD Replacement: stap 7, afbeelding 2 van 2
    • Push the pick between the frame and plastic vents.

    • Slide the pick along the top edge of the plastic vents to release the clips.

  8. Lenovo Legion 5 15ACH6H Left SSD Replacement, Release the left vent clips: stap 8, afbeelding 1 van 3 Lenovo Legion 5 15ACH6H Left SSD Replacement, Release the left vent clips: stap 8, afbeelding 2 van 3 Lenovo Legion 5 15ACH6H Left SSD Replacement, Release the left vent clips: stap 8, afbeelding 3 van 3
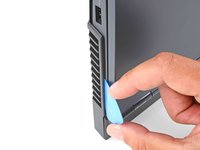
    • Slide the opening pick between the frame and the plastic vents on the right side near the USB-A port.

    • Rotate the pick so that it is positioned on top of the plastic vents.

  9. Lenovo Legion 5 15ACH6H Left SSD Replacement: stap 9, afbeelding 1 van 2 Lenovo Legion 5 15ACH6H Left SSD Replacement: stap 9, afbeelding 2 van 2
    • Push the pick between the frame and plastic vents.

    • Slide the pick along the top edge of the plastic vents to release the clips.

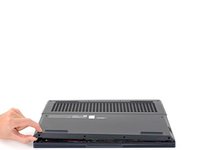
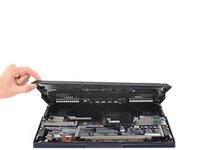
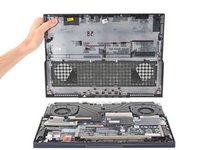
  10. Lenovo Legion 5 15ACH6H Left SSD Replacement, Remove the back cover: stap 10, afbeelding 1 van 3 Lenovo Legion 5 15ACH6H Left SSD Replacement, Remove the back cover: stap 10, afbeelding 2 van 3 Lenovo Legion 5 15ACH6H Left SSD Replacement, Remove the back cover: stap 10, afbeelding 3 van 3
    • Lift the back cover up and remove it from the chassis.

    • During reassembly, this is a good point to power on your laptop and test all functions before sealing it up. Be sure to power your laptop back down before you continue working.

  11. Lenovo Legion 5 15ACH6H Left SSD Replacement, Disconnect the battery: stap 11, afbeelding 1 van 3 Lenovo Legion 5 15ACH6H Left SSD Replacement, Disconnect the battery: stap 11, afbeelding 2 van 3 Lenovo Legion 5 15ACH6H Left SSD Replacement, Disconnect the battery: stap 11, afbeelding 3 van 3
    • Use the pointed end of a spudger to push each side of the battery connector to loosen it.

  12. Lenovo Legion 5 15ACH6H Left SSD Replacement: stap 12, afbeelding 1 van 2 Lenovo Legion 5 15ACH6H Left SSD Replacement: stap 12, afbeelding 2 van 2
    • Use the flat end of a spudger to push out and disconnect battery cable.

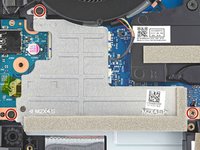
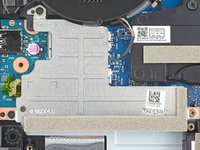
  13. Lenovo Legion 5 15ACH6H Left SSD Replacement, Left SSD removal: stap 13, afbeelding 1 van 2 Lenovo Legion 5 15ACH6H Left SSD Replacement, Left SSD removal: stap 13, afbeelding 2 van 2
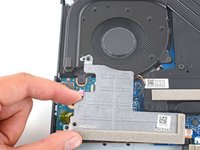
    • Use a Phillips screwdriver to remove the three 5.1 mm PH00 screws securing the left SSD shield to the motherboard.

    • During reassembly, make sure the hole near the top screw aligns with the post on the motherboard.

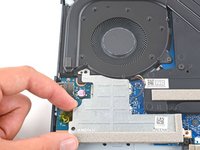
  14. Lenovo Legion 5 15ACH6H Left SSD Replacement, Remove the SSD shield: stap 14, afbeelding 1 van 3 Lenovo Legion 5 15ACH6H Left SSD Replacement, Remove the SSD shield: stap 14, afbeelding 2 van 3 Lenovo Legion 5 15ACH6H Left SSD Replacement, Remove the SSD shield: stap 14, afbeelding 3 van 3
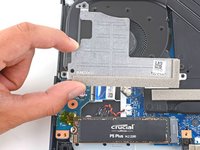
    • Grab the SSD shield and lift up to remove it.

  15. Lenovo Legion 5 15ACH6H Left SSD Replacement: stap 15, afbeelding 1 van 2 Lenovo Legion 5 15ACH6H Left SSD Replacement: stap 15, afbeelding 2 van 2
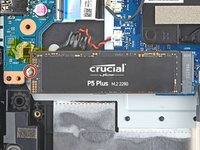
    • Use a Phillips screwdriver to remove the 2.7 mm PH1 screw securing the SSD to the motherboard.

    • The SSD will spring up to about 30˚ when the screw is removed.

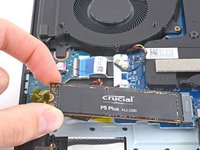
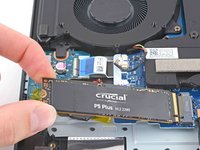
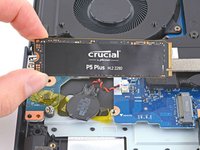
  16. Lenovo Legion 5 15ACH6H Left SSD Replacement, Remove the left SSD: stap 16, afbeelding 1 van 3 Lenovo Legion 5 15ACH6H Left SSD Replacement, Remove the left SSD: stap 16, afbeelding 2 van 3 Lenovo Legion 5 15ACH6H Left SSD Replacement, Remove the left SSD: stap 16, afbeelding 3 van 3
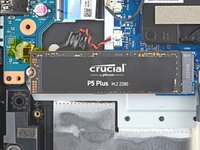
    • Grip the edges of the SSD near the screw indent.

    • Gently pull to remove the SSD.

Conclusie

To reassemble your device, follow these instructions in reverse order.

Take your e-waste to an R2 or e-Stewards certified recycler.

Repair didn’t go as planned? Try some basic troubleshooting, or ask our Lenovo Legion answers community for help.

5 andere personen hebben deze handleiding voltooid.

Chayton Ritter

Lid sinds: 08/21/20

18.012 Reputatie

99 handleidingen geschreven

Team

Guide Team Lid van Guide Team

Staff

6 Leden

7.612 handleidingen geschreven

Één opmerking

sorry guys, I'm new to all this and I don't understand, exactly the same heatsink on the right side of the laptop what is it, is this really the second connector for the m2 PCI 3.0 x 4 ssd connector.
Pls help me

Albert XYZ - Antwoord

Voeg opmerking toe

Weergavestatistieken:

Afgelopen 24 uren: 6

Afgelopen 7 dagen: 89

Afgelopen 30 dagen: 406

Altijd: 9,571