Ga door naar hoofdinhoud
Word lid van de reparatiegemeenschap - Account aanmaken

Hover-1 Rally Brake Pad Replacement

Wat je nodig hebt

    1. Hover-1 Rally Brake Pad Replacement, Rear Wheel: stap 1, afbeelding 1 van 1
      • Remove the 4 mm screw in center of the wheel with a 4 mm hex key.

      • Flip the scooter and remove the same size screw from the opposite side of the wheel.

      Vraag FixBot

      Voeg opmerking toe

    2. Hover-1 Rally Brake Pad Replacement: stap 2, afbeelding 1 van 1
      • Slide the plastic side piece off from both sides of the scooter.

      • Two 4 mm screws and 2 side panels are taken out.

      Vraag FixBot

      Voeg opmerking toe

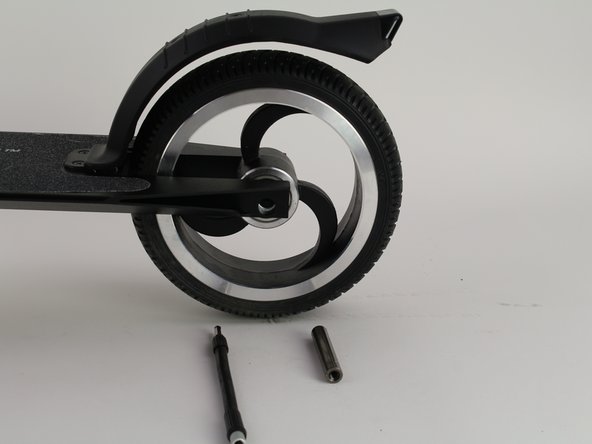
    3. Hover-1 Rally Brake Pad Replacement: stap 3, afbeelding 1 van 2 Hover-1 Rally Brake Pad Replacement: stap 3, afbeelding 2 van 2
      • Use a 4 mm bit extension to push the axle out of the wheel’s center.

      Vraag FixBot

      Voeg opmerking toe

    4. Hover-1 Rally Brake Pad Replacement: stap 4, afbeelding 1 van 1
      • Grab the deck of the scooter, and pull the wheel downwards.

      • 2 washers will fall out with the wheel.

      Vraag FixBot

      Voeg opmerking toe

    1. Hover-1 Rally Brake Pad Replacement, Brake Pad: stap 5, afbeelding 1 van 1
      • Begin by removing the two 8.0 mm screws from the deck using the Phillips #2 screwdriver.

      • Two screw caps will come off with the screws

      Vraag FixBot

      Voeg opmerking toe

    2. Hover-1 Rally Brake Pad Replacement: stap 6, afbeelding 1 van 1
      • Pull the foot brake/ wheel cover away from the deck and downwards.

      Vraag FixBot

      Voeg opmerking toe

    3. Hover-1 Rally Brake Pad Replacement: stap 7, afbeelding 1 van 1
      • On the foot brake, remove the two 8.0 mm screws using the Phillips #2 screwdriver.

      Vraag FixBot

      Voeg opmerking toe

    4. Hover-1 Rally Brake Pad Replacement: stap 8, afbeelding 1 van 1
      • On the opposite side of the brake, remove the silver brake pad.

      • If this is your first time replacing this part, the removal might require more force. You may need to use the flat end of a spudger to pry it off.

      Vraag FixBot

      Voeg opmerking toe

Conclusie

To reassemble your device, follow these instructions in reverse order.

Annuleren: ik heb deze handleiding niet afgemaakt.

2 andere personen hebben deze handleiding voltooid.

Elizabeth Picazo

Lid sinds: 02/12/20

207 Reputatie

1 Handleiding geschreven

Team

Cal Poly, Team S7-G2, Regan Winter 2020 Lid van Cal Poly, Team S7-G2, Regan Winter 2020

CPSU-REGAN-W20S7G2

6 Leden

7 handleidingen geschreven

0Gids Commentaar

Voeg opmerking toe

Weergavestatistieken:

Afgelopen 24 uren: 2

Afgelopen 7 dagen: 8

Afgelopen 30 dagen: 35

Altijd: 1,052