Deze vertaling is door een computer gegenereerd en is nog niet door iemand nagekeken. Spreek je deze taal? Bekijk het hier.

Geek Bar Pulse navullen

Jerry Wheeler en een andere bijdrager
Voor het laatst geüpdatet op 17 aug 2026
Bekeken: 12K
Statistieken weergeven:
- Afgelopen 24 uur:
- 53
- Afgelopen 7 dagen:
- 287
- Afgelopen 30 dagen:
- 1.569
- Altijd:
- 11.597
Commentaar: 8
2 comments on steps, 6 guide comments.
Go to guide commentsVoltooid: 4 5
4 mensen hebben deze handleiding als "voltooid" gemarkeerd. Ben jij de volgende?
5 personen hebben deze handleiding als "voltooid" gemarkeerd. Een daarvan ben jij—lekker bezig!
Favorieten: 1 2
1 persoon heeft deze handleiding als favoriet gemarkeerd en volgt deze. Ben jij de volgende?
2 personen hebben deze handleiding als favoriet gemarkeerd (en blijven daarmee op de hoogte van meldingen)—een daarvan ben jij!
Door de gemeenschap gemaakte handleiding
Deze handleiding is gemaakt door een enthousiasteling uit de gemeenschap, en niet door de iFixit-stafleden.
Inleiding
Ga naar stap 1 ↓Hoewel deze apparaten goed gemaakt zijn en uitstekend werken, is het jammer dat ze gewoon bij het afval belanden zodra ze leeg zijn.
Het is echter mogelijk om ze na te vullen met je favoriete smaak e-liquid, en deze handleiding laat je zien hoe je dit op de juiste manier aanpakt.
Het wordt aangeraden om ze maximaal drie of vier keer na te vullen; daarna raken de verwarmingsspiralen te sterk vervuild met koolstof en verbrandt het katoen, wat resulteert in een slechte smaak en weinig damp.
Als je overweegt om je vape voor de eerste keer na te vullen, zorg er dan voor dat je stopt met het gebruik zodra je een verbrande smaak proeft. Een paar trekjes die verbrand smaken kunnen geen kwaad, maar als je doorgaat, verbrandt het katoen en kun je mogelijk een spiraal doorbranden.
Wat je nodig hebt
Gereedschap


-
-
-
Pak het mondstuk vast met een tang.
-
Geef er een goede, stevige draai aan; linksom of rechtsom maakt niet uit.
 Vraag FixBot
-
-
-
Hopelijk blijft de afdichting van het mondstuk op zijn plek zitten wanneer je het mondstuk verwijdert, maar dat is niet altijd het geval. Als hij los is gekomen, moet je weten hoe je hem terugplaatst.
-
Hij wordt in het mondstuk geplaatst met het viltje naar boven. Als je hem andersom plaatst, zal er geen luchtdichte afsluiting tussen de tank en het mondstuk zijn.
-
-
-
Let erop dat het mondstuk een lipje heeft waardoor het slechts in één stand gemonteerd kan worden. De pijl hier wijst naar de plek op de behuizing waar deze op uitgelijnd moet worden.
-
Hier kun je in de behuizing zien waar het lipje van het mondstuk op uitgelijnd moet worden.
-
-
-
-
-
Zet de aan/uit-schakelaar op de uit-stand; er zouden geen luchtgaten zichtbaar moeten zijn.
-
-
-
Gebruik je hobbymes om de aan-/uitknop omhoog te wippen. Deze is er enkel op gedrukt, dus er zijn geen lijmresten of klemmen waar je rekening mee hoeft te houden.
-
Verwijder de aan-/uitknop.
-
-
-
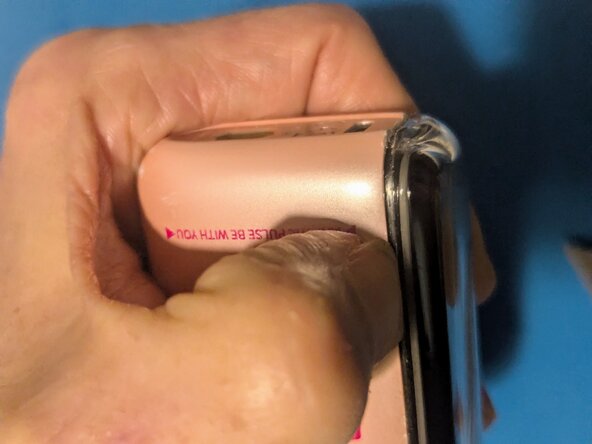
Plaats je duimnagel in de naad bij de onderkant van de vape.
-
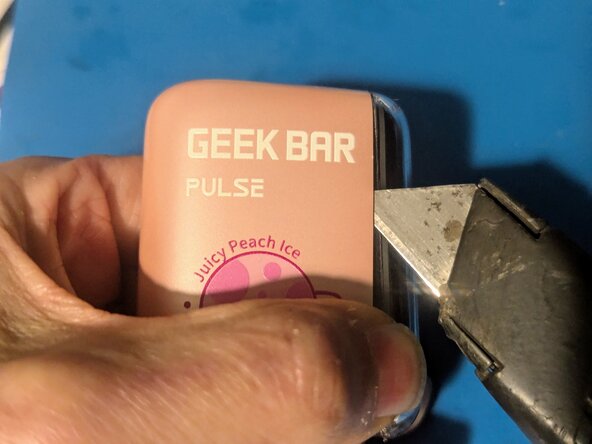
Steek je hobbymes in de twee hoogste punten van de behuizing aan de onderkant.
-
Wrik de dichtstbijzijnde kant van de behuizing ver genoeg open om je vingernagel in de opening te krijgen en deze open te houden.
-
-
-
Steek je mes erin en schuif het naar beneden, gebruik het vervolgens om de bovenkant van de vape uit de behuizing te wippen.
-
Ga met het mes terug naar de onderkant en wip de tegenoverliggende kant naar buiten.
-
Steek het mes aan de andere kant erin en gebruik het om de clips aan die kant los te klikken.
-
-
-
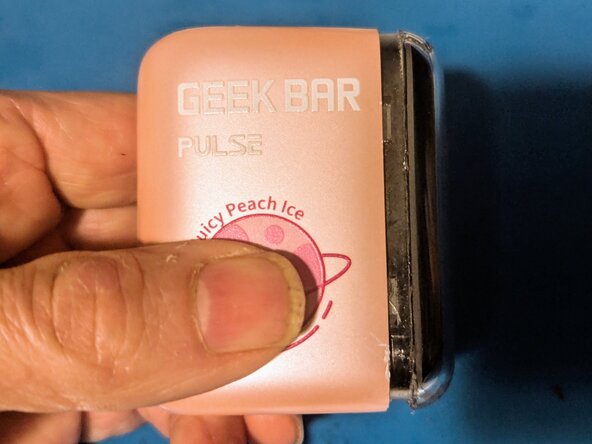
De clips zouden nu rondom los moeten zitten.
-
Trek de vape recht uit de behuizing.
-
-
-
-
-
-
Begin door de punt van je flesje of spuit op het schuim te drukken. Richt deze naar de zijkant en vul totdat de bovenkant van de vape vol zit met vloeistof en stop dan.
-
Op de tweede afbeelding kun je zien hoe de vloeistof zich verspreidt in het schuim en de ruimte tussen het schuim en de transparante behuizing vult.
-
-
-
Ga naar een van de zijkanten om verder te gaan met vullen.
-
...En ga door naar de volgende zijkant.
-
En tot slot de laatste zijkant.
-
-
-
Hier kun je zien hoe de vloeistof in het schuim trekt.
-
Ga door met vullen aan alle vier de zijden.
-
Stop wanneer je op ongeveer 2/3 van de diepte bent; de vloeistof zal zich verder door het schuim verspreiden. Te veel vloeistof zal er weer voor zorgen dat het gaat druppelen.
-
-








Volg deze instructies in omgekeerde volgorde om je apparaat weer in elkaar te zetten.
Annuleren: ik heb deze handleiding niet afgemaakt.
4 andere personen hebben deze handleiding voltooid.

6Gids Commentaar
It's not burning out it's the counter ran out so now it does the light instead of the electricity like it only we could reset the counter... Once it runs down even though it worked perfect 2 seconds before, poof. Lights of death as they call them on xbox with the ring of light.... I loved the crap out of mine it's too bad! Ill still use the cotton somehow in another device I guess. Maybe if I disconnect the screen altogether and just have the battery on it isnt that he black cord their always colorful but it's bound to work like a screenless counter less draw activated....or is it the electricity were enjoying eating on ha. Yum.
Based on my experience with the Pulse vapes, you've got a burnt out coil. I've noted two different conditions where the outer ring flashes red; the first is after you've taken a hit when the counter is at zero; it flashes red for a moment after you've finished drawing, but that doesn't seem to affect the operation in any way.
The second condition where it flashes red is when one or both of the coils is reading wildly out of spec. I've seen them measure on the order of 30 ohms when they should be showing somewhere between 1.2 and 1.5 ohms. When that happens, the flashing will happen as you're drawing air, and it won't heat during that time. The fix for that is to rebuild the coils; usually it's the lower one that goes out first, since that's the one that's used when you're in the normal rather than pulse mode.
Geek Bar Pulse Mesh Coil Rebuild - iFixit Repair Guide
As far as the counter, I haven't found or heard of a way to reset it, but I've refilled a Pulse several times and it doesn't affect anything.
Hi! My vape rapidly starts and stops after I refilled it. Im positive that some liquid got into its electronics. Is there any way to fix it? It also won't start when im sucking on the mouthpiece. It does releace smoke if I keep sucking on it while it keeps quickly turning on the heater for a split second.
I’m not sure how I got here… but might as well ask a question…. I have a vape that still has visible liquid in the tank thing, draw on the vape… no smoke, no lights, blow into the opposite end like where the charger goes and smoke comes out of the top/mouthpuece. 🤷🏽♀️🤷🏽♀️🤷🏽♀️
@tiffanycar26507 in my opinion, it sounds like an improper seal. Try reseating the mouth piece to see if that helps
