Inleiding
The battery in your Garmin Drivesmart 55 EX can lose its ability to hold a charge over time after frequent use. This can reduce the charged battery life and eventually may only be operable when connected to an external power source or inoperable.
The battery is connected to the motherboard through a small plug underneath, requiring you to unscrew and lift the motherboard. Before using this guide, ensure the battery is the issue by testing the charging cable and the vehicle connector cable.
This guide will show you how to replace the battery in your Garmin DriveSmart 55 EX GPS device. Replacing the battery can restore the overall battery life when in use, reduce charging times, and improve overall reliability. From this guide, you will learn how to safely replace the battery on your Garmin device.
Caution: If you notice your battery is swollen or smells strange, be careful when removing it from the device. A swollen battery can explode and catch fire. The What to do with a swollen battery guide is a helpful resource. Check it out for helpful safety tips.
Before you begin, make sure the device is powered off and unplugged from the charger.
Wat je nodig hebt
-
-
-
Use a T5 Torx screwdriver to remove the four 4.2 mm black screws from the back case.
-
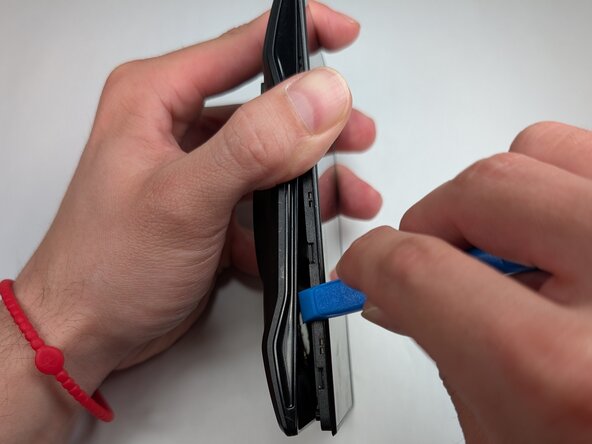
Insert the plastic opening tool into the gap between the screen and case, and release the clips along the edges of the device.
 Vraag FixBot
-
-
-
-
Gently separate the screen from the case and place the device flat on the surface.
-
Use a T5 Torx screwdriver to remove the four 3.8 mm silver screws from the motherboard.
-
Gently pry the motherboard up using the plastic opening tool.
-
-
-
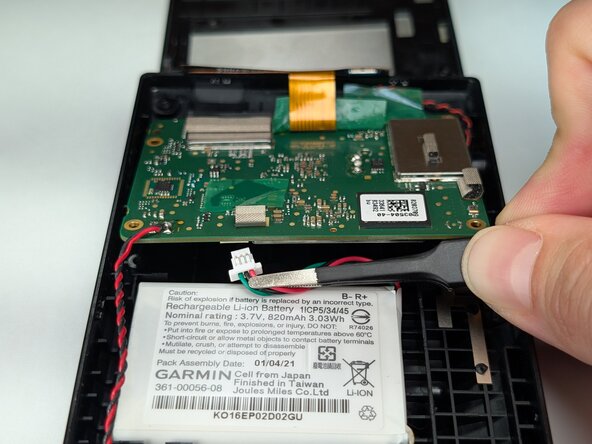
Use your fingers or tweezers to disconnect the battery connector on the underside of the motherboard.
-
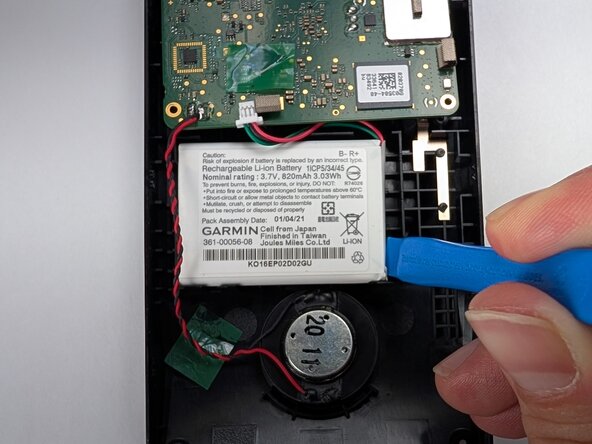
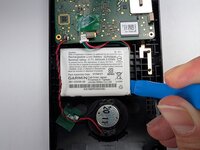
Gently remove the battery from the casing.
-
-








To reassemble your device, follow these instructions in reverse order. Take your e-waste to an R2 or e-Stewards certified recycler.

Team

Purdue University Northwest, Team 7-1, Dieterle Spring 2026 Lid van Purdue University Northwest, Team 7-1, Dieterle Spring 2026
PNW-DIETERLE-S26S7G1
3 Leden
8 handleidingen geschreven
