Inleiding
Is your hair straightener turning off just after a short time of turning it on? It might be the battery having defects. Due to overtime, batteries usually start to deteriorate, which may be caused by overuse of the device or just wearing out. Not allowing the battery to work as usual, and it loses its power to work to its full potential. If the battery in your Dyson Corrale HS03 has defects, it will need to be removed and replaced.
In this guide, we'll show you how to safely remove the battery in your Dyson Corrale HS03 hair straightener so you can replace it with a new 4-cell lithium-ion battery pack.
To make sure your Dyson Corrale needs a new battery, check out our Troubleshooting page, before beginning to make any repairs.
Before you begin, make sure the hair straightener is turned off, unplugged from the charger, and completely cooled if it was used recently.
Warning: Replacing the batteries requires spot welding, which involves specialized tools and experience. If you are not familiar with this process, review this article for guidance or seek help from someone experienced. Always follow proper safety precautions when working with batteries.
Lithium-ion batteries can be dangerous if handled improperly and may catch fire or explode.
Wat je nodig hebt
-
-
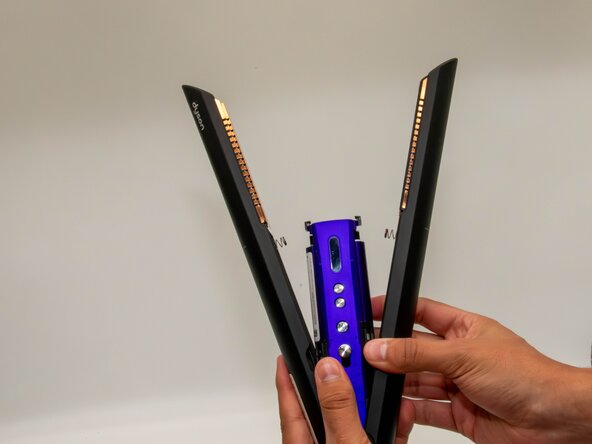
Hold the Dyson with the silver safety lock facing you and push it upward.
 Vraag FixBot
-
-
-
Use a TR6 Torx security screwdriver to remove the screw from the center of the purple hinge bracket on each side of the hinge.
-
Use a Jimmy or spudger to carefully pry up and remove the hinge brackets.
-
-
-
Pull off the black cover from the base.
-
Use a TR7 Torx security screwdriver to remove the two screws from the base of the straightener.
-
-
-
With your thumb and index fingers, pull the black charging port cover off.
-
-
-
Hold the Dyson firmly, supporting one side with one hand while using the other hand to open the opposite side.
-
Pull up on the side you want to open to release it, then repeat on the opposite side.
-
-
-
-
Hold the Dyson firmly with one hand. With the other hand, push down under the black tab while pulling up at the same time to lift and remove the purple casing.
-
-
-
Pull the purple casing upward to access and remove the battery.
-
Use a TR7 Torx security screwdriver to remove the screw securing the magnetic charging port.
-
Detach the charging port.
-
-
-
With a TR6 Torx security screwdriver, you will take off a singular screw.
-
This will later be an advantage when removing the black cover of the control board.
-
-
-
Use a spudger or a clean fingernail to flip up the black locking flap highlighted by the red circle—in the last photo, it is in the unlocked position.
-
Use tweezers or your fingers to gently pull the white ribbon cable from the socket on the board.
-
-
-
Use an iFixit opening tool, to remove the black cover, which should pop right out.
-
Use the iFixit opening tool, to take off the plastic cover leading to the control panel.
-
-
-
Once again, with an iFixit opening tool, take the black cover off, revealing the side part of the battery.
-
-
-
The Control panel will be removed using a ifixit opening tool
-
The plastic cover should now come off by simply grabbing it from the top and taking it off.
-
-
-
Use a TR7 Torx Security Screwdriver to remove the single screw shown in the picture.
-
This now gives you a clear view of the batteries and what you'll need for your next step.
-
-
-
Use a iFixit Opening Tool to remove the battery holder. Be careful, as this step can be a bit challenging.
-
Repeat this on all eight sides. Once you finish, the batteries should fall out on their own.
-




To reassemble your device, follow these instructions in reverse order. Take your e-waste to an R2 or e-Stewards certified recycler.
Annuleren: ik heb deze handleiding niet afgemaakt.
Één andere persoon heeft deze handleiding voltooid.

Team

University of North Texas, Team 1-2, Kilpatrick Fall 2025 Lid van University of North Texas, Team 1-2, Kilpatrick Fall 2025
UNT-KILPATRICK-F25S1G2
3 Leden
8 handleidingen geschreven
3Gids Commentaar
Has anyone done this and it work? I’ve heard the new batteries have to be just right for the system to accept them
Laut meinem Research sind es 18650 Akkus mit 3,7V 2200mAh
Werde auch ein defektes Gerät besorgen und versuchen zu reparieren.
Hab die Akkus getauscht, hat alles geklappt. Aber jetzt blinkt die An/Aus Taste nur lurz ganz schnell und nichts passiert. Was nun?
