Ga door naar hoofdinhoud

Disassembling Fujifilm X30 Camera

Wat je nodig hebt

  1. Disassembling Fujifilm X30 Camera, Battery: stap 1, afbeelding 1 van 2 Disassembling Fujifilm X30 Camera, Battery: stap 1, afbeelding 2 van 2
    • Turn the camera upside down.

    • Place your thumb on the switch, and slide it towards the center of the camera.

    • The compartment will pop open.

  2. Disassembling Fujifilm X30 Camera: stap 2, afbeelding 1 van 1
    • Once you have the battery compartment open, slide the orange tab away from the battery until it ejects.

  3. Disassembling Fujifilm X30 Camera: stap 3, afbeelding 1 van 1
    • Pull the battery out.

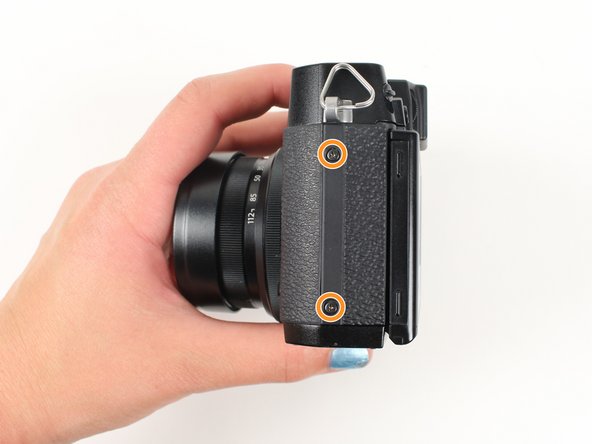
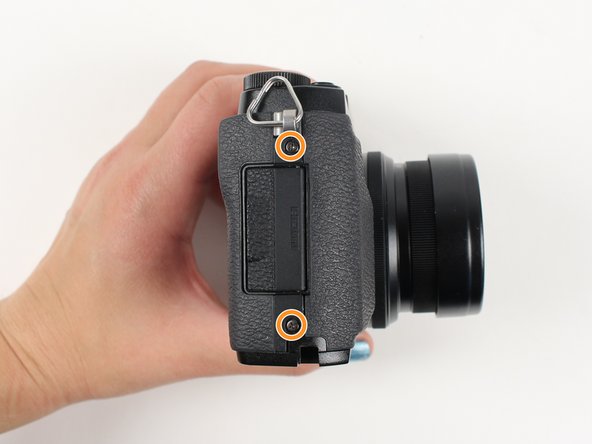
  4. Disassembling Fujifilm X30 Camera, Motherboard: stap 4, afbeelding 1 van 3 Disassembling Fujifilm X30 Camera, Motherboard: stap 4, afbeelding 2 van 3 Disassembling Fujifilm X30 Camera, Motherboard: stap 4, afbeelding 3 van 3
    • Begin by removing the outside screws using a Phillips #000 Screwdriver:

    • Remove the three 3.6 mm silver screws located on the bottom of the camera.

    • Remove all four of the 4.7 mm screws from the sides of the camera.

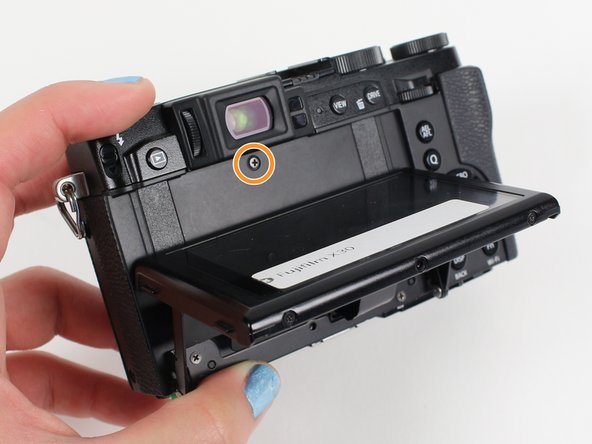
  5. Disassembling Fujifilm X30 Camera: stap 5, afbeelding 1 van 2 Disassembling Fujifilm X30 Camera: stap 5, afbeelding 2 van 2
    • Remove all screws below using a Phillips #000 Screwdriver:

    • Lift up the screen and remove the two 4.5 mm screws located in the bottom corners.

    • Remove the 4.0 mm screw that is located behind the screen and directly under the eye piece.

  6. Disassembling Fujifilm X30 Camera: stap 6, afbeelding 1 van 1
    • Carefully lift up the bottom piece of the camera to remove it.

  7. Disassembling Fujifilm X30 Camera: stap 7, afbeelding 1 van 1
    • Do not pull hard when removing the backing because it could rip the orange strip attached to the motherboard.

    • Gently pull off the back of the camera from the left side so that it is partially open.

    • Use a spudger to lift up the tab holding the orange strip and slide the strip out to disconnect it

    • Refer to the next step to see pictures of how to properly use the spudger when removing a strip.

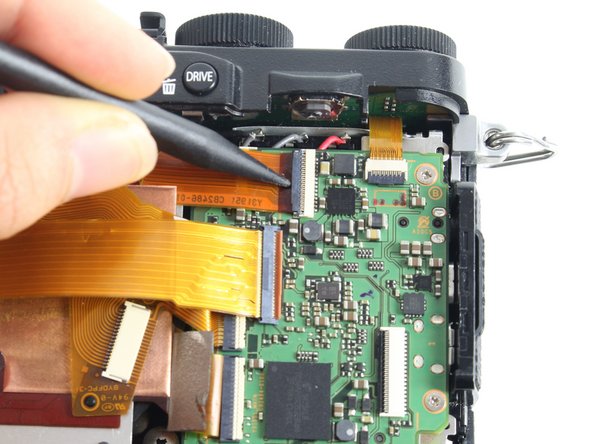
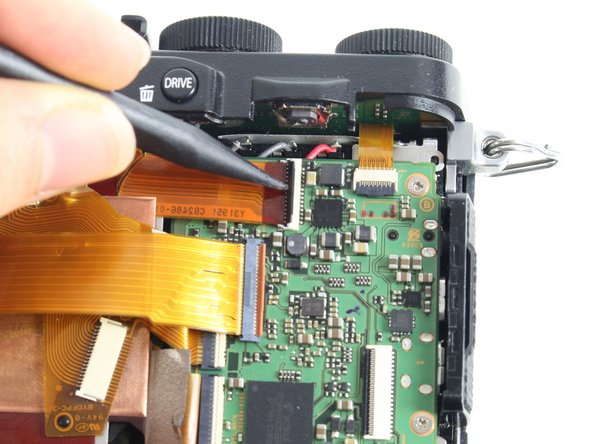
  8. Disassembling Fujifilm X30 Camera: stap 8, afbeelding 1 van 3 Disassembling Fujifilm X30 Camera: stap 8, afbeelding 2 van 3 Disassembling Fujifilm X30 Camera: stap 8, afbeelding 3 van 3
    • For all five indicated orange strips:

    • Use a spudger to lift up the tab holding the orange strip and slide the strip out to disconnect it.

  9. Disassembling Fujifilm X30 Camera: stap 9, afbeelding 1 van 1
    • For the last orange strip located behind the top strip:

    • Use a spudger to lift up the tab holding the orange strip and slide the strip out to disconnect it.

  10. Disassembling Fujifilm X30 Camera: stap 10, afbeelding 1 van 1
    • This step is required if you are doing a full disassembly, but can be skipped if you are only removing the motherboard.

    • For the two orange strips attached to the capacitor circuitboard:

    • Use a spudger to lift up the tab holding the orange strip and slide the strip out to disconnect it.

  11. Disassembling Fujifilm X30 Camera: stap 11, afbeelding 1 van 3 Disassembling Fujifilm X30 Camera: stap 11, afbeelding 2 van 3 Disassembling Fujifilm X30 Camera: stap 11, afbeelding 3 van 3
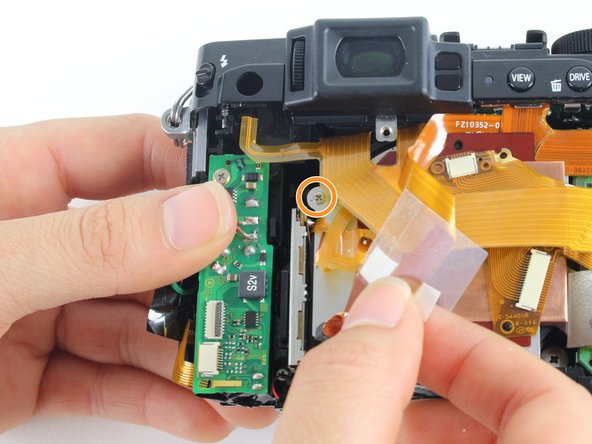
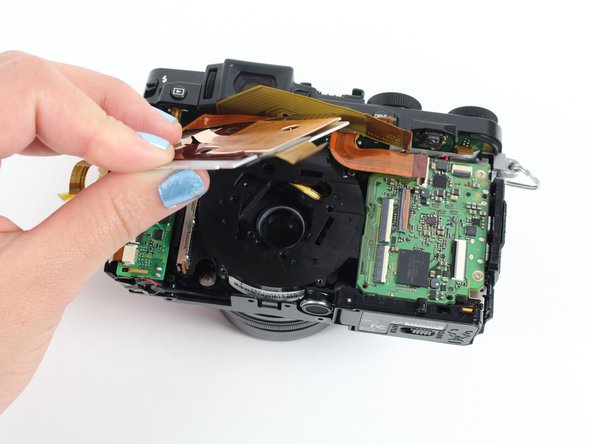
    • Remove all screws listed below using a Phillips #000 screwdriver:

    • Remove the two 3.4 mm screws at the bottom of the silver plate.

    • Hold back the clear strip to reveal a 2.8 mm screw on the left of the silver plate and remove it.

    • Peel back the copper plate.

  12. Disassembling Fujifilm X30 Camera: stap 12, afbeelding 1 van 1
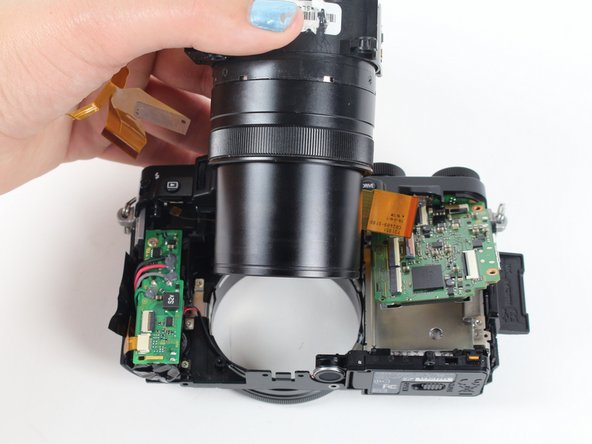
    • Remove the three 2.6 mm screws located in the top two corners and the bottom right corner of the motherboard using a Phillips #000 screwdriver.

  13. Disassembling Fujifilm X30 Camera: stap 13, afbeelding 1 van 2 Disassembling Fujifilm X30 Camera: stap 13, afbeelding 2 van 2
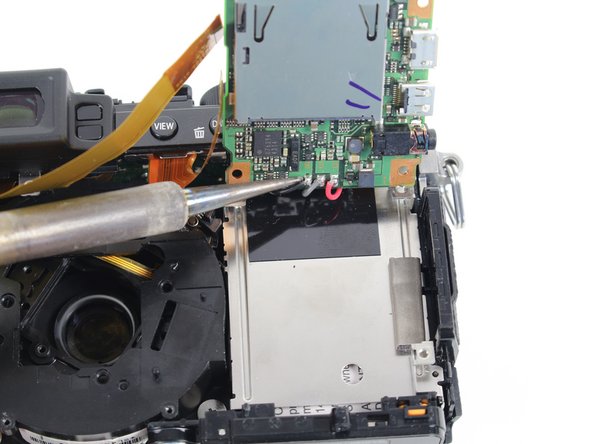
    • Tilt up the motherboard to locate the black, grey, and red wires.

    • Desolder these wires in order to completely remove the motherboard.

    • You can learn about soldering techniques here.

  14. Disassembling Fujifilm X30 Camera, Disassembling Fujifilm X30 Camera: stap 14, afbeelding 1 van 1
    • Remove the four 4.4 mm silver screws at the corners of the lens using a Phillips #000 screwdriver.

  15. Disassembling Fujifilm X30 Camera: stap 15, afbeelding 1 van 2 Disassembling Fujifilm X30 Camera: stap 15, afbeelding 2 van 2
    • Pull the lens toward the bottom of the camera so it can clear the silver tab.

    • Then push the lens with your index fingers from the front of the camera until it is removed.

  16. Disassembling Fujifilm X30 Camera: stap 16, afbeelding 1 van 2 Disassembling Fujifilm X30 Camera: stap 16, afbeelding 2 van 2
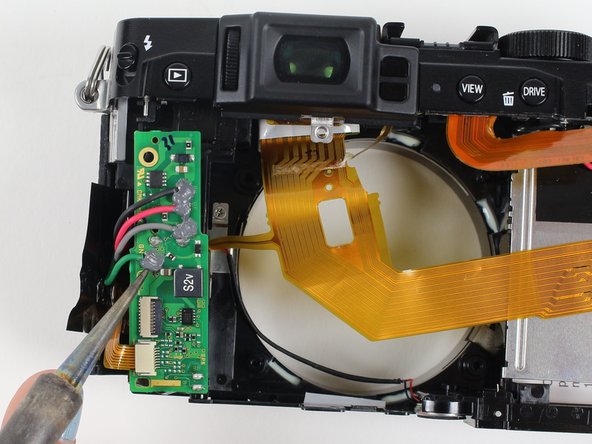
    • Do not touch the leads on the capacitor below the green circuitboard because they can shock you.

    • Remove the silver 3.4 mm screw from the top left corner of the capacitor circuitboard using a Phillips #000 screwdriver.

    • Desolder the red, black, grey, and green wires attached to the capacitor circuitboard so the circuitboard is disconnected and can be set aside.

  17. Disassembling Fujifilm X30 Camera: stap 17, afbeelding 1 van 2 Disassembling Fujifilm X30 Camera: stap 17, afbeelding 2 van 2
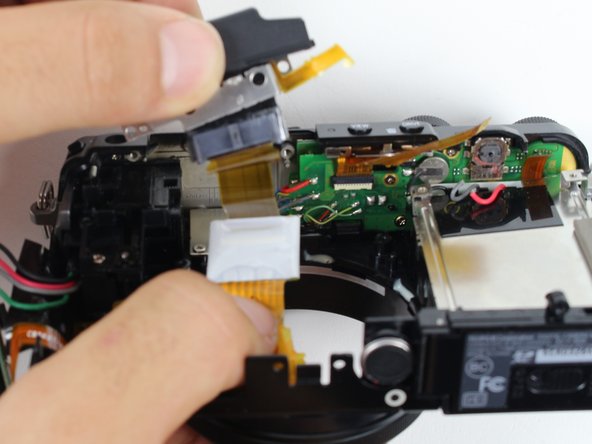
    • Rotate the camera so you are looking at the bottom.

    • Remove the two silver 3.4 mm screws on the silver plate that are holding the eyepiece using a Phillips #000 screwdriver.

    • Lift the eyepiece out of the camera.

  18. Disassembling Fujifilm X30 Camera: stap 18, afbeelding 1 van 2 Disassembling Fujifilm X30 Camera: stap 18, afbeelding 2 van 2
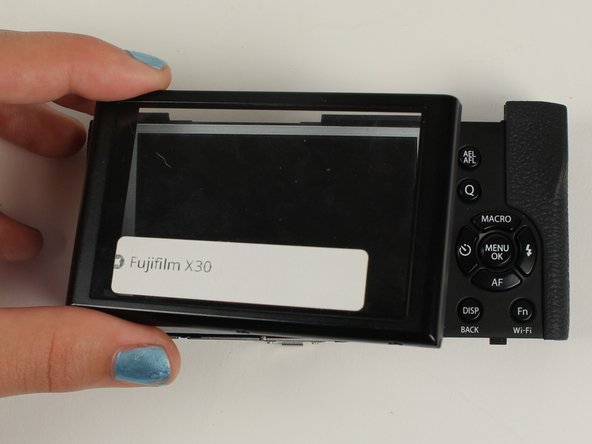
    • To remove the LCD screen, look at the back of the tiltable screen plate.

    • Remove the two black 3.7 mm screws in the back corners of the screen plate using a Phillips #000 screwdriver.

    • Lay the back panel flat to lift off the clear casing that is over the LCD screen.

  19. Disassembling Fujifilm X30 Camera: stap 19, afbeelding 1 van 1
    • You have disassembled the Fujifilm X30 camera!

Conclusie

To reassemble your device, follow these instructions in reverse order.

9 andere personen hebben deze handleiding voltooid.

Jay Sterner

Lid sinds: 01/12/16

450 Reputatie

2 handleidingen geschreven

Team

Cal Poly, Team 70-3, Forte Winter 2016 Lid van Cal Poly, Team 70-3, Forte Winter 2016

CPSU-FORTE-W16S70G3

5 Leden

4 handleidingen geschreven

2 opmerkingen

the big question is how to repair the common stuck open flash?

Don Makaveli - Antwoord

and the broken battery latch (orange tab)? Thanks.

yoyoy - Antwoord

Voeg opmerking toe

Weergavestatistieken:

Afgelopen 24 uren: 5

Afgelopen 7 dagen: 28

Afgelopen 30 dagen: 160

Altijd: 13,335