Ga door naar hoofdinhoud

Casio G-Shock GA110-1B Battery Replacement

Wat je nodig hebt

Video overzicht

  1. Casio G-Shock GA110-1B Battery Replacement, A Guide on Battery Replacement: stap 1, afbeelding 1 van 3 Casio G-Shock GA110-1B Battery Replacement, A Guide on Battery Replacement: stap 1, afbeelding 2 van 3 Casio G-Shock GA110-1B Battery Replacement, A Guide on Battery Replacement: stap 1, afbeelding 3 van 3
    • Remove the four screws from the back of the watch using the Phillips #0 Screwdriver

  2. Casio G-Shock GA110-1B Battery Replacement: stap 2, afbeelding 1 van 3 Casio G-Shock GA110-1B Battery Replacement: stap 2, afbeelding 2 van 3 Casio G-Shock GA110-1B Battery Replacement: stap 2, afbeelding 3 van 3
    • Use a pair of tweezers to remove the metal cover.

    • Make sure not to lose the rubber circle underneath the metal cover because it's part of the watch.

  3. Casio G-Shock GA110-1B Battery Replacement: stap 3, afbeelding 1 van 1
    • Remove the white cover carefully.

    • Using the pair of tweezers, unhook where the battery is held onto.

    • You are going to need to pull the hook will a bit of force. As seen in the video.

    • Be careful!! Do not pull it too hard with the tweezers. You don't want to damage the hook where the battery is placed.

  4. Casio G-Shock GA110-1B Battery Replacement: stap 5, afbeelding 1 van 3 Casio G-Shock GA110-1B Battery Replacement: stap 5, afbeelding 2 van 3 Casio G-Shock GA110-1B Battery Replacement: stap 5, afbeelding 3 van 3
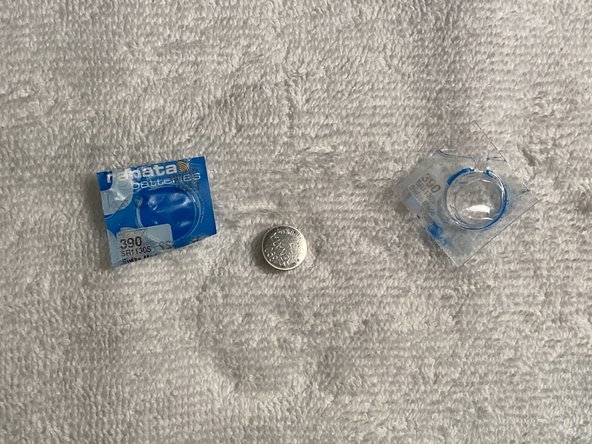
    • Use a pair of tweezers or your fingers to remove the battery from its place.

    • Remove the new battery from its packaging.

  5. Casio G-Shock GA110-1B Battery Replacement: stap 6, afbeelding 1 van 2 Casio G-Shock GA110-1B Battery Replacement: stap 6, afbeelding 2 van 2
    • Place the new battery where it belongs with your fingers. Hook it back onto the device to secure it in place.

    • Reattach the white cover onto the device.

  6. Casio G-Shock GA110-1B Battery Replacement: stap 7, afbeelding 1 van 3 Casio G-Shock GA110-1B Battery Replacement: stap 7, afbeelding 2 van 3 Casio G-Shock GA110-1B Battery Replacement: stap 7, afbeelding 3 van 3
    • Don't forget that the rubber goes 1st inside the watch before placing the metal cover.

    • Make sure that the metal cover is aligned with the watch and not upside down.

    • Put back the metal cover and screw in back the four screws using the Phillips #0 screwdriver.

    • After screwing in the four screws, flip the watch over. Push the button on the bottom left and the watch should turn on!

Conclusie

To reassemble your device, follow these instructions in reverse order.

For optimal performance, after completing this guide, calibrate your newly installed battery.

Take your e-waste to an R2 or e-Stewards certified recycler.

2 andere personen hebben deze handleiding voltooid.

Hector Mejia

Lid sinds: 10/05/21

361 Reputatie

1 Handleiding geschreven

Team

CSU Los Angeles, Team 11-3, Grodsky Fall 2021 Lid van CSU Los Angeles, Team 11-3, Grodsky Fall 2021

CSULA-GRODSKY-F21S11G3

1 Lid

1 handleiding geschreven

0 opmerkingen

Voeg opmerking toe

Weergavestatistieken:

Afgelopen 24 uren: 14

Afgelopen 7 dagen: 77

Afgelopen 30 dagen: 334

Altijd: 4,002