Inleiding
This guide will walk you through the battery connection replacement process for the Casio CTK-501.
The circuit board collects all the power from the keyboard. If the battery area has been damaged, repair to the connection circuit board may be needed. This repair may be needed if the device will not turn on after cleaning the battery area and replacing the batteries.
Soldering knowledge is needed. If you are unfamiliar with soldering, take a look at this soldering guide for more information.
Use caution while soldering not to burn yourself or your surroundings.
Wat je nodig hebt
-
-
-
Flip the keyboard over so that the bottom is facing up.
-
Remove the twenty-seven 12 mm screws from the dark-grey panel using a Phillips #2 screwdriver.
 Vraag FixBot
-
-
-
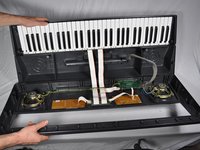
Flip open the top half of the keyboard.
-
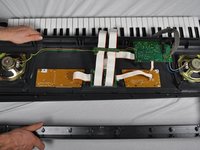
Set the keyboard onto the bottom half with the internal parts facing up.
-
-
-
-
-
-
Plug in the soldering iron.
-
Unscrew the top green circuit board with black and red wires running through it.
-
-
-
Heat up the solder covering the end of the wires connected to the circuit board.
-
Once the solder melts, remove the wires from the circuit board.
-
-
-
Melt new solder with your soldering iron.
-
Then apply it over the tip of the wire resting on the circuit board.
-
-
-
Once the wires are firmly attached, screw the circuit board back into the keyboard.
-
-




To reassemble your device, follow these instructions in reverse order.
Annuleren: ik heb deze handleiding niet afgemaakt.
3 andere personen hebben deze handleiding voltooid.

Team

Cal Poly, Team 9-16, Amido Fall 2012 Lid van Cal Poly, Team 9-16, Amido Fall 2012
CPSU-AMIDO-F12S9G16
4 Leden
12 handleidingen geschreven
