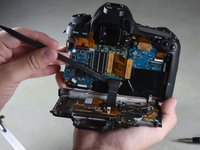
Ga door naar hoofdinhoud

Canon EOS 6D Rear Body Panel Replacement

Wat je nodig hebt

  1. Canon EOS 6D Rear Body Panel Replacement, Rear Body Panel: stap 1, afbeelding 1 van 1
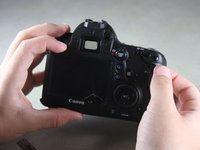
    • Remove the viewfinder cover by pinching the sides and sliding it upward.

  2. Canon EOS 6D Rear Body Panel Replacement: stap 2, afbeelding 1 van 1
    • Open the battery door on the bottom of the camera.

    • Use your thumb to slide the small black tab on the inside of the battery door up and pull the door off the camera.

  3. Canon EOS 6D Rear Body Panel Replacement: stap 3, afbeelding 1 van 1
    • Slide your fingernail or the flat end of the spudger underneath the rubber covering and gently peel it off all sides of the camera.

  4. Canon EOS 6D Rear Body Panel Replacement: stap 4, afbeelding 1 van 1
    • Open the covers to the HDMI/AV/MIC ports on the side of the camera by gently pulling outward on the bottom of the covers.

    • Rotate the covers to the side so that you can see the connection ports inside.

    • Remove the following screws:

    • Two silver 5mm Phillips #00

    • One black 6mm Phillips #00

  5. Canon EOS 6D Rear Body Panel Replacement: stap 5, afbeelding 1 van 1
    • Remove the cover to the HDMI/AV/MIC ports by gently lifting the tab on the bottom edge of the camera.

  6. Canon EOS 6D Rear Body Panel Replacement: stap 6, afbeelding 1 van 1
    • Rotate your camera so the bottom side is facing you.

    • Remove the following screws:

    • One 6mm Phillips #00

    • Two 3mm Phillips #00

  7. Canon EOS 6D Rear Body Panel Replacement: stap 7, afbeelding 1 van 1
    • Rotate your camera so the back is facing you.

    • Remove the following screws:

    • Three silver 5mm Phillips #00

    • Two black 6mm Phillips #00

    • One black 4mm Phillips #00

  8. Canon EOS 6D Rear Body Panel Replacement: stap 8, afbeelding 1 van 2 Canon EOS 6D Rear Body Panel Replacement: stap 8, afbeelding 2 van 2
    • A black ribbon wire connects the rear panel to the inside of the camera. Breaking this wire would make your rear screen and buttons non-functional.

    • Carefully use your fingers to tilt the back panel downward to about a 90 degree angle.

    • Use the flat end of the spudger to gently pry off the ribbon wire from the inside of the camera.

Conclusie

To reassemble your device, follow these instructions in reverse order.

11 andere personen hebben deze handleiding voltooid.

Justin Thomas

Lid sinds: 04/22/14

2.148 Reputatie

6 handleidingen geschreven

Team

Cal Poly, Team 11-48, Amido Spring 2014 Lid van Cal Poly, Team 11-48, Amido Spring 2014

CPSU-AMIDO-S14S11G48

4 Leden

18 handleidingen geschreven

2 opmerkingen

Thanks alot, very helpful

busulwa paddy - Antwoord

Thanks alot, very helpful fixed an issue

busulwa paddy - Antwoord

Voeg opmerking toe

Weergavestatistieken:

Afgelopen 24 uren: 1

Afgelopen 7 dagen: 6

Afgelopen 30 dagen: 33

Altijd: 9,771