Inleiding
Here you can fix common problems like keyboard replacement, dirty vents, and thermal paste replacement.
I am not responsible for damages that may be caused. This is for informational purposes only. Follow at your own risk.
This is my first guide so please be kind.
Wat je nodig hebt
-
Gereedschap gebruikt in deze stap:Tweezers$4.99
-
Welcome to the Alienware M11xR3 disassembly. Below, I will describe the necessary tools and steps to disassemble the Alienware M11xR3. This disassembly applies to all M11x, including the R1, R2, and R3.
-
Required tools:
-
1x Phillips #1 and #00 Screwdriver
-
1x Flathead Screwdriver
-
1x Small Needle Nose Pliers or Tweezers
-
1x Thermal Paste and Finger Stalls Optional: Small water balloons (to spread thermal paste without getting dirty)
-
1x Anti-Static Mat
-
-
-
Gently flip over the laptop so that the bottom side is facing up.
-
Use a Phillips #1 screwdriver to remove the 8 screws securing the base-plate.
-
-
-
Remove the battery cable on the plate by pulling vertically.
-
Unscrew and remove the screws retaining the battery.
-
-
-
Remove the hard drive mounting bracket by removing the three screws with the Phillips #1 screwdriver.
-
Pull out the hard drive by lifting up on the black tab.
-
-
-
In order to remove the hard drive from the mounting bracket, remove the four screws at each corner with the Phillips #1 screwdriver.
-
-
-
Pull the tabs away from RAM.
-
Carefully pull the RAM module to remove.
-
Depending on the configuration that you have on your Alienware, there may be another RAM module.
-
Number of Sockets: 2
-
Max memory: 16384 MB (16GB)
-
Memory Comments: PC3-10600 1333Mhz DDR3 SDRAM SO-DIMM 204-pin
-
-
-
Remove the aerial cables vertically with Tweezers or Small Needle Nose Pliers.
-
Once the aerial cables are removed, extract the screws.
-
Remove the WLAN card.
-
-
-
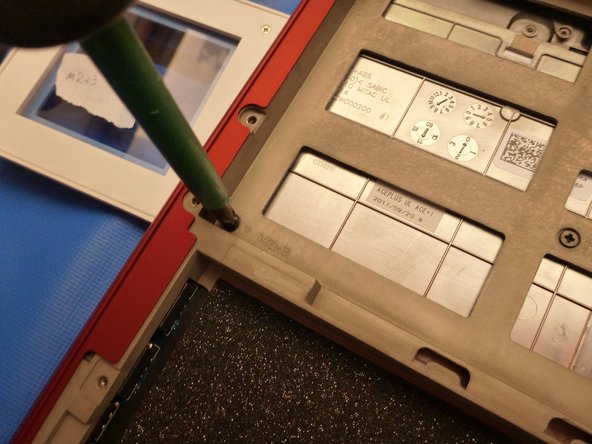
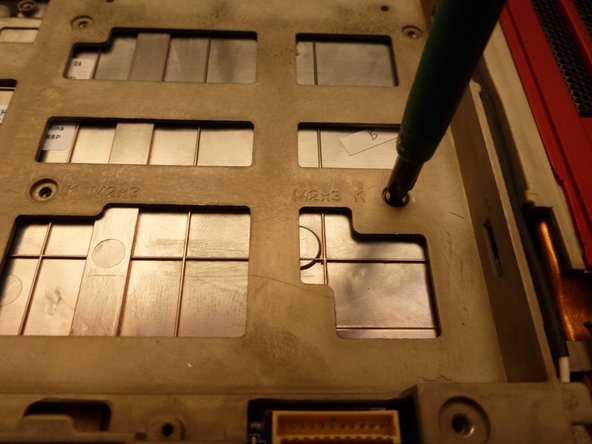
Remove the chassis screws using a Phillips #1 screwdriver.
-
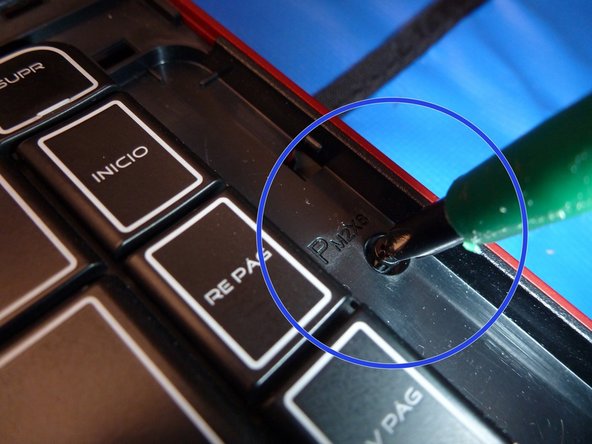
Remove the keyboard screws using a Phillips #1 screwdriver.
-
-
-
-
Use a small flat screwdriver to carefully pry the cover from the chassis.
-
Next, use your finger as a lever to extract the cover. The cover has tabs that attach it to the chassis.
-
-
-
Lift the tab to a vertical position to free the bus cable as shown.
-
-
-
Free the keyboard bus data cable as you did for the RGB bus data cable.
-
Remove the keyboard to replace it; it has pressure points like the previous cover.
-
-
-
Continue taking out the chassis by unscrewing the 3 shown screws.
-
First one to the left of the RGB bus data cable.
-
Second one at bottom near the touchpad.
-
Third one on the right edge of the laptop.
-
-
-
Lift the tab to disconnect the touchpad data bus cable.
-
-
-
Extract the bus cable with needle nose pliers by lifting the tab and pulling it away.
-
-
-
Unscrew the screws in the correct order by using the numbers near the holes.
-
-
-
Pass the cable from the bottom of the laptop through the hole carefully.
-
-
-
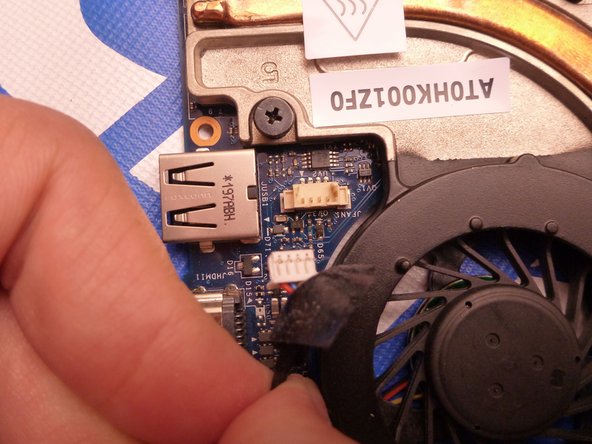
Remove the four screws, marked by red circles, to remove the motherboard.
-
-
-
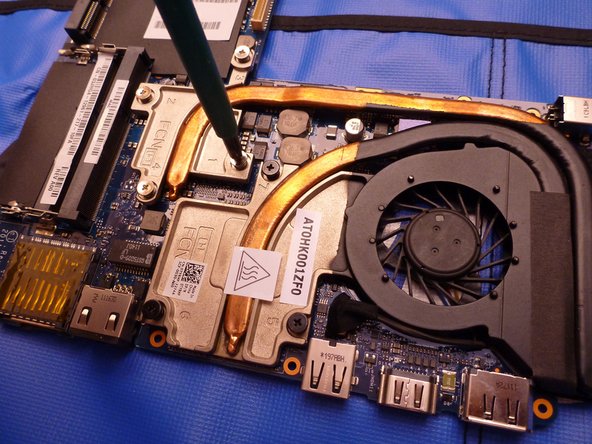
To remove the heatsink and replace thermal paste, remove the screws in the correct order (marked with a number on the heatsink).
-
Rescrew in the correct order (refer to the numbers on the heat sink).
-


Annuleren: ik heb deze handleiding niet afgemaakt.
7 andere personen hebben deze handleiding voltooid.
2 opmerkingen
I needed to modify it so i t would work for my M11X R1
but after all, pretty goosd tutorial.