Ga door naar hoofdinhoud

ASUS TUF Gaming F15 FX506L Back Cover Replacement

Wat je nodig hebt

  1. ASUS TUF Gaming F15 FX506L Back Cover Replacement, Unfasten the back cover: stap 1, afbeelding 1 van 2 ASUS TUF Gaming F15 FX506L Back Cover Replacement, Unfasten the back cover: stap 1, afbeelding 2 van 2
    • For your safety, discharge the battery below 25% and power down your device before disassembly.

    • Use a Phillips screwdriver to remove the 10 screws securing the back cover:

    • Seven 11.6 mm screws

    • Two 14.6 mm screws

    • One 6 mm screw

    • Use a Phillips screwdriver to loosen the captive screw.

    • Loosening this captive screw will pop up and separate the bottom-right corner of the back cover from the chassis.

    • During reassembly, tighten the captive screw before the rest of the screws.

  2. ASUS TUF Gaming F15 FX506L Back Cover Replacement, Release the clips: stap 2, afbeelding 1 van 2 ASUS TUF Gaming F15 FX506L Back Cover Replacement, Release the clips: stap 2, afbeelding 2 van 2
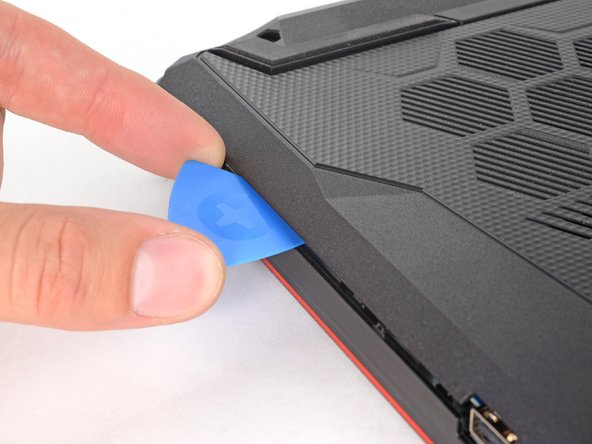
    • Insert an opening pick between the bottom-right corner of the back cover and the chassis, near the captive screw.

    • Pry up to release the clips securing the back cover.

    • You'll hear a click whenever a clip is released.

  3. ASUS TUF Gaming F15 FX506L Back Cover Replacement, Release the remaining clips: stap 3, afbeelding 1 van 3 ASUS TUF Gaming F15 FX506L Back Cover Replacement, Release the remaining clips: stap 3, afbeelding 2 van 3 ASUS TUF Gaming F15 FX506L Back Cover Replacement, Release the remaining clips: stap 3, afbeelding 3 van 3
    • Insert your opening pick again between the top-left corner of the back cover and the chassis.

    • Insert the pick at a steep angle. Pry up to release the remaining clips securing the back cover.

  4. ASUS TUF Gaming F15 FX506L Back Cover Replacement, Remove the back cover: stap 4, afbeelding 1 van 3 ASUS TUF Gaming F15 FX506L Back Cover Replacement, Remove the back cover: stap 4, afbeelding 2 van 3 ASUS TUF Gaming F15 FX506L Back Cover Replacement, Remove the back cover: stap 4, afbeelding 3 van 3
    • Lift the back cover off the chassis and remove it.

    • If your back cover is stuck to the chassis, use an opening pick to release the clips around the back cover's perimeter.

Conclusie

To reassemble your device, follow these instructions in reverse order.

Take your e-waste to an R2 or e-Stewards certified recycler.

Repair didn’t go as planned? Try some basic troubleshooting, or ask our ASUS TUF laptop answers community for help.

3 andere personen hebben deze handleiding voltooid.

Clay Eickemeyer

Lid sinds: 09/19/22

67.303 Reputatie

453 handleidingen geschreven

Team

iFixit Lid van iFixit

Staff

136 Leden

17.430 handleidingen geschreven

0 opmerkingen

Voeg opmerking toe

Weergavestatistieken:

Afgelopen 24 uren: 6

Afgelopen 7 dagen: 68

Afgelopen 30 dagen: 318

Altijd: 6,738