Ga door naar hoofdinhoud

APC Smart-UPS SMT1500RM2UC Battery Cartridge Replacement

Wat je nodig hebt

  1. APC Smart-UPS SMT1500RM2UC Battery Cartridge Replacement, Safety Precautions: stap 1, afbeelding 1 van 1
    • Before you begin your repair, unplug your UPS.

  2. APC Smart-UPS SMT1500RM2UC Battery Cartridge Replacement, Unclip an edge of the front bezel: stap 2, afbeelding 1 van 3 APC Smart-UPS SMT1500RM2UC Battery Cartridge Replacement, Unclip an edge of the front bezel: stap 2, afbeelding 2 van 3 APC Smart-UPS SMT1500RM2UC Battery Cartridge Replacement, Unclip an edge of the front bezel: stap 2, afbeelding 3 van 3
    • Two plastic clips secure the outer edges of the front bezel.

    • Press in one of the clips until it releases.

    • Pull the edge of the front bezel away from the device until the clip comes out of its slot.

  3. APC Smart-UPS SMT1500RM2UC Battery Cartridge Replacement, Remove the front bezel: stap 3, afbeelding 1 van 3 APC Smart-UPS SMT1500RM2UC Battery Cartridge Replacement, Remove the front bezel: stap 3, afbeelding 2 van 3 APC Smart-UPS SMT1500RM2UC Battery Cartridge Replacement, Remove the front bezel: stap 3, afbeelding 3 van 3
    • Gently pull the unclipped edge of the bezel away from the device until the other clip releases.

    • Remove the front bezel.

    • During reassembly, push the bezel into place until both clips engage.

  4. APC Smart-UPS SMT1500RM2UC Battery Cartridge Replacement, Remove the battery disconnect string: stap 4, afbeelding 1 van 2 APC Smart-UPS SMT1500RM2UC Battery Cartridge Replacement, Remove the battery disconnect string: stap 4, afbeelding 2 van 2
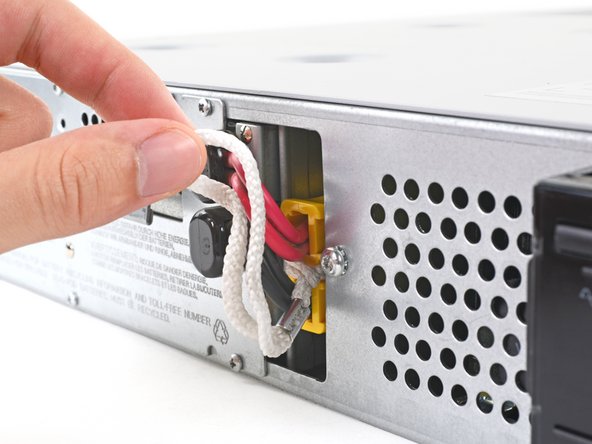
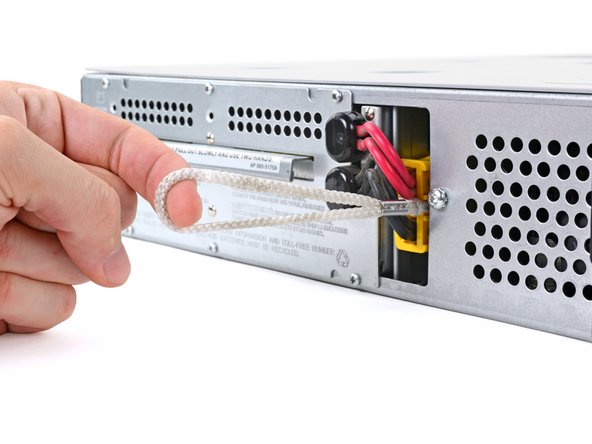
    • Pull the battery disconnect string out of its recess in the middle of the front edge.

  5. APC Smart-UPS SMT1500RM2UC Battery Cartridge Replacement, Disconnect the battery: stap 5, afbeelding 1 van 3 APC Smart-UPS SMT1500RM2UC Battery Cartridge Replacement, Disconnect the battery: stap 5, afbeelding 2 van 3 APC Smart-UPS SMT1500RM2UC Battery Cartridge Replacement, Disconnect the battery: stap 5, afbeelding 3 van 3
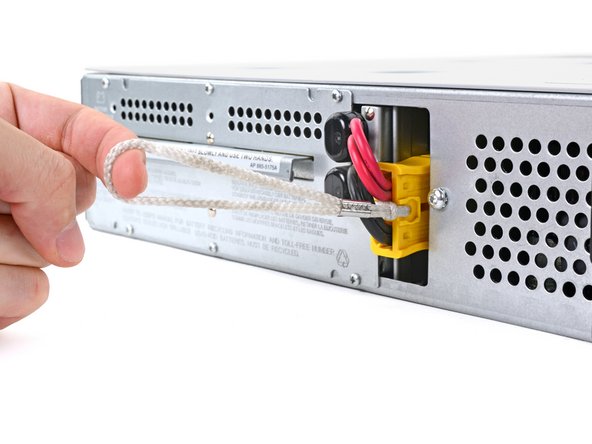
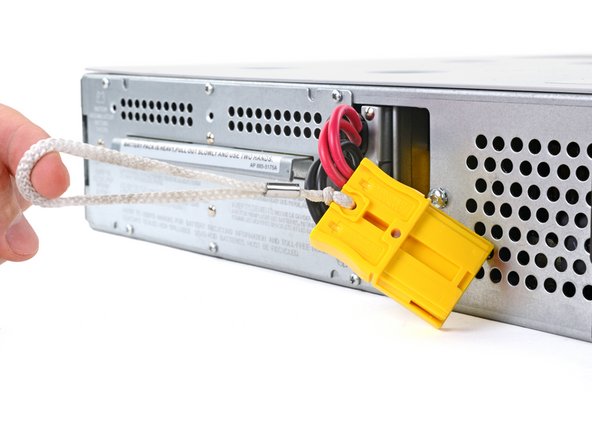
    • Use the battery disconnect string to pull the yellow connector completely out of its socket, disconnecting the battery.

  6. APC Smart-UPS SMT1500RM2UC Battery Cartridge Replacement, Unfasten the battery cartridge: stap 6, afbeelding 1 van 2 APC Smart-UPS SMT1500RM2UC Battery Cartridge Replacement, Unfasten the battery cartridge: stap 6, afbeelding 2 van 2
    • Use a Phillips screwdriver to remove the six 11.2 mm‑long screws securing the battery cartridge.

  7. APC Smart-UPS SMT1500RM2UC Battery Cartridge Replacement, Remove the battery cartridge: stap 7, afbeelding 1 van 2 APC Smart-UPS SMT1500RM2UC Battery Cartridge Replacement, Remove the battery cartridge: stap 7, afbeelding 2 van 2
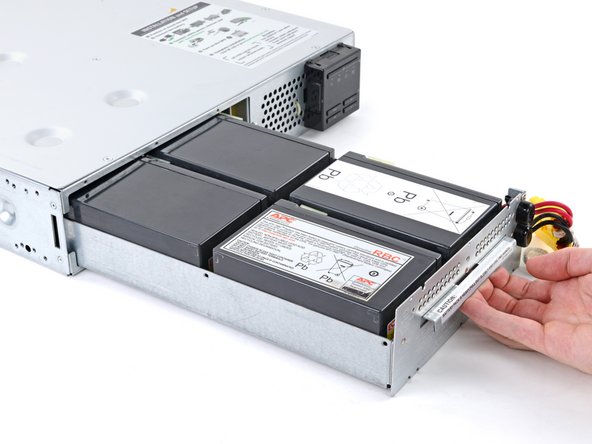
    • Slide the battery cartridge out of the device until it stops.

  8. APC Smart-UPS SMT1500RM2UC Battery Cartridge Replacement: stap 8, afbeelding 1 van 3 APC Smart-UPS SMT1500RM2UC Battery Cartridge Replacement: stap 8, afbeelding 2 van 3 APC Smart-UPS SMT1500RM2UC Battery Cartridge Replacement: stap 8, afbeelding 3 van 3
Conclusie

To reassemble your device, follow these instructions in reverse order.

Take your e-waste to an R2 or e-Stewards certified recycler.

Repair didn’t go as planned? Try some basic troubleshooting, or ask our Answers community for help.

Spencer Day

Lid sinds: 09/14/22

58.587 Reputatie

430 handleidingen geschreven

Team

iFixit Lid van iFixit

Staff

137 Leden

17.523 handleidingen geschreven

0 opmerkingen

Voeg opmerking toe

Weergavestatistieken:

Afgelopen 24 uren: 1

Afgelopen 7 dagen: 25

Afgelopen 30 dagen: 79

Altijd: 523