I opened my Jabra Speak 710 for a necessary battery replacement, but I can easily take pictures of anything else if anyone needs them. I tore apart the casing with a vengeance, as the device was inoperable anyway. Turns out most of the time I spent was wasted going in the wrong way, and my initial destructive entry was a dead end; I was reminded the lesson I learned early on laptops “if you feel like you’re using too much force, you probably are and you’re probably doing it wrong”.
Tools necessary:
- torx T6 screwdriver
- torx T9 screwdriver
- thin pry tool (optimally, plastic)
- soldering iron/solder/flux (to replace battery)
Time: ~20 minutes
Parts: 2x AHB682828HPA 3.8v 530mah 2.1Wh Li-ion batteries (See comments for discussion)
Disclaimer:
- This is not a soldering guide and does not endorse or prepare you for safely desoldering batteries. If you are not already comfortable soldering, please do so under the guidance of an expert.
- Take replacement battery recommendations at your own risk, as these will be third party and varying quality.
Precautions:
- Be very careful when using soldering irons around batteries.
- Work somewhere well ventilated and/or near an exit, lithium batteries release dangerous chemical vapours when they catch fire.
- Keep a metal pot/container nearby in case of a fire, having sand and/or a fire extinguisher aren't a bad idea either.
- When soldering the new battery the device will power on during the soldering process (thanks "The Verbose Barnacle" for pointing this out in the comments). Take care not to jump and have an accident.
- Do not bend or deform the old batteries during or after removal.
- Store the batteries in a metal container until you have them recycled, somewhere that would be safe should they catch fire. (e.g. a metal pot)
- If the batteries are swollen or physically damaged they are at an elevated risk for spontaneous combustion.
Teardown:
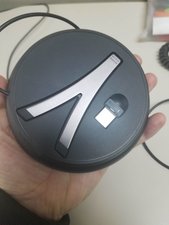
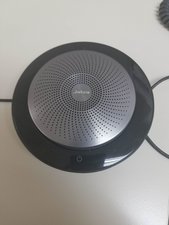
1) Reference “before” picture of the Jabra Speak 710. The first step is to remove the front silver plate, which is held in place with double sided tape.
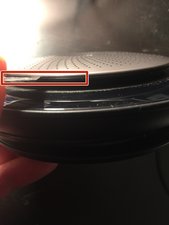
2) You’ll need to wedge a thin pry tool or knife just under the plate, between the silver metal plate and black plastic housing. If you want to reduce the risk of noticeable scratches to the edges of the face plate you should try using a plastic pry tool first. The adhesive is just on the outer edge, about 4mm.
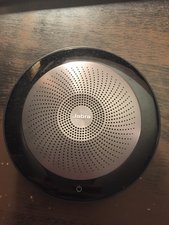
3) After removing the silver front speaker plate, 4 screws (T6) are accessible. These screws hold the bottom/back part of the chassis assembly.
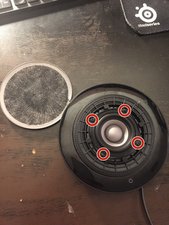
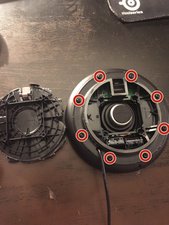
4) Once the four screws have been removed, the bottom/back removes easily, which provides access to the remaining 8 screws (T9) that hold the mid and top/front of the chassis together. You can ignore my mangled back/bottom, a casualty of discovery.
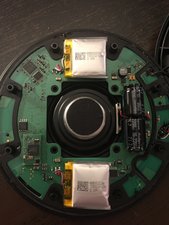
5) The chassis opens up to reveal two batteries, each connected by three wires. The underside of the batteries has the google-able model number AHB682828HPA (thanks Mike Riebesehl) and the battery specs 3.8v 530mah.
At this point you can desolder the battery (take note of the wire colors and order), but first please read through the "Precautions" and "Disclaimer" listed earlier. You can use a thin, flat, wide, plastic pry tool to get under the battery if it is strongly adhered to the PCB. Metal pry tools can pierce a battery and cause a runaway fire.
When I authored this guide these batteries were hard to find, but as of March 2024 their part numbers and the Jabra model are searchable via Aliexpress. Please share your experiences with any specific third party batteries you choose to order (e.g. "working well after X months" or "almost burned down my house" are very helpful to the whole community)


5 opmerkingen
I have this problem too. Tried to tear the rack away from the case. However, it is firmly attached. Has anyone solved this problem?
door informatyk.piotr3k
I called Jabra Support. When asked how to take the case apart for this purpose, I was told that the batteries were not meant to be replaced. Instead I was offered a 40% discount on the price of replacement 710s which happen to be out of the 2-year warranty. This offer is good for 7 days, so I intend to perform some destructive reverse engineering on one unit. Will post results here.
door Randy Isbell
How did it go, @Randy Isbell? I need to open my unit as well.
door Tomasz
@tomasz The answer below from Colin Purcell works.
door Randy Isbell
Many thanks, I did it and it is working BUT showing low battery alarm when the battery is charged. So, working but with wrong alarm.
door Pablo Araujo