-
-
At the E3 2013 Xbox Media Briefing, Microsoft briefly announced a redesigned version of the Xbox 360 styled after the much anticipated Xbox One.
-
Despite a new look, the Xbox 360 E's tech specs are nearly identical to those of the Xbox 360 S:
-
4 or 250 GB Hard Drive
-
Internal Wi-Fi capability
-
-
-
Microsoft did a little bit of housekeeping with the backside of the Xbox 360 E, yielding a neater port layout that does away with the old A/V and S/PDIF ports in favor of a single composite out jack.
-
Apparently having five USB ports was excessive, so now you only get four. The E has two ports in the front to match the two seen here, dropping one of the rear USB ports found in the S.
-
-
-
Back on the front of the device, the first thing we notice is a warning sticker. It seems that Microsoft hasn't yet caught up to Sony's skip protection technology.
-
Our new, out of the box console has some cosmetic damage. The Xbox 360 logo on the optical disc drive faceplate is missing a portion of the "X." We hope this is just a one time occurrence and not common to other Xbox 360 E consoles.
-
-
-
If there's something we here at iFixit can't do, it's leave a "black box" alone.
-
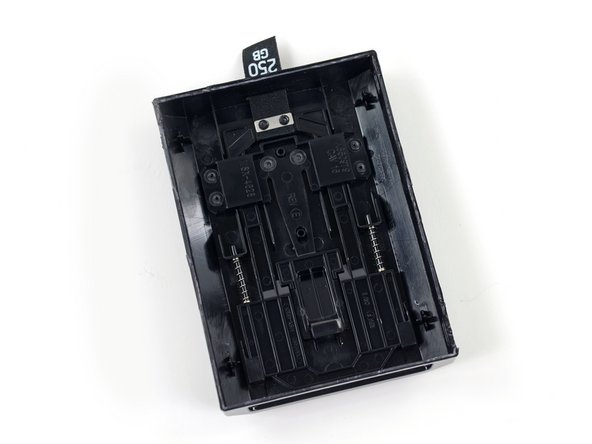
We slice open the hard drive case to see who's providing the storage for our particular Xbox.
-
The 5400 RPM Seagate 250 GB hard drive is pretty cool, but we're more intrigued by what's underneath it.
-
Closer inspection shows that not only does the hard drive case have a pull tab, it has a spring-loaded pull tab.
-
A standard 2.5" SATA hard drive means I can safely upgrade my Xbox 360 E, right?
-
-
-
-
Just like the 360 S, the E's top panel and left case require some precise and diligent spudgering to remove.
-
Our first glimpse inside the Xbox 360 E shows us, well, not much besides the metal frame. It looks like we'll have to keep digging.
-
-
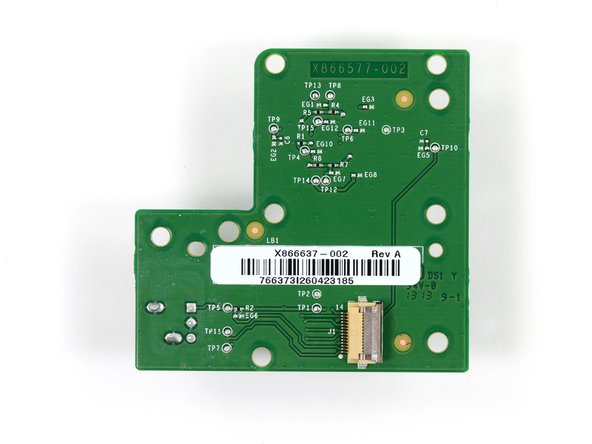
New to the 360 E, the front buttons are housed on their own separate board within the front panel, rather than residing on the RF module.
-
The following buttons are located on the button board:
-
Power button (surrounded by LEDs for that characteristic glowing ring)
-
Disc tray eject button
-
Connect (wireless sync) button
-
-
-
Unlike the hard drive, Microsoft redesigned, and even printed new stickers for, the Xbox 360 E's RF module.
-
While much of the board is largely unchanged, the absence of the power button backlight found in the Xbox 360 S is easily noticed.
-
Even Microsoft's X857052-001 IC is the same part from the 360 S' RF module.
-
-
-
This screw came pre-screwed-up. We're beginning to think that our 360 E's assemblers chose expediency over error elimination.
-
The Torx screws in the metal frame are reluctant to let go, so we grab the extension from our 54 bit driver kit and use it to activate high-torque driver mode.
-
With the final component of the outer case out of the way, we get to the really good stuff at last.
-
Inspection at a macro level reveals no major changes. We'll have to see what happens if we go deeper.
-
-
-
The design of the optical drive remains unchanged. The optical drive in this particular Xbox 360 E is the Lite-On DG-16D5S.
-
Microsoft claims that the Xbox 360 E is "quieter than ever." How much of that quiet has to do with the fans is unknown seeing as how the fan is identical to the fan found in the Xbox 360 S.
-
The fan is labeled as X858313-008; its lovely cowling is labeled F94, or X857295, in fine print.
-
-
-
With the guts of the E cleared out of the way, we can finally gain access to its brain.
-
Disclaimer: Anatomical accuracy not guaranteed.
-
If you've ever been around an Xbox 360, chances are you've heard of the Red Ring of Death—a catastrophic failure caused by overheating that was rampant in nearly every revision of the console.
-
Finally, after a drastic redesign to the processors and their heat sink in the Xbox 360 S, Microsoft seems to have the overheating issues under control, and is continuing to use the same cooling system in the 360 E.
-
With the heat sink unclamped and free to move about the cabin, we pop it off to take a gander at the processor.
-
-
-
It's time to think inside the box. The prominent ICs found on the frontside of the motherboard:
-
GlobalFoundries (joint venture of AMD and ATIC) XCGPU SoC (combination of the Xenon CPU and the Xenos X818337 GPU onto the same die, with eDRAM in the same package)
-
Microsoft X850744-004 south bridge
-
Hynix HY27US08281A 128 Mb NAND flash
-
Samsung K4J10324KG-HC14 1 Gb GDDR3 SDRAM (total of four = 4 Gb)
-
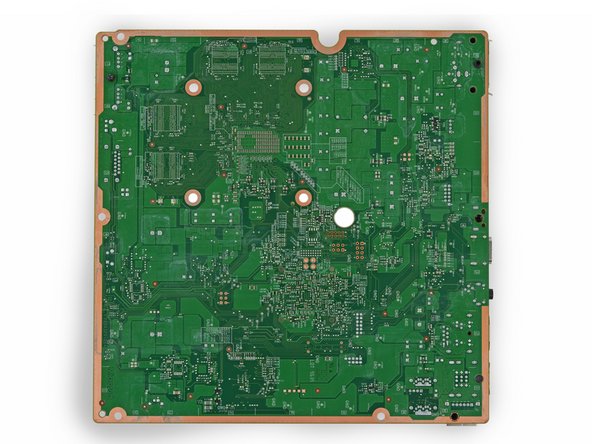
On the backside...
-
A green land flecked with gold and the hopes of the internet-free gamers of tomorrow.
-
-
-
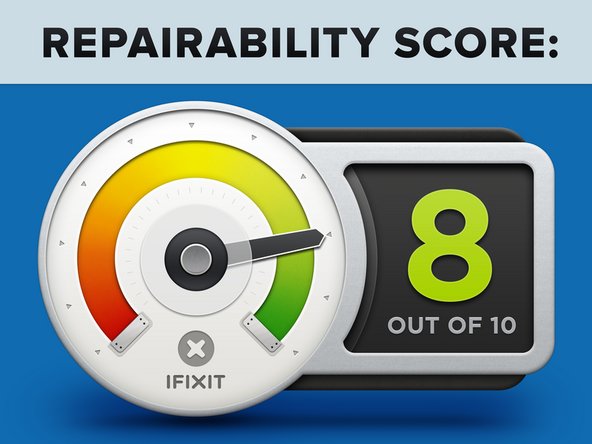
Xbox 360 E Repairability Score: 8 out of 10 (10 is easiest to repair).
-
Without the flashy chrome bezels, the 360 E's case is easier to open than 360 S.
-
Highly modular design allows replacement of drives, fan, Wi-Fi card, RF module, button board, and heat sink independently.
-
Use of cards and connectors instead of cables, where possible, makes disassembly and reassembly a snap.
-
The hard drive is easily accessible for upgrade or replacement but requires buying a proprietary Xbox hard drive.
-
Use of clips instead of screws on the main case makes opening more difficult and potentially damaging.
-


30 opmerkingen
Any changes to the external power brick? That part is clearly the loudest part of the old S-Modells. Did they address that?
The external power brick has no sound whatsoever.
Can you please provide the dimensions of the new model? Wondering how the case size differs from the previous version. Thanks.
The dimensions are 10 3/8 inches x 10 inches x 2 5/8 inches, and can also be found in the updated Technical Specs section on the device page.
Where as I would like to agree with the state of the hard drive only being able to be replaced by a microsoft xbox hard drive is not factually true. There are programs out there that will take any drive and format it in their special format. I have done this with several xbox units spaning all of their models. Use xbox live and have yet to have any issues.