Ga door naar hoofdinhoud

Wat je nodig hebt

Deze demontage is geen reparatiehandleiding. Om je Samsung Intensity te repareren, gebruik onze reparatiehandleidingen.

  1. Samsung Intensity Teardown, Samsung Intensity Teardown: stap 1, afbeelding 1 van 1
    • Remove the back cover and battery

  2. Samsung Intensity Teardown: stap 2, afbeelding 1 van 1
    • Remove the 8 screw that hold the back cover down.

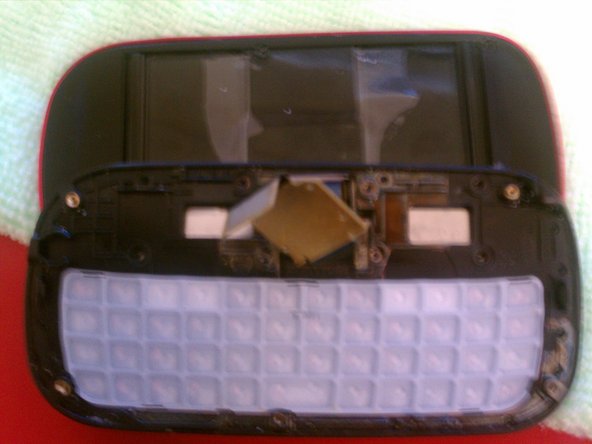
    • Carefully pry back piece off

    • Start at the bottom and work toward the top.

  3. Samsung Intensity Teardown: stap 3, afbeelding 1 van 1
    • Use the ipod opening tool to disconnect the Connector

  4. Samsung Intensity Teardown: stap 4, afbeelding 1 van 2 Samsung Intensity Teardown: stap 4, afbeelding 2 van 2
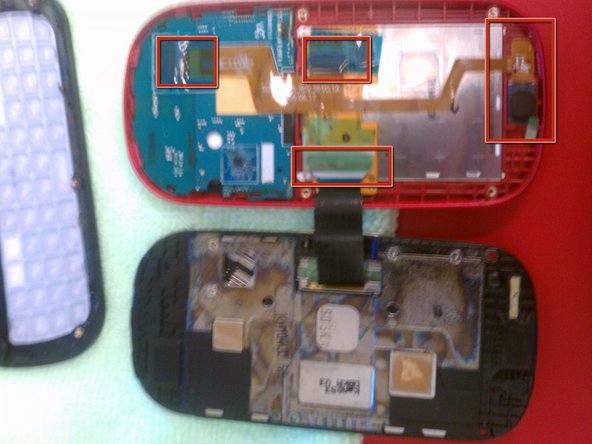
    • Carefully remove the main board

    • Make sure to not tear the microphone cable, pry it from the phone carefully

  5. Samsung Intensity Teardown: stap 5, afbeelding 1 van 2 Samsung Intensity Teardown: stap 5, afbeelding 2 van 2
    • Remove the 6 screws

    • Pry to ribbon cable assembly loose from the slider

    • Its glued on the left and right side

  6. Samsung Intensity Teardown: stap 6, afbeelding 1 van 1
    • Remove the 4 screw the holds the slider to the phone assembly

    • one of the screws will be behind the hinge

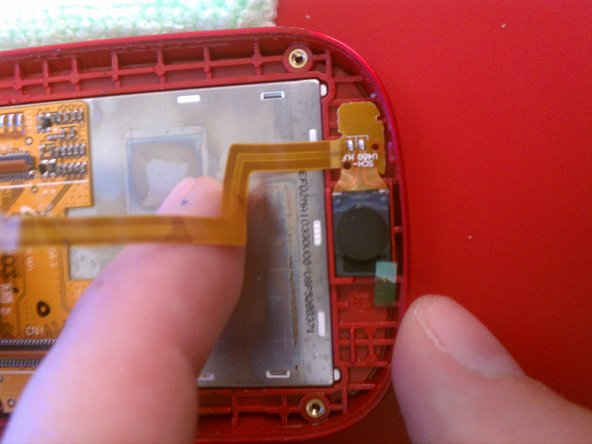
    • Carefully pry slider assembly loose from display assembly

  7. Samsung Intensity Teardown: stap 7, afbeelding 1 van 3 Samsung Intensity Teardown: stap 7, afbeelding 2 van 3 Samsung Intensity Teardown: stap 7, afbeelding 3 van 3
    • Remove the tape and pop the connectors and pull all the ribbon cables loose

    • Carefully pry the speaker loose from the case.

  8. Samsung Intensity Teardown: stap 8, afbeelding 1 van 1
    • Carefully work the keyboard loose from the display assembly

    • There are a couple fragile clips that hold it in place

  9. Samsung Intensity Teardown: stap 9, afbeelding 1 van 2 Samsung Intensity Teardown: stap 9, afbeelding 2 van 2
    • LCD comes out pretty easily

    • Pry it from the bottom and work up the sides to release it if stuck

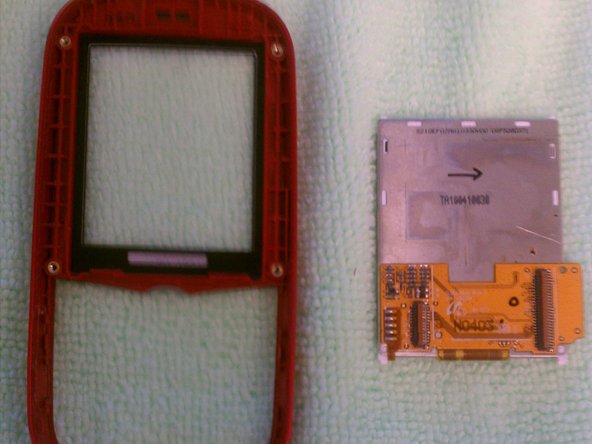
    • The glass can be removed with a little heat from a heat gun or blow dryer

    • Pry it out from the outside edges working around carefully

David

Lid sinds: 08/10/11

148 Reputatie

1 Handleiding geschreven

Team

West Georgia Technology Lid van West Georgia Technology

Business

1 Lid

1 handleiding geschreven

Één opmerking

This was so helpful! How can I show my gratitude to you for these helpful instructions?

teh_pwnerer22 - Antwoord

Voeg opmerking toe

Weergavestatistieken:

Afgelopen 24 uren: 1

Afgelopen 7 dagen: 2

Afgelopen 30 dagen: 13

Altijd: 4,673