Ga door naar hoofdinhoud

iPhone 6 Power Button Kabeleinheit ersetzen

Waarschuwing: Je bewerkt een vooraf vereiste handleiding. Alle wijzigingen die je hierin maakt, beïnvloeden alle 2 handleidingen die deze stap bevatten.

Stap 5
iPhone 6 Power Button Cable Assembly Replacement: stap 0, afbeelding 1 van 1
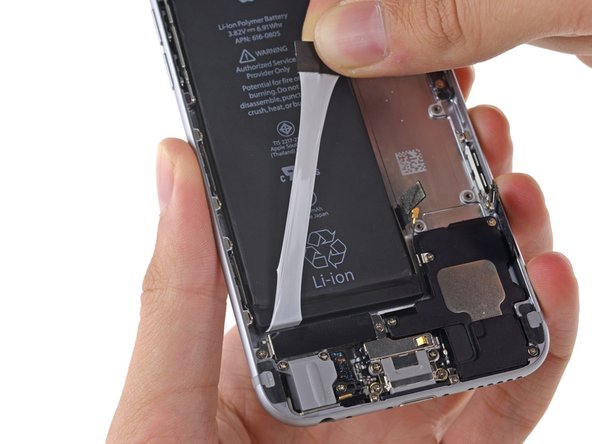
  • When you feel increased resistance from the adhesive strip, pull it gently around the lower left corner of the battery.

  • Don't allow the adhesive strip to snag on the corner of the battery, or it may tear or break off.

  • Continue pulling the adhesive tab upward and away from the left edge of the battery, allowing it to slowly slide out from between the battery and the rear case, until the strip comes free from the iPhone.

  • If you removed both adhesive strips successfully, skip the next two steps and continue on Step 46.

  • If either of the adhesive strips broke off underneath the battery and could not be retrieved, continue with the next step below.

Wenn du verstärkten Widerstand des Klebestreifens fühlst, ziehe ihn vorsichtig um die linke untere Ecke des Akkus.

Achte darauf, dass der Kleber nicht an der Ecke des Akkus hängenbleibt, da der Streifen sonst reißen könnte.

Ziehe weiter am Klebestreifen, nach oben und weg von der linken Kante, bis der Streifen sich zwischen Akku und Rückseite herausziehen lässt.

Wenn du beide Klebestreifen erfolgreich entfernt hast, überspringe die beiden nächsten Schritte und mach bei Schritt 46 weiter.

Wenn einer der Klebestreifen unter dem Akku gerissen ist und nicht entfernt werden konnte, mach mit dem nächsten Schritt weiter.

Je bijdragen zijn gelicentieerd onder de open source Creative Commons-licentie.