Waarschuwing: Je bewerkt een vooraf vereiste handleiding. Alle wijzigingen die je hierin maakt, beïnvloeden alle 9 handleidingen die deze stap bevatten.
Stap 4 vertalen
Stap 4


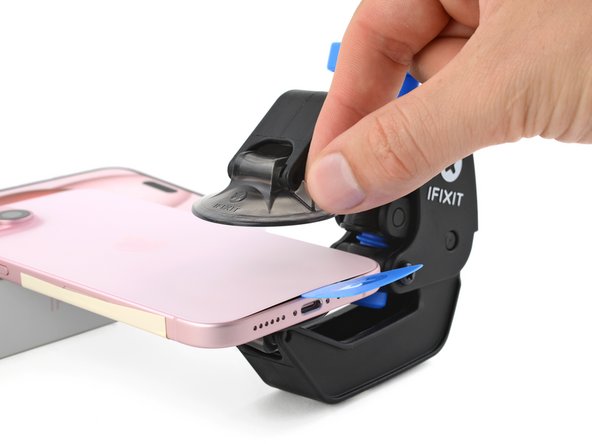


Insert an opening pick
-
Use a hair dryer or heat gun to heat the bottom edge of the back glass until it's hot to the touch.
-
Wait up to a minute for the adhesive to separate and a gap to form between the back glass and the frame.
-
Insert an opening pick into the gap.
-
Remove the Anti-Clamp using the pull tabs on the suction cups.
-
Skip the next two steps.
Je bijdragen zijn gelicentieerd onder de open source Creative Commons-licentie.