Ga door naar hoofdinhoud

iPad Pro 12.9インチ 第5世代 バッテリーの交換

Stap 3
iPad Pro 12.9" 5th Gen Battery Replacement: stap 0, afbeelding 1 van 3 iPad Pro 12.9" 5th Gen Battery Replacement: stap 0, afbeelding 2 van 3 iPad Pro 12.9" 5th Gen Battery Replacement: stap 0, afbeelding 3 van 3
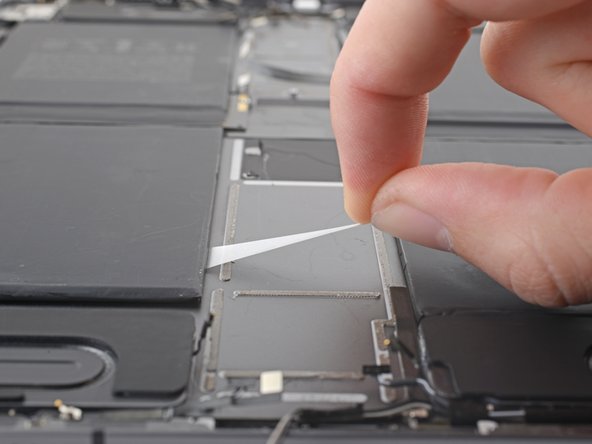
  • Pull the strip out slowly and steadily at a low angle. Give it plenty of time to stretch and un-stick from under the battery.

  • If the adhesive strip breaks off, try to retrieve it using your fingers or blunt tweezers, and continue pulling—but do not pry under the battery.

  • Repeat the process on all nine stretch-release adhesive strips.

  • If you removed all of the stretch-release adhesive, skip to this step. Otherwise, follow the next two steps for each battery cell with remaining adhesive.

ストリップを低い角度でゆっくりと引き抜きます。接着ストリップが伸びてバッテリーの下から外れるまで、ゆっくりと時間をかけてください。

接着ストリップが切れてしまった場合は、指や先端が鋭利でないピンセットを使ってストリップを取り出し、引き続けますが、バッテリーの下をこじ開けないようにしてください。

9本全てのストレッチリリース接着ストリップに同じ手順を繰り返します。

全てのストレッチリリース接着剤をはがせたら、この手順はスキップします。そうでない場合は、残りの接着剤がついたバッテリーセルを外すために、次の2つの手順に進んでください。

Je bijdragen zijn gelicentieerd onder de open source Creative Commons-licentie.