Ga door naar hoofdinhoud

Samsung Galaxy Note9 Vervanging van de schermmodule

Engels
Nederlands
Stap 6
Samsung Galaxy Note9 Display Assembly Replacement: stap 0, afbeelding 1 van 3 Samsung Galaxy Note9 Display Assembly Replacement: stap 0, afbeelding 2 van 3 Samsung Galaxy Note9 Display Assembly Replacement: stap 0, afbeelding 3 van 3
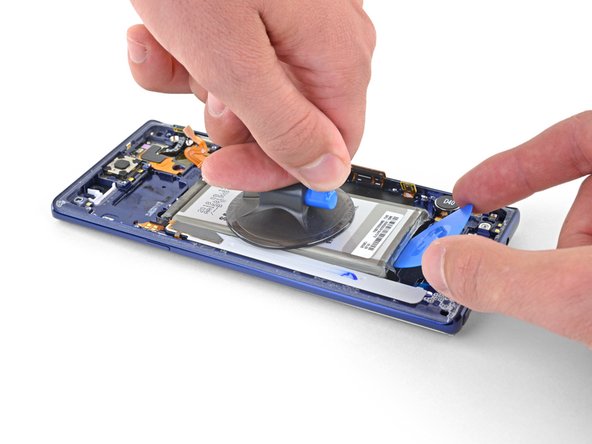
  • Apply a suction cup to the battery.

  • Lift the battery straight up until there is a gap large enough to insert the opening pick.

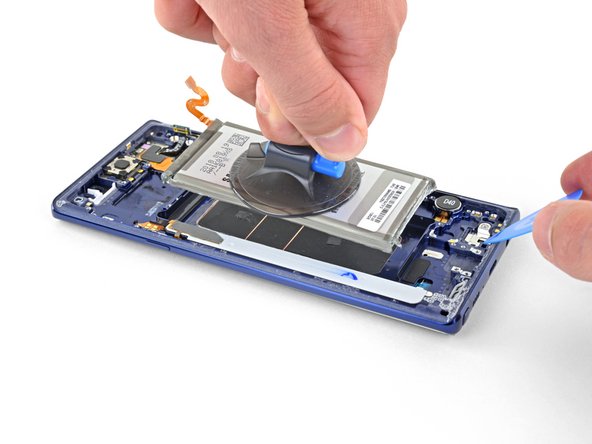
  • Insert an opening pick underneath the bottom edge of the battery and twist to loosen the battery adhesive.

  • Remove the battery.

  • It may take multiple attempts to get the suction cup to adhere. Apply is as close to the center of the battery as possible and avoid the white sticker at the bottom of the battery.

  • Do not bend the battery.

Druk een zuignap op de batterij.

Til de batterij recht omhoog tot er een opening is waar je openingsplectrum in past.

Steek een openingsplectrum onder de onderkant van de batterij en kantel deze om de batterij van de lijm te scheiden.

Verwijder de batterij.

Het kan meerdere pogingen kosten om de zuignap vast te laten zuigen. Plaats de zuignap zo dicht mogelijk bij het midden van de batterij en vermijd de witte sticker aan de onderkant van de batterij.

Buig de batterij niet.

Je bijdragen zijn gelicentieerd onder de open source Creative Commons-licentie.