Ga door naar hoofdinhoud

iPad Mini CDMAの液晶ディスプレイの交換

Waarschuwing: Je bewerkt een vooraf vereiste handleiding. Alle wijzigingen die je hierin maakt, beïnvloeden alle 38 handleidingen die deze stap bevatten.

Stap 2
iPad Mini CDMA LCD Replacement: stap 0, afbeelding 1 van 3 iPad Mini CDMA LCD Replacement: stap 0, afbeelding 2 van 3 iPad Mini CDMA LCD Replacement: stap 0, afbeelding 3 van 3
  • The LCD is still connected to the rest of the iPad by two wide strips of adhesive tape that run up from the inside of the rear case to the front bottom LCD frame.

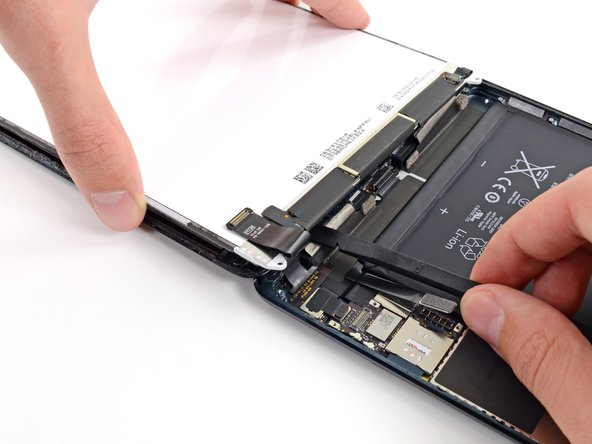
  • While holding the LCD with one hand, insert the flat end of a spudger between the LCD and tape on the iPad's right side.

  • Slide the spudger outward, separating the tape, while gently lifting up on the LCD to pull it away from the tape.

  • It may help to twist the spudger, to spread the gap the rest of the way and separate the LCD from the tape.

液晶ディスプレイは、背面ケースの内部から液晶ディスプレイフレームの正面側下部に接続する2本の太い接着テープにより、iPadとまだ繋がっています。

液晶ディスプレイを片手で押さえながら、スパッジャーの平面側先端を液晶ディスプレイとiPadの右側のテープの間に差し込みます。

スパッジャーを外側に向けてスライドします。液晶ディスプレイからテープを剥がすため、少し持ち上げながら動かしてください。

残り部分の隙間を広げて、液晶ディスプレイからテープを剥がすため、スパッジャーをひねりながら動かすと効果的です。

Je bijdragen zijn gelicentieerd onder de open source Creative Commons-licentie.