Stap 5 vertalen
Stap 5


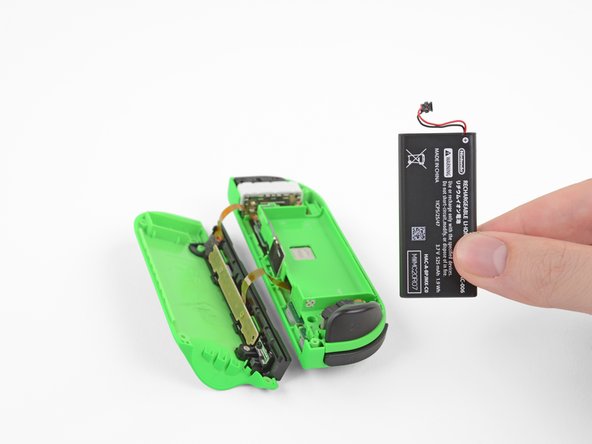


Remove the battery
-
Insert an opening pick between the battery and the Joy-Con housing. Gently pry out the battery, which is lightly taped in place.
Je bijdragen zijn gelicentieerd onder de open source Creative Commons-licentie.