Deze vertaling is door een computer gegenereerd en is nog niet door iemand nagekeken. Spreek je deze taal? Bekijk het hier.
Inleiding
( NIET VOLTOOID )
Wat je nodig hebt
-
-
-
Houd de aan-uitknop (aan-/uitknop) ongeveer 4 of 5 seconden ingedrukt.
-
De schuifbalk om uit te schakelen
 Vraag FixBot
-
-
-
-
Verwijder de afdekking over de batterij door er warmte op aan te brengen
-
-
Gereedschap gebruikt in deze stap:Tweezers$4.99
-
Verwijder de tape over de accuaansluitingen met een pincet.
-
-


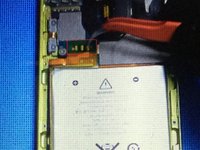
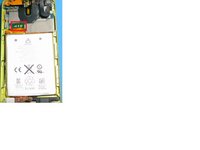

Volg deze instructies in omgekeerde volgorde om uw apparaat weer in elkaar te zetten.
Annuleren: ik heb deze handleiding niet afgemaakt.
20 andere personen hebben deze handleiding voltooid.

11Gids Commentaar
PRO TIP: ad a little bit of flux to all 3 pads. Then ad some solder to your soldering iron tip and build up the solder on the 3 contacts. Be careful to not damage the flex cable/ board by letting your soldering iron stay on the pads for too long (2-3 seconds each). My iron temp is set at 350F. Once that is complete, set your hot air gun on 350F and speed about half. Slowly wedge a spudger between the board and the battery flex. DO NOT PRY. You will damage the pads. Just let it sit there and hang out while you apply hot air, the soldier you added will liquify and the battery flex cable will pull itself up. When that occurs, you can remove the battery connector and replace with a new one. Make sure to ad a bit of flux to the pads on the board for attachment. For re-attachment: line up the 3 pads and use your soldering iron to put them down. Gently press down on the gold pad of the flex cable, and you will see the solder from the board liquify and come though the 2 holes. Repeat for the next 2 and YOUR DONE!
I found this comment most helpful. Adding solder first helps. My only problem with this repair was accidentally letting the soldering iron touch the black plastic covering the back of the screen. This melted thru the screen backing. This is a reflective backing to the screen. The damaged area is very small and not as bright as the rest of the screen and is a little annoying when looking at picture on the screen now!
Extremely helpful, would that be a micro pall worth of flux? Or some other Rosman repair measurement?
