Ga door naar hoofdinhoud
Word lid van de reparatiegemeenschap - Account aanmaken

iPad mini 4 Wi-Fi Home Button Assembly Replacement

Wat je nodig hebt

  1. iPad mini 4 Wi-Fi Home Button Assembly Replacement, Opening Procedure: stap 1, afbeelding 1 van 1
    Vraag FixBot
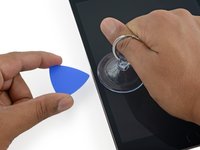
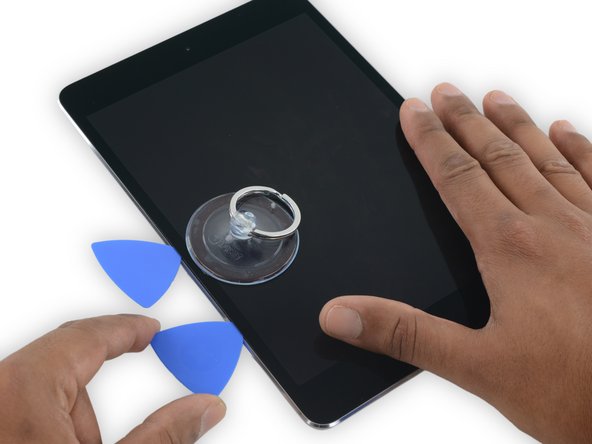
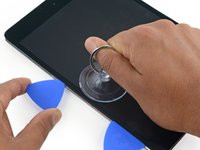
  2. iPad mini 4 Wi-Fi Home Button Assembly Replacement: stap 2, afbeelding 1 van 3 iPad mini 4 Wi-Fi Home Button Assembly Replacement: stap 2, afbeelding 2 van 3 iPad mini 4 Wi-Fi Home Button Assembly Replacement: stap 2, afbeelding 3 van 3
    • Apply a suction cup halfway up the heated side.

    • Be sure the cup is completely flat on the screen to get a tight seal.

    • While holding the iPad down with one hand, pull up on the suction cup with strong, steady force to create a gap.

    • Depending on the age of your device, this may be difficult. If you have trouble, apply more heat and try again.

    • Be careful to only lift the glass enough to insert an opening pick—any more and you risk cracking the glass.

    Vraag FixBot
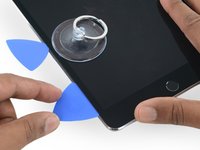
  3. iPad mini 4 Wi-Fi Home Button Assembly Replacement: stap 3, afbeelding 1 van 2 iPad mini 4 Wi-Fi Home Button Assembly Replacement: stap 3, afbeelding 2 van 2
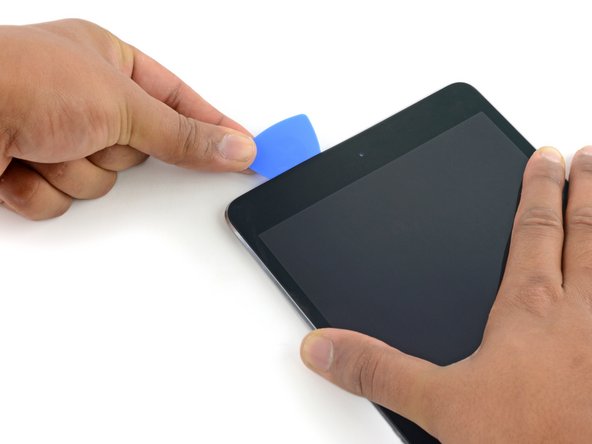
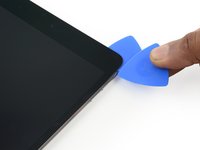
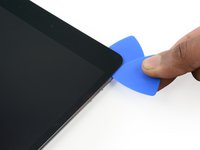
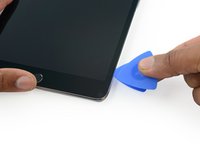
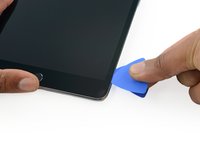
    • While holding the glass up with the suction cup, insert the point of an opening pick into the gap between the glass and body of the iPad.

    • Don't insert the opening pick any deeper than 2 mm into the side of the display. Inserting the pick deeper than 2 mm could damage the backlight assembly, LCD display, or touchscreen.

    Vraag FixBot
  4. iPad mini 4 Wi-Fi Home Button Assembly Replacement: stap 4, afbeelding 1 van 1
    • Reheat and reapply the iOpener to the left edge for a few minutes.

    • Be careful not to overheat the iOpener during the repair procedure. Always wait at least ten minutes before reheating the iOpener.

    Vraag FixBot
  5. iPad mini 4 Wi-Fi Home Button Assembly Replacement: stap 5, afbeelding 1 van 3 iPad mini 4 Wi-Fi Home Button Assembly Replacement: stap 5, afbeelding 2 van 3 iPad mini 4 Wi-Fi Home Button Assembly Replacement: stap 5, afbeelding 3 van 3
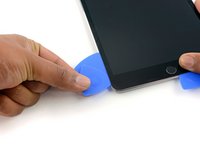
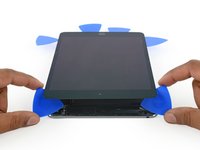
    • Insert a second opening pick alongside the first and slide the pick down along the edge of the iPad, releasing the adhesive as you go.

    • Throughout the rest of the procedure, if you encounter significant resistance while sliding the pick, stop and reheat the section you're working on. Applying too much pressure with the pick can crack the glass.

    Vraag FixBot
  6. iPad mini 4 Wi-Fi Home Button Assembly Replacement: stap 6, afbeelding 1 van 3 iPad mini 4 Wi-Fi Home Button Assembly Replacement: stap 6, afbeelding 2 van 3 iPad mini 4 Wi-Fi Home Button Assembly Replacement: stap 6, afbeelding 3 van 3
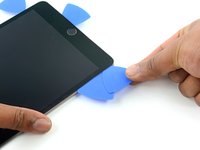
    • Continue moving the opening pick down the side of the display to release the adhesive.

    • If the opening pick gets stuck in the adhesive, "roll" the pick along the side of the iPad, continuing to release the adhesive.

    Vraag FixBot
  7. iPad mini 4 Wi-Fi Home Button Assembly Replacement: stap 7, afbeelding 1 van 2 iPad mini 4 Wi-Fi Home Button Assembly Replacement: stap 7, afbeelding 2 van 2
    • Take the first pick you inserted and slide it up toward the top corner of the iPad.

    Vraag FixBot
  8. iPad mini 4 Wi-Fi Home Button Assembly Replacement: stap 8, afbeelding 1 van 1
    • Reheat the iOpener and place it on the top edge of the iPad, over the front-facing camera.

    • Be careful not to overheat the iOpener during the repair procedure. Wait at least ten minutes before reheating the iOpener.

    • If you have a flexible iOpener, you can bend it to heat both the upper left corner and the upper edge at the same time.

    Vraag FixBot
  9. iPad mini 4 Wi-Fi Home Button Assembly Replacement: stap 9, afbeelding 1 van 3 iPad mini 4 Wi-Fi Home Button Assembly Replacement: stap 9, afbeelding 2 van 3 iPad mini 4 Wi-Fi Home Button Assembly Replacement: stap 9, afbeelding 3 van 3
    • Slide the opening pick around the top left corner of the iPad to separate the adhesive.

    Vraag FixBot
  10. iPad mini 4 Wi-Fi Home Button Assembly Replacement: stap 10, afbeelding 1 van 3 iPad mini 4 Wi-Fi Home Button Assembly Replacement: stap 10, afbeelding 2 van 3 iPad mini 4 Wi-Fi Home Button Assembly Replacement: stap 10, afbeelding 3 van 3
    • Slide the opening pick along the top edge of the iPad, stopping just before you reach the camera.

    • As you reach the front-facing camera, pull the pick out slightly and continue sliding it across the top edge.

    • Avoid sliding the opening pick over the front-facing camera, as you may smear adhesive onto the lens or damage the camera. The following steps will detail how to best avoid disturbing the front-facing camera.

    Vraag FixBot
  11. iPad mini 4 Wi-Fi Home Button Assembly Replacement: stap 11, afbeelding 1 van 3 iPad mini 4 Wi-Fi Home Button Assembly Replacement: stap 11, afbeelding 2 van 3 iPad mini 4 Wi-Fi Home Button Assembly Replacement: stap 11, afbeelding 3 van 3
    • Leave the opening pick in the iPad slightly past the front-facing camera.

    • Take a third pick and insert it to the left of the camera, where the first pick just was. Slide it back to the corner to completely cut any remaining adhesive.

    • Leave the third pick in place to prevent the corner adhesive from re-sealing as it cools.

    Vraag FixBot
  12. iPad mini 4 Wi-Fi Home Button Assembly Replacement: stap 12, afbeelding 1 van 2 iPad mini 4 Wi-Fi Home Button Assembly Replacement: stap 12, afbeelding 2 van 2
    • Insert the previous pick deeper into the iPad and slide it away from the camera toward the corner.

    Vraag FixBot
  13. iPad mini 4 Wi-Fi Home Button Assembly Replacement: stap 13, afbeelding 1 van 1
    • Leave the three picks in the corners of the iPad to prevent re-adhering of the front panel adhesive.

    • Reheat the iOpener and place it on the remaining long side of the iPad—along the volume and lock buttons.

    Vraag FixBot
  14. iPad mini 4 Wi-Fi Home Button Assembly Replacement: stap 14, afbeelding 1 van 3 iPad mini 4 Wi-Fi Home Button Assembly Replacement: stap 14, afbeelding 2 van 3 iPad mini 4 Wi-Fi Home Button Assembly Replacement: stap 14, afbeelding 3 van 3
    • Insert a new opening pick and slide it down the right edge of the iPad, releasing the adhesive as you go.

    Vraag FixBot
  15. iPad mini 4 Wi-Fi Home Button Assembly Replacement: stap 15, afbeelding 1 van 3 iPad mini 4 Wi-Fi Home Button Assembly Replacement: stap 15, afbeelding 2 van 3 iPad mini 4 Wi-Fi Home Button Assembly Replacement: stap 15, afbeelding 3 van 3
    • Continue sliding the opening pick down the right edge of the iPad, reheating the edge using an iOpener if necessary.

    • Be careful not to slice too deep near the bottom right corner, or you risk damaging the display cable.

    Vraag FixBot
  16. iPad mini 4 Wi-Fi Home Button Assembly Replacement: stap 16, afbeelding 1 van 1
    • Leave the opening picks in place and reheat the iOpener.

    • Remember not to overheat the iOpener—no more than once every ten minutes.

    • Set the reheated iOpener on the home button end of the iPad and let it rest for a few minutes to soften the adhesive beneath the glass.

    Vraag FixBot
  17. iPad mini 4 Wi-Fi Home Button Assembly Replacement: stap 17, afbeelding 1 van 3 iPad mini 4 Wi-Fi Home Button Assembly Replacement: stap 17, afbeelding 2 van 3 iPad mini 4 Wi-Fi Home Button Assembly Replacement: stap 17, afbeelding 3 van 3
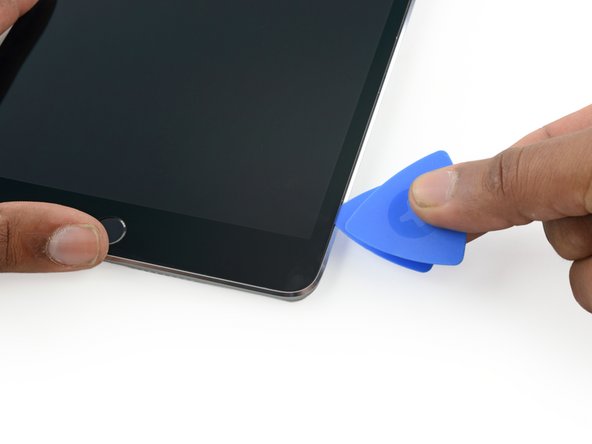
    • Insert a new opening pick at the bottom right corner of the display, below the last opening pick you used to slice down the right edge.

    • Rotate the new pick around the lower right corner of the device.

    Vraag FixBot
  18. iPad mini 4 Wi-Fi Home Button Assembly Replacement: stap 18, afbeelding 1 van 2 iPad mini 4 Wi-Fi Home Button Assembly Replacement: stap 18, afbeelding 2 van 2
    • Slide the pick from the bottom right corner along the lower edge of the device. Stop about half an inch shy of the home button.

    Vraag FixBot
  19. iPad mini 4 Wi-Fi Home Button Assembly Replacement: stap 19, afbeelding 1 van 2 iPad mini 4 Wi-Fi Home Button Assembly Replacement: stap 19, afbeelding 2 van 2
    • Insert a final opening pick at the lower left corner of the iPad, directly below the existing one.

    Vraag FixBot
  20. iPad mini 4 Wi-Fi Home Button Assembly Replacement: stap 20, afbeelding 1 van 2 iPad mini 4 Wi-Fi Home Button Assembly Replacement: stap 20, afbeelding 2 van 2
    • Slide the pick around the lower left edge of the iPad.

    Vraag FixBot
  21. iPad mini 4 Wi-Fi Home Button Assembly Replacement: stap 21, afbeelding 1 van 3 iPad mini 4 Wi-Fi Home Button Assembly Replacement: stap 21, afbeelding 2 van 3 iPad mini 4 Wi-Fi Home Button Assembly Replacement: stap 21, afbeelding 3 van 3
    • Continue sliding the pick at the lower left edge of the display toward the center of the iPad, until it is roughly half an inch from the home button.

    Vraag FixBot
  22. iPad mini 4 Wi-Fi Home Button Assembly Replacement: stap 22, afbeelding 1 van 3 iPad mini 4 Wi-Fi Home Button Assembly Replacement: stap 22, afbeelding 2 van 3 iPad mini 4 Wi-Fi Home Button Assembly Replacement: stap 22, afbeelding 3 van 3
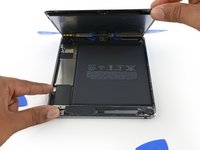
    • Twist the two picks at the top edge of the iPad to break up the last of the adhesive holding the display assembly in place.

    • Lift the display from the top edge to open the device.

    Vraag FixBot
  23. iPad mini 4 Wi-Fi Home Button Assembly Replacement, Battery Connector: stap 23, afbeelding 1 van 1
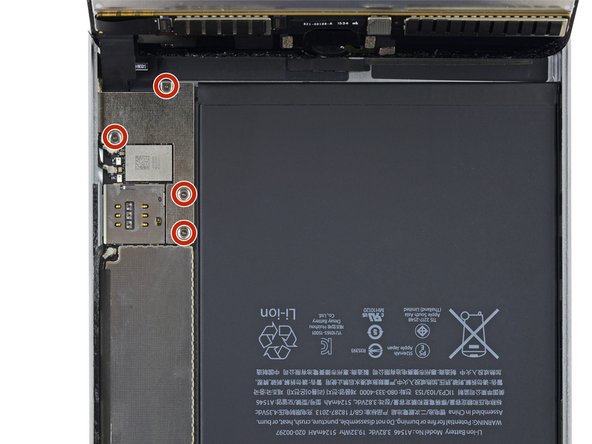
    • To avoid stressing any cables, hold the display assembly perpendicular to the body of the iPad until it is disconnected.

    • Remove the four 1.2 mm Phillips screws over the battery/display connector bracket.

    Vraag FixBot
  24. iPad mini 4 Wi-Fi Home Button Assembly Replacement: stap 24, afbeelding 1 van 1
    • Remove the battery/display cable bracket.

    Vraag FixBot
  25. iPad mini 4 Wi-Fi Home Button Assembly Replacement: stap 25, afbeelding 1 van 2 iPad mini 4 Wi-Fi Home Button Assembly Replacement: stap 25, afbeelding 2 van 2
    • When disconnecting any press connectors from the logic board, be sure to lift the connector straight up to avoid ripping the socket off the board.

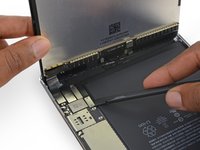
    • Use the flat tip of a spudger to disconnect the battery connector from its socket on the logic board.

    • Bend the battery connector ribbon cable up slightly to prevent it from making contact and powering on the iPad.

    Vraag FixBot
  26. iPad mini 4 Wi-Fi Home Button Assembly Replacement, Display Assembly: stap 26, afbeelding 1 van 3 iPad mini 4 Wi-Fi Home Button Assembly Replacement, Display Assembly: stap 26, afbeelding 2 van 3 iPad mini 4 Wi-Fi Home Button Assembly Replacement, Display Assembly: stap 26, afbeelding 3 van 3
    • Use the pointed end of a spudger to disconnect the display data connector from its socket on the logic board.

    • Use the pointed end of a spudger to disconnect the digitizer cable connector from its socket on the logic board.

    • When reconnecting these, press down from one end of the connector to the other. If you press in the middle of the connector, you may bend it, causing damage or a poor connection.

    Vraag FixBot
  27. iPad mini 4 Wi-Fi Home Button Assembly Replacement: stap 27, afbeelding 1 van 1
    • Remove the display assembly.

    • To reinstall your display assembly, you will need to replace the display adhesive. Use our display adhesive application guide to reapply your display adhesive and reseal your device.

    Vraag FixBot
  28. iPad mini 4 Wi-Fi Home Button Assembly Replacement, Home Button Assembly: stap 28, afbeelding 1 van 2 iPad mini 4 Wi-Fi Home Button Assembly Replacement, Home Button Assembly: stap 28, afbeelding 2 van 2
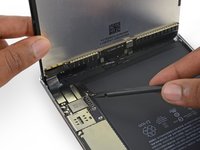
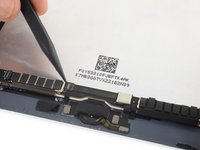
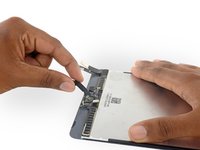
    • Use the pointed tip of a spudger to flip up the retaining flap on the home button ZIF socket.

    Vraag FixBot
  29. iPad mini 4 Wi-Fi Home Button Assembly Replacement: stap 29, afbeelding 1 van 3 iPad mini 4 Wi-Fi Home Button Assembly Replacement: stap 29, afbeelding 2 van 3 iPad mini 4 Wi-Fi Home Button Assembly Replacement: stap 29, afbeelding 3 van 3
    Gereedschap gebruikt in deze stap:
    Tweezers
    $4.99
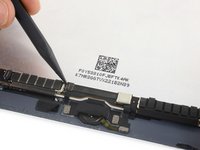
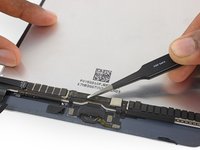
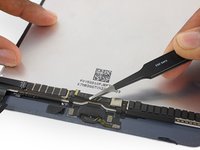
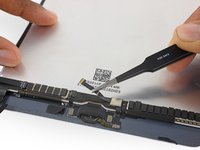
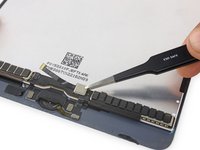
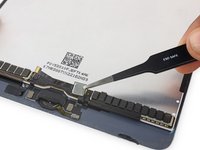
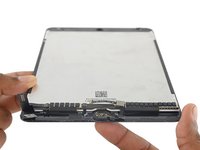
    • Use tweezers to unplug the home button ribbon cable from the ZIF socket.

    • Continue peeling the ribbon cable up to the EMI shield.

    Vraag FixBot
  30. iPad mini 4 Wi-Fi Home Button Assembly Replacement: stap 30, afbeelding 1 van 2 iPad mini 4 Wi-Fi Home Button Assembly Replacement: stap 30, afbeelding 2 van 2
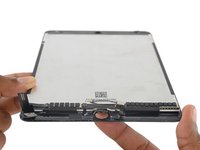
    • Use tweezers to lift the home button control hardware module off the display assembly.

    Vraag FixBot
  31. iPad mini 4 Wi-Fi Home Button Assembly Replacement: stap 31, afbeelding 1 van 2 iPad mini 4 Wi-Fi Home Button Assembly Replacement: stap 31, afbeelding 2 van 2
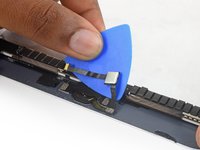
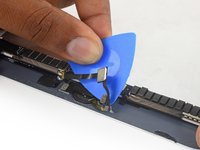
    • Use an opening pick to continue separating the home button ribbon cable from the display assembly.

    • If you use metal tools to separate this cable, you may scratch the iPad glass, removing some paint.

    Vraag FixBot
  32. iPad mini 4 Wi-Fi Home Button Assembly Replacement: stap 32, afbeelding 1 van 3 iPad mini 4 Wi-Fi Home Button Assembly Replacement: stap 32, afbeelding 2 van 3 iPad mini 4 Wi-Fi Home Button Assembly Replacement: stap 32, afbeelding 3 van 3
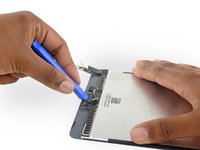
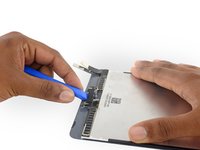
    • Use a plastic opening tool to pry the home button bracket off the display assembly.

    • When replacing this bracket, it's recommended to use some high-bond tape to secure it.

    Vraag FixBot
  33. iPad mini 4 Wi-Fi Home Button Assembly Replacement: stap 33, afbeelding 1 van 1
    • Heat an iOpener and lay it over the lower edge of the front panel to soften the adhesive holding the home button in place.

    Vraag FixBot
  34. iPad mini 4 Wi-Fi Home Button Assembly Replacement: stap 34, afbeelding 1 van 2 iPad mini 4 Wi-Fi Home Button Assembly Replacement: stap 34, afbeelding 2 van 2
    • The home button is held in place by a thin, delicate, rubber gasket that is mildly adhered to the front panel.

    • Slowly push the home button up and out of the display assembly to separate the gasket from the front panel.

    • Be careful to not push the gasket past its tearing point. If the adhesive is adequately heated, it will separate from the front panel with some gentle pressure.

    Vraag FixBot
  35. iPad mini 4 Wi-Fi Home Button Assembly Replacement: stap 35, afbeelding 1 van 1
    • Remove the home button assembly.

    Vraag FixBot
Conclusie

To reassemble your device, follow these instructions in reverse order.

30 andere personen hebben deze handleiding voltooid.

Evan Noronha

Lid sinds: 02/05/15

229.331 Reputatie

168 handleidingen geschreven

5Gids Commentaar

Is the piece of tape connecting the HB cable to the bracket important?

Perrin Aybara - Antwoord Deel

Home Button still does not work after home button transfer and digitizer replacement.

MC EnderFromVN - Antwoord Deel
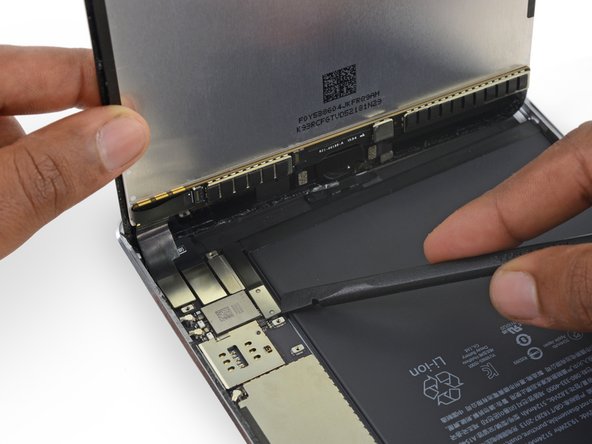
there is a tiny black circle on the actual button underneath the kapton tape. if that isnt properly lined up it will not depress properly. also if the collar isnt perfect the home button will not sit correctly and popout. its a pretty crappy design by apple.

jsox79 - Antwoord Deel

I agree crappy design, i tried realigning button several times, best i got was “sort of works”

josh - Antwoord Deel

It took me several attempts - but I eventually got mine to work perfectly. I had put glue on the bracket - since there was glue on the old one - but that made the gap too wide, so it wasn’t seating the home button right. I also had a replacement that had a slightly bent plug for the touch - so it wasn’t seating properly and the touchscreen was not consistent. I eventually got it all seated (the connector and the home button). Then it worked like a charm. Thanks for the guide.

Jason Kolberg - Antwoord Deel

Voeg opmerking toe

Weergavestatistieken:

Afgelopen 24 uren: 7

Afgelopen 7 dagen: 31

Afgelopen 30 dagen: 180

Altijd: 20,532