Inleiding
For the updated iFixit guide, click here. This guide has been archived for historical purposes.
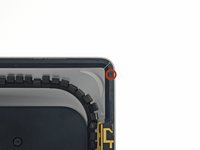
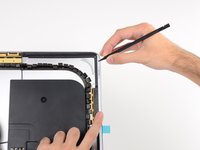
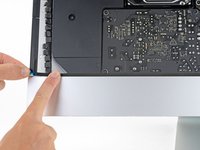
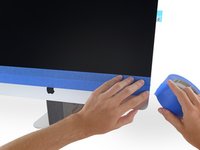
Removing the display on a Late 2012 iMac requires cutting through the adhesive around the perimeter of the screen. After the adhesive is cut, it cannot be used to re-seal the display in place, so you'll need to apply a new set of adhesive strips.
Wat je nodig hebt
Video overzicht
-
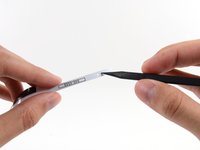
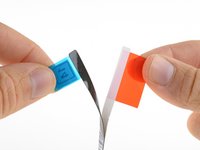
Gereedschap gebruikt in deze stap:Tweezers$4.99
-
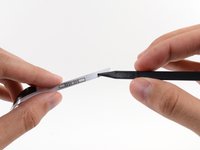
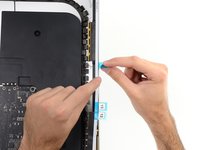
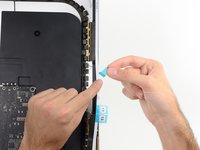
If you are re-using your existing display, you must also remove the old adhesive from the back of the display.
-
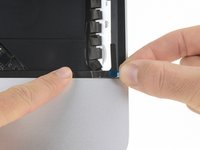
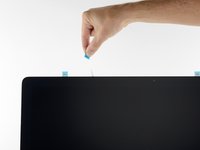
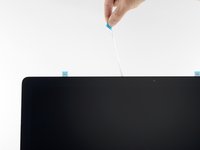
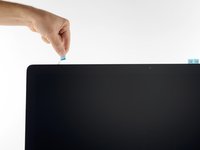
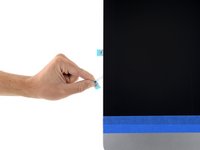
Peel off the old strips of adhesive using tweezers or your fingers. Start at the bottom and peel upward towards the top of the device.
-
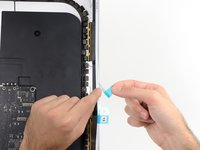
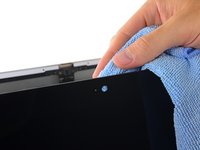
After all the old adhesive is removed, carefully clean the area under the adhesive with 90% (or greater) isopropyl alcohol and a lint-free cloth. Wipe in one direction, not back and forth.
-
-
-
With the spudger still poking through the hole in the adhesive strip, push the spudger tip into the corresponding hole in the frame of the iMac.
-
Using the hole and spudger to anchor the position of the adhesive strip, line the strip up against the right edge, gently pull down against the spudger to ensure the strip is taut, and stick it onto the frame.
-
-
-
-
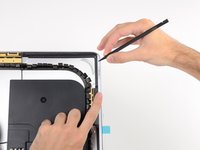
Work your way around the perimeter of the iMac, adding three more adhesive strips in the same manner.
-
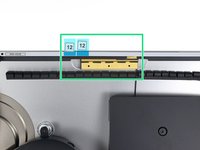
Working counter-clockwise from strip 13, place:
-
strip 12 on the top right
-
strip 11 on the top left
-
strip 16 on the left vertical
-
On the iMac Intel 27" Retina 5K Display, strip 12's blue tabs will not line up with the top antenna in the same way as the regular model. This is perfectly acceptable and won't impact the performance of the strips or antenna.
-
-
-
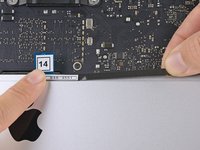
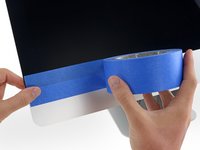
Grasp the red film pull tab on the 14 adhesive strip and pull to remove the backing from the strip.
-
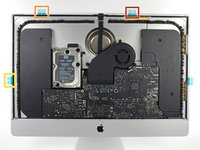
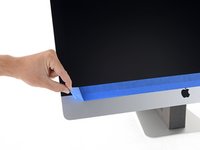
Align the strip on the bottom edge of the rear enclosure, directly to the right of the middle screw on that edge.
-
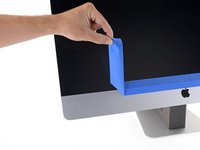
Run your finger along the length of the adhesive strip to ensure it is straight and unwrinkled, pressing down as you go to adhere the strip to the iMac.
-
-
-
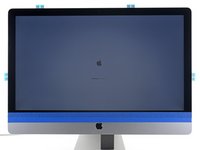
If you've already verified that your iMac is working correctly and are ready to seal it up, skip to Step 16.
-
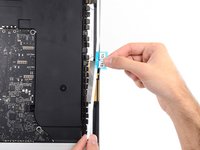
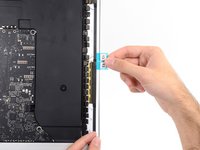
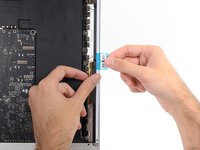
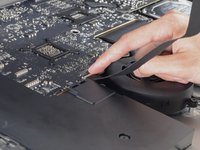
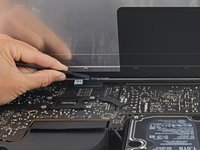
Gently insert the display data connector into its socket on the logic board. Be sure to press it straight into the socket, and insert it completely.
-
Flip the display data connector lock down onto the socket.
-
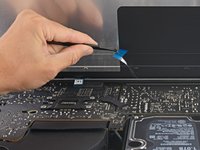
Insert the display power connector into its socket on the logic board.
-


To reassemble your device, follow these instructions in reverse order.
To reassemble your device, follow these instructions in reverse order.
Annuleren: ik heb deze handleiding niet afgemaakt.
188 andere personen hebben deze handleiding voltooid.

17 opmerkingen
Hello guys!
Could anyone tell what the width of these strips is? I need to buy some double sided strips to do a hard drive upgrade, but I can't order from iFixit :(
Thank you!
Some 3m Extreme Mounting tape works perfect for hdd upgrades on an imac.
torch130 -
Hey guys... there's one critical step that's missing here. Before doing Step 18, you have to make sure the iSight camera is in the right place. It's 'floating' inside the computer housing and has to be positioned just right for the glass to close/seal properly with the frame. I followed all of these steps but the glass would not seal around the camera, leaving a 1/8" gap there and distortion on the LCD when powered on. I had to re-order the strips and do the process over again. While doing a 'dry run', I realized the camera was the culprit and was able to hold it in position with a paper clip which allowed for the glass to adhere properly on the 2nd try.
I'm surprised to see, that you install the tape strips on the unit lying down.
It's a lot easier to attach them with the unit standing upright.
Also, attach ALL the strips to the rear housing, NOT to the LCD.
Attach the tape strips to the housing, mount the display, use som painters (/masking) tape, when you have aligned the display to the edges of the housing, attach the tape to the bottom of the glass and rear housing, making sure the display won't slip out of alignment.
Then, tilt the display towards you and support it with either a hand or your chest, while you remove the tapes protective layer and tilt the display back.
That way, it's still well aligned and it won't shift.
Same goes when removing the display in the first place.
Don't lay it down on the table - use a wedge, to make sure that the housing doesn't tilt while removing the display, and let the wedge stay there unit finished. The display is a lot easier to handle when upright, and you won't put too much pressure on the edges of the glass.
By the way, a minor detail you guys left out;
The tape strips for the 2012 and 2013, are not the same as 2014 Retina model.
The WiFi antenna's are located differently on the right. It's slightly elevated on the Retina, compared to the 2012 and 2013 models.