Deze vertaling is door een computer gegenereerd en is nog niet door iemand nagekeken. Spreek je deze taal? Bekijk het hier.
Inleiding
Gebruik deze handleiding om je CPU te upgraden.
Wat je nodig hebt
-
-
-
Draai de drie kruiskopschroeven los waarmee het toegangsklepje aan de onderkant van uw iMac vastzit.
-
Verwijder het toegangsklepje van uw iMac.
 Vraag FixBot
-
-
-
-
Gereedschap gebruikt in deze stap:Heavy-Duty Suction Cups (Pair)$16.95
-
Bevestig een zuignap bij elk van de twee bovenste hoeken van de glasplaat.
-
Als de zuignappen niet blijven zitten, probeer dan zowel de glasplaat als de zuignap schoon te maken met een mild oplosmiddel.
-
-
-
Til het glaspaneel voorzichtig loodrecht op het LCD-scherm op, net ver genoeg om de stalen bevestigingspinnen aan de onderkant van de bovenrand van het glaspaneel vrij te maken.
-
Trek het glaspaneel weg van de onderrand van de iMac en leg het voorzichtig opzij.
-
-
-
-
-
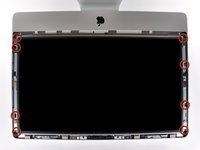
Verwijder de acht 8 mm T10 Torx-schroeven waarmee het scherm aan de buitenste behuizing is bevestigd.
-
-
-
Til de bovenrand van het display een klein stukje uit de buitenste behuizing.
-
-
-
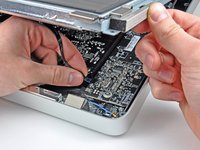
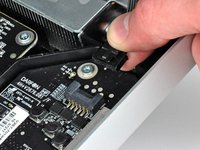
Trek de verticale sync-lintkabel uit het stopcontact op de LED-driverkaart in de buurt van de linkerbovenhoek van je iMac.
-
-
-
Draai het scherm ver genoeg uit de buitenste behuizing om de stroomkabel van de led-achtergrondverlichting los te koppelen van de led-driverkaart.
-
-
-
Knijp de twee armen van de Schermkabelaansluiting samen om deze uit het stopcontact op het logic board te ontgrendelen.
-
Trek de Schermkabelaansluiting uit het stopcontact op het logic board.
-
-
-
Koppel de (kabel)aansluiting van de thermische sensor van het lcd-scherm los van het stopcontact op het logic board.
-
-
-
Trek het display voorzichtig richting de bovenrand van je iMac en til het uit de behuizing, waarbij je let op eventuele kabels die klem kunnen komen te zitten.
-
-
-
-
-
Verwijder de volgende vier schroeven waarmee de voeding aan de buitenkant van de behuizing is bevestigd:
-
Twee 22,2 mm T10 Torx-schroeven met fijne draad
-
Eén 25 mm T10 Torx-schroef met grove draad
-
Eén 9 mm T10 Torx-schroef met grove draad
-
-
-
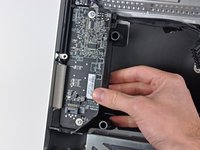
Til de voeding voorzichtig uit de buitenste behuizing en draai deze om de kabelvergrendeling bloot te leggen zoals getoond, waarbij je rekening houdt met de DC-Out-kabel die de voeding nog steeds met de iMac verbindt.
-
Koppel de DC-In-kabel los door het vergrendelingsmechanisme op de (kabel)aansluiting in te drukken terwijl je de (kabel)aansluiting uit het stopcontact op de voeding trekt.
-
Zodra het vergrendelingsmechanisme los is van het stopcontact, trek je de DC-In-(kabel)aansluiting los van de voeding.
-
-
-
Koppel de AC-In-kabel los door het vergrendelingsmechanisme in te drukken terwijl je de kabelaansluiting uit het stopcontact trekt.
-
Verwijder de voeding uit de buitenbehuizing.
-
-
-
-
-
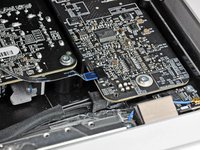
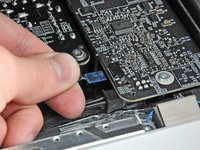
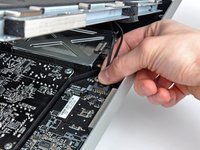
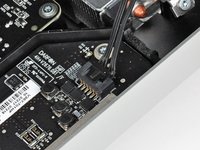
Trek de (kabel)aansluiting van de thermische sensor van de optische schijf recht uit het stopcontact op het logic board.
-
-
-
-
Verwijder de vier 9 mm Torx-schroeven (T10) waarmee de optische schijf aan de buitenbehuizing is bevestigd.
-
-
-
Til de binnenrand van de optische schijf op en manoeuvreer de (kabel)aansluiting voorbij de omlijsting die aan het logic board is bevestigd.
-
Trek de optische schijf voorzichtig van de montagepennen aan de rand van de buitenbehuizing om ruimte te maken voor het loskoppelen van de kabel van de optische schijf.
-
-
-
Gebruik de platte kant van een spudger om te helpen bij het loskoppelen van de kabel van de optische schijf.
-
-
-
-
-
Verwijder de enkele 13 mm T10 Torx-schroef waarmee de ventilator van de optische schijf aan de buitenbehuizing is bevestigd.
-
-
-
Trek de optische schijf van de pinnen die aan de buitenbehuizing zijn bevestigd.
-
-
-
Trek de (kabel)aansluiting van de optische schijf-ventilator weg van het stopcontact op het moederbord.
-
Verwijder de optische schijf-ventilator uit de iMac.
-
-
-
-
-
Trek de linker- en rechterkabelaansluiting naar de rechterkant van de iMac om ze los te koppelen van het logic board.
-
-
-
Koppel de (kabel)aansluiting van de audiopoort los door de (kabel)aansluiting naar de rechterkant van de iMac te trekken.
-
-
-
Koppel de AirPort-kabel los door de (kabel)aansluiting uit het stopcontact op het logic board te tillen.
-
-
-
Koppel de volgende kabels los door hun (kabel)aansluitingen naar de bovenrand van de iMac te trekken:
-
Camerakabel
-
Temperatuursensor voor harde schijf
-
Ventilator voor harde schijf
-
Microfoon
-
Koppel de volgende kabels los door hun (kabel)aansluitingen naar de rechterrand van de iMac te trekken:
-
Temperatuursensor voor omgevingstemperatuur
-
Bluetooth-kabel
-
-
-
Koppel de (kabel)aansluiting van de CPU-ventilator en de aan-/uitknop los door ze richting de linkerrand van de iMac te trekken.
-
-
-
Verwijder, indien aanwezig, het stukje tape dat over de kabelaansluiting van de IR-sensor zit.
-
Koppel de IR-sensor los door de kabelaansluiting naar de bovenrand van de iMac te trekken.
-
-
-
Gebruik je vingers om de infraroodsensor-module recht omhoog uit de buitenste behuizing te tillen.
-
-
-
Verwijder de volgende zes schroeven waarmee het moederbord aan de buitenbehuizing vastzit:
-
Drie 25 mm T10 Torx-schroeven
-
Twee 21,5 mm T10 Torx-schroeven
-
Eén 7 mm T10 Torx-schroef
-
-
-
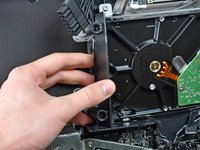
Verwijder de plastic kanalen van de zijkant van de LED-schroevendraaierkaart en de harde schijf door ze van de buitenbehuizing weg te trekken.
-
-
-
Verwijder voorzichtig de aluminiumtape die het koellichaam van de GPU aan de buitenbehuizing bevestigt.
-
-
-
Trek het logic board voorzichtig een klein stukje van de buitenbehuizing af.
-
Terwijl u het board van de buitenbehuizing af houdt, draait u het board heen en weer terwijl u het omhoog tilt om het los te maken van de buitenbehuizing.
-
-
-
Nu de onderrand van het moederbord los is van de behuizing, draait u het moederbord naar u toe om de achterkant bloot te leggen.
-
Trek de (kabel)aansluiting van de optische schijf voorzichtig uit het stopcontact op het moederbord.
-
-
-
Koppel de DC-In-kabel los van het logic board door tegelijkertijd de vergrendelingshendel op de (kabel)aansluiting in te drukken en deze uit het stopcontact te trekken.
-
Verwijder het logic board uit de behuizing.
-
-
-
-
Gereedschap gebruikt in deze stap:Tweezers$4.99
-
Gebruik een pincet om de (kabel)aansluiting van de thermische sensor van het koellichaam recht omhoog uit zijn stopcontact op het logic board te tillen.
-
-
-
Verwijder de volgende zes schroeven waarmee het koellichaam aan het logic board is bevestigd:
-
Vijf 6,5 mm T8 Torx-schroeven
-
Eén 7 mm T10 Torx-schroef
-
-
-
-
-
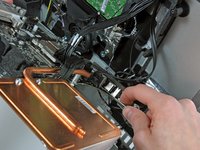
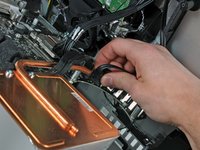
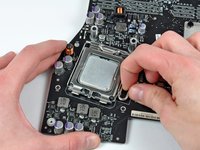
Trek de CPU-borgbeugel voorzichtig weg van het CPU-stopcontact.
-
Draai de beugel naar het midden van het logic board.
-
-
















Volg deze instructies in omgekeerde volgorde om je apparaat weer in elkaar te zetten.
Annuleren: ik heb deze handleiding niet afgemaakt.
33 andere personen hebben deze handleiding voltooid.

19Gids Commentaar
Hello I fixit.!
Hello a lot of congrats! for your site! is very very helpfully for Mac Users
so. i have a question please if you want to help me.!
i have an i mac 21,5 late2009
3,06ghz intel core 2 duo
i have an idea to change the processor to. intel core i5 3,3 Ghz core
can be compatible . on main board .
thanks a lot for your time
These 21.5" (and 27") iMacs came with only either Core 2 Duo E7600 (3.06Ghz, 2 core, 65W TDP, LGA 775) or Core 2 Duo E8600 (3.33GHz, 2 core, 65W TDP, LGA 775), which are incompatible with any Core i5 as there are no Core i5's that were available on the LGA 775 socket these systems.
You might be able to upgrade to a Core 2 Quad Q9505S or Q9550S (2.83GHz, 4 core, 65W TDP LGA 775) which would provide 2 extra cores than the E7600/E8600 and work in the same socket but drop the max clocks to stay at the same 65W TDP power limit.
I installed a Q6700 Core 2 Quad into my late 2009 Core 2 Duo iMac.
Sadly it is not working, only recognize 2 Cores instead 4 under Windows 7.
Booting in the lates Mac OS, it gives up Kernel panic.
Any advise?
The Core 2 Quad Q6700 is a 105W TDP processor and the 21.5" & 27" iMacs running the Core 2 Duo E7600/E8600 only support 65W TDP LGA 775 Core 2 processors. If you wish to upgrade from the Core 2 Duo E7600/E8600 to a Core 2 Quad in these systems; I would recommend wither the Q9505S or Q9550S - specifically the "S" on there as those are the 65W TDP versions of the 105W TDP Q9505 and Q9550.
Windows is only allowing 2 of the 4 cores of that Q6700 to run to fit within the TDP of the system (particularly by regulating how much power the CPU can draw), and MacOS is panicking as it doesn't know how to handle the 105W the Q6700 is asking for on a 65W system.
Hello,
I'd like to upgrade the Core 2 Duo 3.06 CPU of my iMac 10,1 21.5". I already done the same operation in a white Core Duo iMac, being able to install the unsupported OS X 10.7. I'd like to do the same on the 10,1 but what CPU can I install? It seems that the i3, i5 or i7 are phisically different, am I right? And the user Tim report in being unable to make it work with a Core 2 Quad. So... what are the possibilities? Thanks!
