Waarschuwing: Je bewerkt een vooraf vereiste handleiding. Alle wijzigingen die je hierin maakt, beïnvloeden alle 2 handleidingen die deze stap bevatten.
Stap 22 vertalen
Stap 22


-
Use the plastic spudger to remove the ribbon cable from the motherboard by placing the spudger under the ribbon cable connector and pulling up.
-
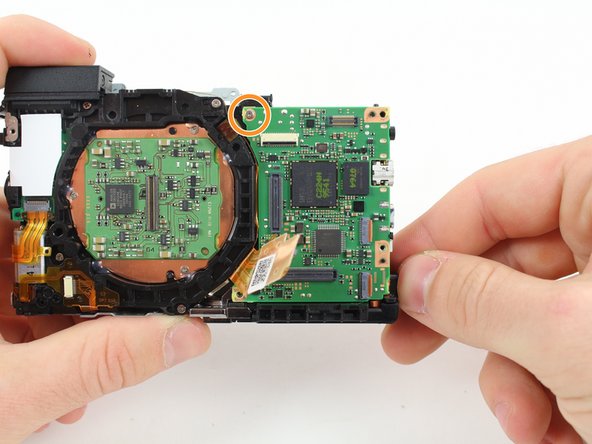
Remove the 2.8mm screw from the motherboard.
-
Carefully rotate the motherboard upward.
-
Use the plastic spudger to remove the ribbon cable from the bottom of the motherboard by placing the spudger under the ribbon cable connector and pulling up.
Je bijdragen zijn gelicentieerd onder de open source Creative Commons-licentie.