Waarschuwing: Je bewerkt een vooraf vereiste handleiding. Alle wijzigingen die je hierin maakt, beïnvloeden alle 13 handleidingen die deze stap bevatten.
Stap 3 vertalen
Stap 3


Anti-Clamp instructions
-
Pull the blue handle backwards to unlock the Anti-Clamp's arms.
-
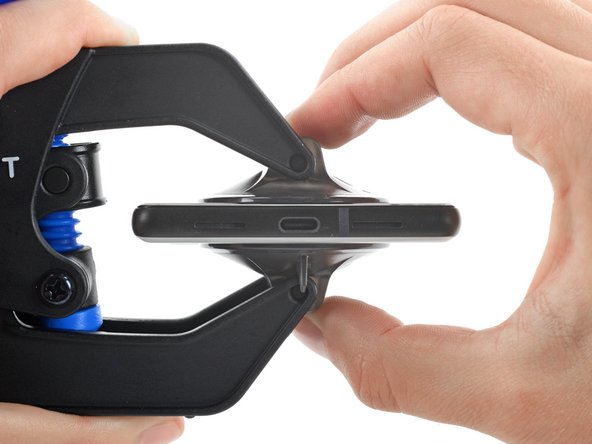
Slide the arms over either the left or right edge of your phone.
-
Position the suction cups near the bottom edge of the phone—one on the front, and one on the back.
-
Squeeze the cups together to apply suction.
| [title] Anti-Clamp instructions | |
| - | [* icon_note] The next three steps demonstrate the Anti-Clamp, a tool we designed to make the opening procedure easier. ***If you aren't using the Anti-Clamp, skip down three steps for an alternate method.*** |
| + | [* icon_note] The next three steps demonstrate the [product|IF145-513|Anti-Clamp], a tool we designed to make the opening procedure easier. ***If you aren't using the Anti-Clamp, skip down three steps for an alternate method.*** |
| [* icon_note] For complete instructions on how to use the Anti-Clamp, [guide|152309|check out this guide|new_window=true]. | |
| [* icon_note] If your screen is cracked, cover it with a layer of clear packing tape to help the suction cup adhere. | |
| [* black] Pull the blue handle backwards to unlock the Anti-Clamp's arms. | |
| [* black] Slide the arms over either the left or right edge of your phone. | |
| [* black] Position the suction cups near the bottom edge of the phone—one on the front, and one on the back. | |
| [* black] Squeeze the cups together to apply suction. | |
| [* icon_note] If you find that the surface of your phone is too slippery for the Anti-Clamp to hold onto, you can [guide|159595|use tape|new_window=true] to create a grippier surface. |
Je bijdragen zijn gelicentieerd onder de open source Creative Commons-licentie.