Ga door naar hoofdinhoud
Word lid van de reparatiegemeenschap - Account aanmaken

bObi Pet Screen Replacement

Wat je nodig hebt

    1. bObi Pet Screen  Replacement, Turn bObi Pet Off: stap 1, afbeelding 1 van 3 bObi Pet Screen  Replacement, Turn bObi Pet Off: stap 1, afbeelding 2 van 3 bObi Pet Screen  Replacement, Turn bObi Pet Off: stap 1, afbeelding 3 van 3
      • Before we get started, turn bObi Pet OFF and flip her over onto a flat surface.

      • Next, remove bObi Pet's dustbin. Grip the small tab on the back of the bin, and pull to remove.

      Vraag FixBot

      Voeg opmerking toe

    2. bObi Pet Screen  Replacement, Remove the Front Wheel: stap 2, afbeelding 1 van 2 bObi Pet Screen  Replacement, Remove the Front Wheel: stap 2, afbeelding 2 van 2
      • Grip the front wheel and pull straight up, using the screwdriver for leverage.

      • The wheel will pop out and you will see two screws beneath it.

      • There is a larger screw set deeper in the wheel compartment. Use the screwdriver to remove it.

      • Remember to keep all screws and parts removed from bObi Pet safely aside during the repair. They may be needed for re-assembly.

      Vraag FixBot

      Voeg opmerking toe

    3. bObi Pet Screen  Replacement, Remove the Dustbin's Holders: stap 3, afbeelding 1 van 3 bObi Pet Screen  Replacement, Remove the Dustbin's Holders: stap 3, afbeelding 2 van 3 bObi Pet Screen  Replacement, Remove the Dustbin's Holders: stap 3, afbeelding 3 van 3
      • Remove the screws on both sides of bObi Pet’s dustbin. Then, remove the corner pieces that were held down by the screws.

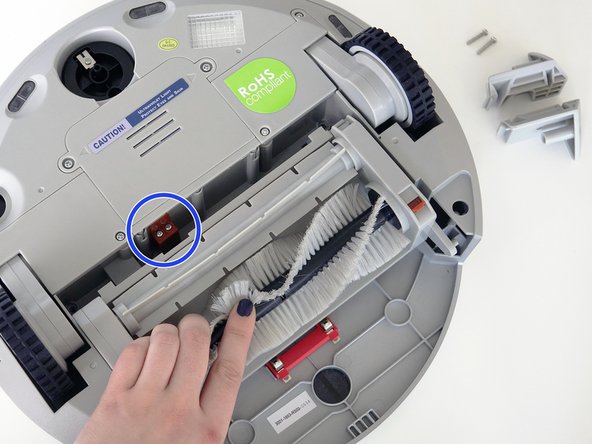
      • Grip the brush compartment and pull down to reveal two screws on a red fastener.

      • Remove them with the screwdriver.

      Vraag FixBot

      Voeg opmerking toe

    4. bObi Pet Screen  Replacement, Remove the Main Brush Attachment: stap 4, afbeelding 1 van 3 bObi Pet Screen  Replacement, Remove the Main Brush Attachment: stap 4, afbeelding 2 van 3 bObi Pet Screen  Replacement, Remove the Main Brush Attachment: stap 4, afbeelding 3 van 3
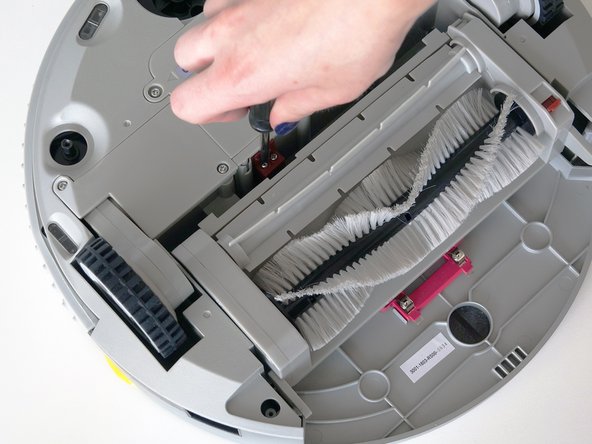
      • Pull the brush compartment up until the fastener is freed from bObi Pet. Then, detach the brush compartment's circuit plug and set it aside.

      • Remove the 4 screws located beneath the brush compartment.

      Vraag FixBot

      Voeg opmerking toe

    5. bObi Pet Screen  Replacement, Remove the Cover Screws: stap 5, afbeelding 1 van 2 bObi Pet Screen  Replacement, Remove the Cover Screws: stap 5, afbeelding 2 van 2
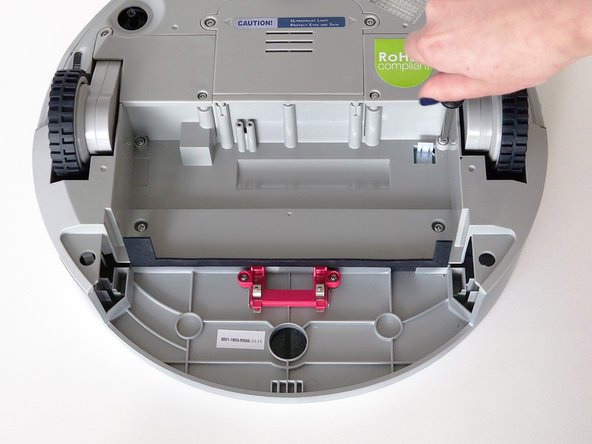
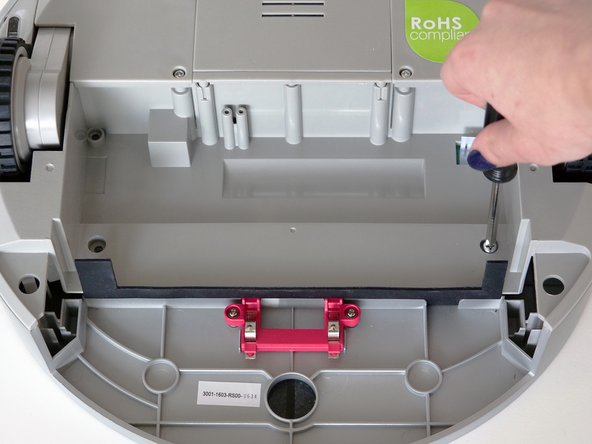
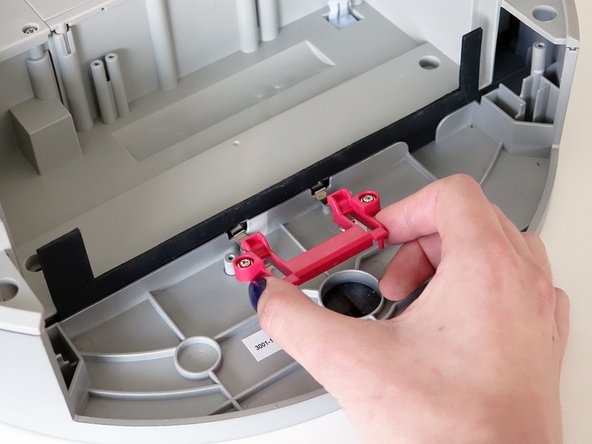
      • Remove the 2 screws on the dustbin’s red fastener.

      • Remove the fastener and set it aside for reassembly.

      • The cover is no longer secured, so carefully flip bObi Pet onto her wheels.

      Vraag FixBot

      Voeg opmerking toe

    6. bObi Pet Screen  Replacement, Detach the Cover: stap 6, afbeelding 1 van 3 bObi Pet Screen  Replacement, Detach the Cover: stap 6, afbeelding 2 van 3 bObi Pet Screen  Replacement, Detach the Cover: stap 6, afbeelding 3 van 3
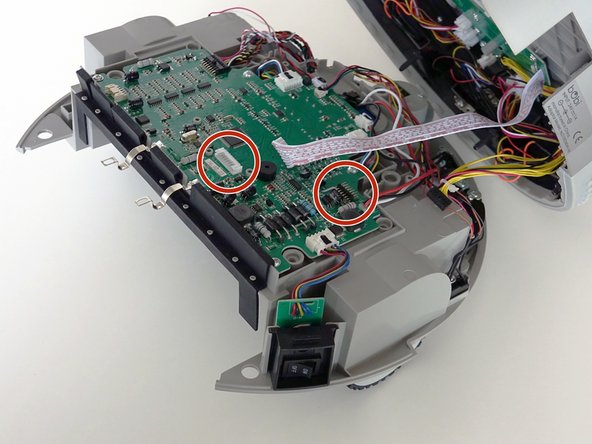
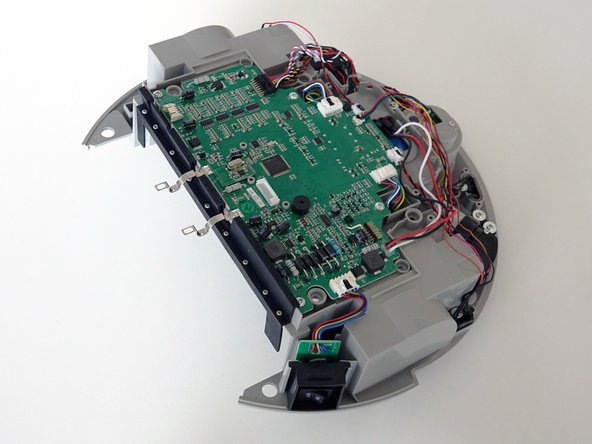
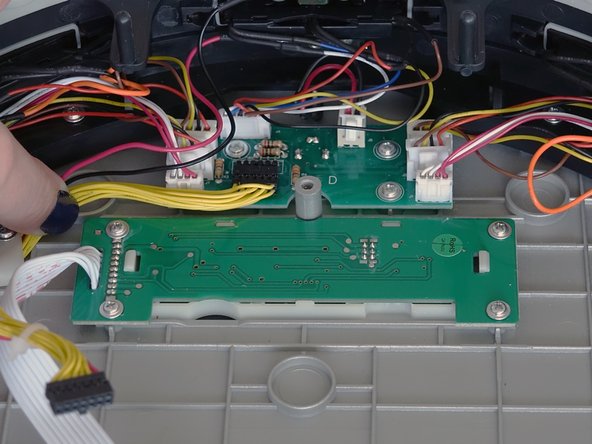
      • Lift the cover to reveal the main board underneath.

      • Remove the two circuit plugs connecting the lid to the mainboard.

      • bObi Pet's cover is entirely separated, and you may now access any of her internal parts for replacement.

      Vraag FixBot

      Voeg opmerking toe

    1. bObi Pet Screen  Replacement, Remove the Screen: stap 7, afbeelding 1 van 3 bObi Pet Screen  Replacement, Remove the Screen: stap 7, afbeelding 2 van 3 bObi Pet Screen  Replacement, Remove the Screen: stap 7, afbeelding 3 van 3
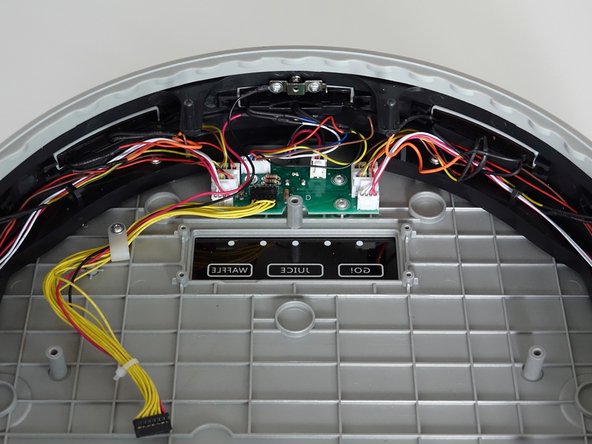
      • Remove the four screws holding bObi Pet's screen.

      • Then, lift it straight up and out to make space for the replacement.

      Vraag FixBot

      Voeg opmerking toe

    2. bObi Pet Screen  Replacement, Place the New Screen: stap 8, afbeelding 1 van 3 bObi Pet Screen  Replacement, Place the New Screen: stap 8, afbeelding 2 van 3 bObi Pet Screen  Replacement, Place the New Screen: stap 8, afbeelding 3 van 3
      • Lay the new screen in the open space on bObi Pet's lid.

      • Align the screw holes on the screen with the screw posts in bObi Pet and push down until it lies flat.

      • Install all four screws, and you'll be ready to close bObi Pet. See the following instructions: Assemble bObi Pet Post-Repair

      Vraag FixBot

      Voeg opmerking toe

Conclusie

To reassemble bObi Pet, see this tutorial: Assemble bObi Pet Post-Repair

Annuleren: ik heb deze handleiding niet afgemaakt.

Chelsea

Lid sinds: 09/24/14

2.278 Reputatie

31 handleidingen geschreven

0Gids Commentaar

Voeg opmerking toe

Weergavestatistieken:

Afgelopen 24 uren: 0

Afgelopen 7 dagen: 4

Afgelopen 30 dagen: 23

Altijd: 285