Ga door naar hoofdinhoud
Word lid van de reparatiegemeenschap - Account aanmaken

Xbox One Elite Controller (Model 1698) Motherboard Replacement

Wat je nodig hebt

  1. Xbox One Elite Controller (Model 1698) Motherboard Replacement, Show me the Screws!: stap 1, afbeelding 1 van 2 Xbox One Elite Controller (Model 1698) Motherboard Replacement, Show me the Screws!: stap 1, afbeelding 2 van 2
    • You can remove the side panels with a pry tool.

    • You don't need to remove the rubber. The rubber on this controller was already bad.

    Vraag FixBot

    Voeg opmerking toe

  2. Xbox One Elite Controller (Model 1698) Motherboard Replacement, Removing the back panel screws: stap 2, afbeelding 1 van 1
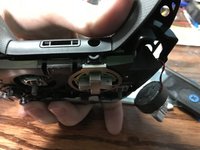
    • Remove the 5 Torx Security Bit (TR9) screws.

    Vraag FixBot

    Voeg opmerking toe

  3. Xbox One Elite Controller (Model 1698) Motherboard Replacement, Popping that back panel off: stap 3, afbeelding 1 van 3 Xbox One Elite Controller (Model 1698) Motherboard Replacement, Popping that back panel off: stap 3, afbeelding 2 van 3 Xbox One Elite Controller (Model 1698) Motherboard Replacement, Popping that back panel off: stap 3, afbeelding 3 van 3
    • Pry the panel next to the 3.5mm port.

    • Be careful to not rip the ribbon shown in the next step.

    Vraag FixBot

    Voeg opmerking toe

  4. Xbox One Elite Controller (Model 1698) Motherboard Replacement, Warning Carefully remove the ribbon: stap 4, afbeelding 1 van 2 Xbox One Elite Controller (Model 1698) Motherboard Replacement, Warning Carefully remove the ribbon: stap 4, afbeelding 2 van 2
    • Be careful to not rip the ribbon cable.

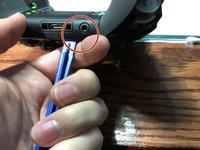
    • You can pop the connector up to remove the ribbon easily.

    • Ribbon Cable

    Vraag FixBot

    Voeg opmerking toe

  5. Xbox One Elite Controller (Model 1698) Motherboard Replacement, Screws on controller motherboard: stap 5, afbeelding 1 van 1
    • Remove the 2 Torx (T6) screws.

    Vraag FixBot

    Voeg opmerking toe

  6. Xbox One Elite Controller (Model 1698) Motherboard Replacement, Desolder wires from motherboard: stap 6, afbeelding 1 van 2 Xbox One Elite Controller (Model 1698) Motherboard Replacement, Desolder wires from motherboard: stap 6, afbeelding 2 van 2
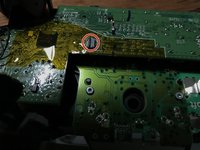
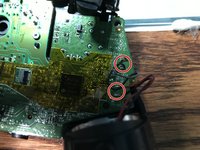
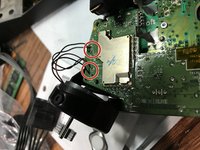
    • Desolder the 4 wires on each side, these control the vibrations and the RT LT.

    Vraag FixBot

    Voeg opmerking toe

  7. Xbox One Elite Controller (Model 1698) Motherboard Replacement, Remove the motherboard: stap 7, afbeelding 1 van 2 Xbox One Elite Controller (Model 1698) Motherboard Replacement, Remove the motherboard: stap 7, afbeelding 2 van 2
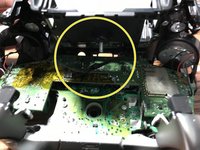
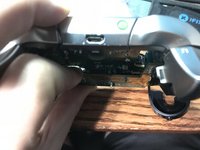
    • Pull up from the "top" side of the controller on the daughterboard.

    Vraag FixBot

    Voeg opmerking toe

Conclusie

To reassemble your device, follow these instructions in reverse order.

Annuleren: ik heb deze handleiding niet afgemaakt.

9 andere personen hebben deze handleiding voltooid.

EasyAsABC123

Lid sinds: 01/22/10

2.557 Reputatie

5 handleidingen geschreven

1Gids Commentaar

50 minutes? half of that tops

glenn.fowell - Antwoord Deel

Voeg opmerking toe

Weergavestatistieken:

Afgelopen 24 uren: 8

Afgelopen 7 dagen: 28

Afgelopen 30 dagen: 120

Altijd: 19,266