Ga door naar hoofdinhoud

WRS315SDHW Condenser Fan Replacement

Wat je nodig hebt

  1. WRS315SDHW Condenser Fan Replacement, Safety precautions: stap 1, afbeelding 1 van 1
    • Before you begin your repair, perform the following:

    • Turn off your main water supply

    • Unplug your device

  2. WRS315SDHW Condenser Fan Replacement, Unfasten the rear panel: stap 2, afbeelding 1 van 3 WRS315SDHW Condenser Fan Replacement, Unfasten the rear panel: stap 2, afbeelding 2 van 3 WRS315SDHW Condenser Fan Replacement, Unfasten the rear panel: stap 2, afbeelding 3 van 3
    • Use a 1/4 inch socket wrench, or a flathead screwdriver, to remove the seven 16.2 mm-long screws securing the rear panel.

    • Use a 1/4 inch socket wrench to loosen the screw securing the water hose enough for the rear panel to freely move.

  3. WRS315SDHW Condenser Fan Replacement, Remove the rear panel: stap 3, afbeelding 1 van 3 WRS315SDHW Condenser Fan Replacement, Remove the rear panel: stap 3, afbeelding 2 van 3 WRS315SDHW Condenser Fan Replacement, Remove the rear panel: stap 3, afbeelding 3 van 3
    • Pull the rear panel off the chassis to remove it.

  4. WRS315SDHW Condenser Fan Replacement, Disconnect the condenser fan: stap 4, afbeelding 1 van 2 WRS315SDHW Condenser Fan Replacement, Disconnect the condenser fan: stap 4, afbeelding 2 van 2
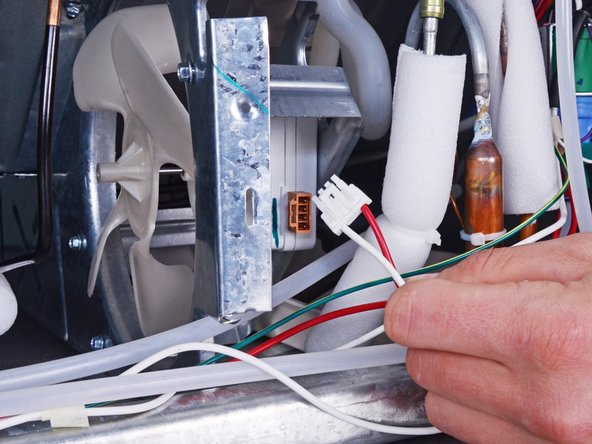
    • Press the tab on the condenser fan cable connector to unclip it.

    • Pull the connector straight out of its slot to remove it.

  5. WRS315SDHW Condenser Fan Replacement, Remove the condenser fan: stap 5, afbeelding 1 van 3 WRS315SDHW Condenser Fan Replacement, Remove the condenser fan: stap 5, afbeelding 2 van 3 WRS315SDHW Condenser Fan Replacement, Remove the condenser fan: stap 5, afbeelding 3 van 3
    • Put on gloves before continuing, as the sheet metal and the fan itself are sharp.

    • Pull the condenser fan straight off its peg to remove it.

  6. WRS315SDHW Condenser Fan Replacement, Unfasten the condenser fan motor: stap 6, afbeelding 1 van 1
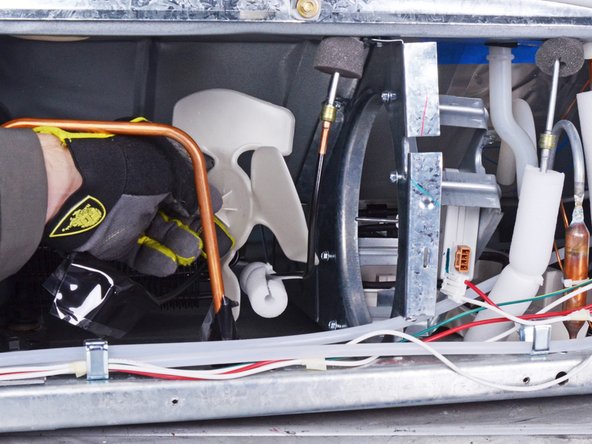
    • Use a 1/4 inch socket wrench to remove the four 16.5 mm-long screws securing the condenser fan motor to the chassis.

  7. WRS315SDHW Condenser Fan Replacement, Remove the motor: stap 7, afbeelding 1 van 3 WRS315SDHW Condenser Fan Replacement, Remove the motor: stap 7, afbeelding 2 van 3 WRS315SDHW Condenser Fan Replacement, Remove the motor: stap 7, afbeelding 3 van 3
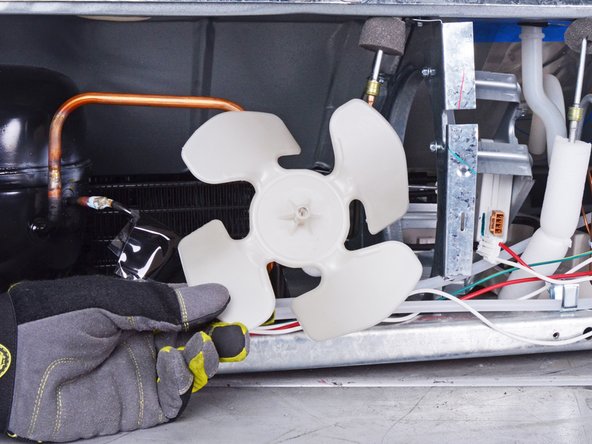
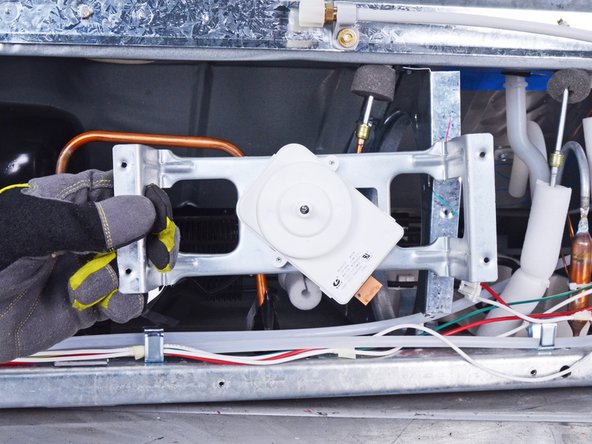
    • Rotate the motor housing through its slot in the chassis.

    • Remove the motor.

Conclusie

To reassemble your device, follow these instructions in reverse order.

Take your e-waste to an R2 or e-Stewards certified recycler.

Repair didn’t go as planned? Ask our Answers community for help.

Één andere persoon heeft deze handleiding voltooid.

nicO

Lid sinds: 04/14/15

15.927 Reputatie

88 handleidingen geschreven

Team

Global Fixers Lid van Global Fixers

Community

35 Leden

603 handleidingen geschreven

0 opmerkingen

Voeg opmerking toe

Weergavestatistieken:

Afgelopen 24 uren: 1

Afgelopen 7 dagen: 1

Afgelopen 30 dagen: 4

Altijd: 105