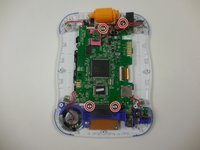
Ga door naar hoofdinhoud

Vtech Innotab 3 Button Replacement

Wat je nodig hebt

  1. Vtech Innotab 3 Button Replacement, Rear Panel: stap 1, afbeelding 1 van 3 Vtech Innotab 3 Button Replacement, Rear Panel: stap 1, afbeelding 2 van 3 Vtech Innotab 3 Button Replacement, Rear Panel: stap 1, afbeelding 3 van 3
    • Slide the battery compartment door lock down.

    • While still holding the battery compartment lock down, slide the two battery doors outwards on either side of the device.

    • Carefully remove the batteries from the battery compartment.

    • The standard option for the InnoTab 3 is four AA batteries. Vtech also offers a rechargeable battery online, but both battery options are removed from the device the same way.

  2. Vtech Innotab 3 Button Replacement: stap 2, afbeelding 1 van 1
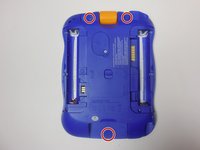
    • Remove the six 7.6mm screws found in the battery compartment using a PH00 screwdriver.

  3. Vtech Innotab 3 Button Replacement: stap 3, afbeelding 1 van 3 Vtech Innotab 3 Button Replacement: stap 3, afbeelding 2 van 3 Vtech Innotab 3 Button Replacement: stap 3, afbeelding 3 van 3
    • There are three hidden screws on the back of the device, two at the top and one near the bottom.

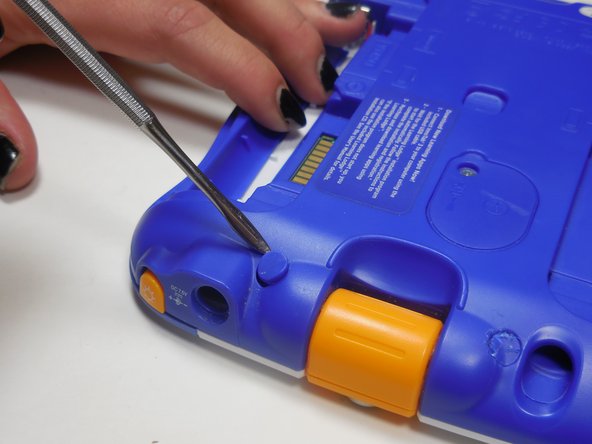
    • Using a nylon or metal spudger, remove the three caps that hide the screws.

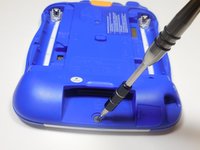
    • Remove the 5mm screw near the bottom and the two 7.6mm at the top using a PH00 screwdriver.

  4. Vtech Innotab 3 Button Replacement: stap 4, afbeelding 1 van 1
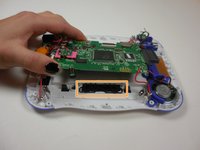
    • Carefully separate the back panel from the front panel revealing the motherboard connected to the front panel.

  5. Vtech Innotab 3 Button Replacement, Button Repair: stap 5, afbeelding 1 van 3 Vtech Innotab 3 Button Replacement, Button Repair: stap 5, afbeelding 2 van 3 Vtech Innotab 3 Button Replacement, Button Repair: stap 5, afbeelding 3 van 3
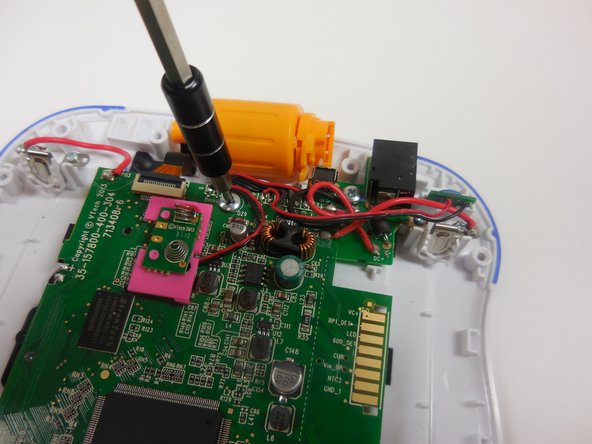
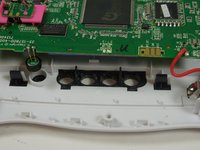
    • Remove the four 7.6 mm screws using a PH00 screwdriver.

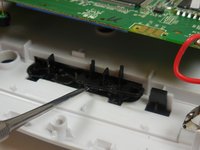
    • Lift the circuit board up to give yourself room to remove the buttons.

  6. Vtech Innotab 3 Button Replacement: stap 6, afbeelding 1 van 3 Vtech Innotab 3 Button Replacement: stap 6, afbeelding 2 van 3 Vtech Innotab 3 Button Replacement: stap 6, afbeelding 3 van 3
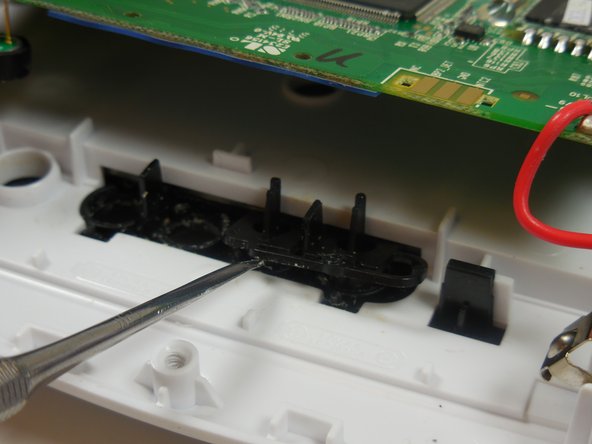
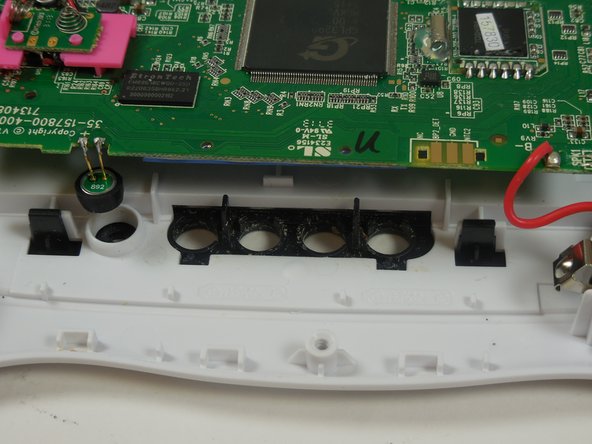
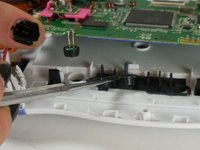
    • Using a nylon or metal spudger, lift up the buttons to remove them from their holding. they should just pop out of place.

    • The buttons are joined together in pairs, be sure not to break them apart during removal.

Conclusie

To reassemble your device, follow these instructions in reverse order.

Zach Diviney

Lid sinds: 03/11/15

419 Reputatie

4 handleidingen geschreven

Team

Colorado Springs, Team 5-4, Panko Spring 2015 Lid van Colorado Springs, Team 5-4, Panko Spring 2015

UCCS-PANKO-S15S5G4

3 Leden

10 handleidingen geschreven

0 opmerkingen

Voeg opmerking toe

Weergavestatistieken:

Afgelopen 24 uren: 0

Afgelopen 7 dagen: 1

Afgelopen 30 dagen: 11

Altijd: 545