Deze versie kan foutieve bewerkingen bevatten. Schakel over naar de recentste gecontroleerde momentopname.
Wat je nodig hebt
-
Deze stap is niet vertaald. Help het te vertalen
-
Unscrew the two 4.0mm Phillips head screws found near the ports at the bottom of the device using a PH #00 screwdriver.
-
-
Deze stap is niet vertaald. Help het te vertalen
-
Slide the plastic prying tool in between the front and back panel and pry them apart on all 4 sides.
-
It may be easiest to start on one of the sides, and work your way around the device. The bottom, with the ports, is the most difficult side and can be saved for last.
-
-
-
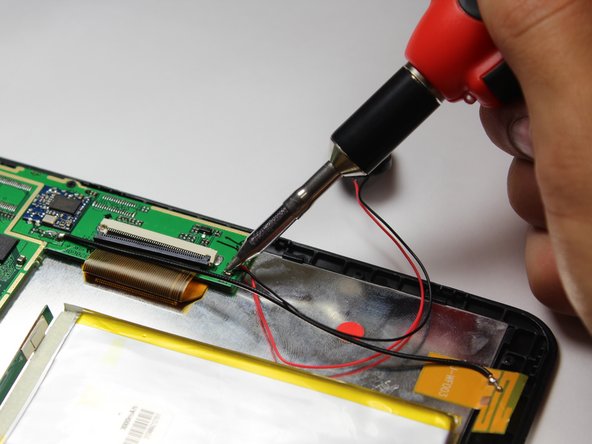
Deze stap is niet vertaald. Help het te vertalen
-
Desolder the two connection points at the black and red wires.
-


Team

Cal Poly, Team 10-41, Amido Fall 2014 Lid van Cal Poly, Team 10-41, Amido Fall 2014
CPSU-AMIDO-F14S10G41
4 Leden
12 handleidingen geschreven