Ga door naar hoofdinhoud
Word lid van de reparatiegemeenschap - Account aanmaken

USB/Auxiliary Port

Wat je nodig hebt

  1. USB/Auxiliary Port, Outer Case: stap 1, afbeelding 1 van 2 USB/Auxiliary Port, Outer Case: stap 1, afbeelding 2 van 2
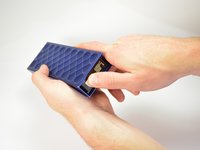
    • Using the standard metal spudger, begin by prying at the bottom of the plain rubber end cap (the end without the USB or auxiliary input).

    Vraag FixBot

    Voeg opmerking toe

  2. USB/Auxiliary Port: stap 2, afbeelding 1 van 1
    • Continue prying around the end panel, prying at different points until the entire panel is out of its seating.

    • Carefully remove the end panel.

    • The tabs which connect the panel are on the short sides.

    • WARNING: you will likely cause cosmetic damage to the end cap.

    Vraag FixBot

    Voeg opmerking toe

  3. USB/Auxiliary Port: stap 3, afbeelding 1 van 1
    • Slide out the rubber foot located on the bottom of the case.

    Vraag FixBot

    Voeg opmerking toe

  4. USB/Auxiliary Port: stap 4, afbeelding 1 van 1
    • Using a T6 bit, remove the flat topped 5mm screw located on the bottom of the casing, underneath the rubber foot.

    • This is the only flat topped screw in the speaker, so keep track of which one it is.

    Vraag FixBot

    Voeg opmerking toe

  5. USB/Auxiliary Port: stap 5, afbeelding 1 van 3 USB/Auxiliary Port: stap 5, afbeelding 2 van 3 USB/Auxiliary Port: stap 5, afbeelding 3 van 3
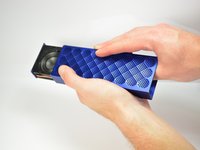
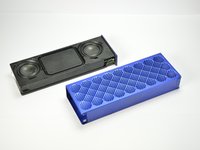
    • Push against the side without end cap to slide the internal components out of the case.

    • While holding the metal outset casing with one hand, press on the black inner plastic casing with your thumb.

    • It will be very difficult the first time. There is a rubber seal on the outside of the plastic inner case that creates a lot of friction with the metal outer case.

    Vraag FixBot

    Voeg opmerking toe

  6. USB/Auxiliary Port, USB/Auxiliary Port: stap 6, afbeelding 1 van 2 USB/Auxiliary Port, USB/Auxiliary Port: stap 6, afbeelding 2 van 2
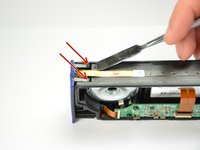
    • Using the standard metal spudger, carefully pry up the top 2 plastic tabs which hold the exterior button and port cover onto the interior plastic frame.

    Vraag FixBot

    Voeg opmerking toe

  7. USB/Auxiliary Port: stap 7, afbeelding 1 van 1
    • Using the classic metal spudger, pry up the bottom 2 tabs attaching the other side of the button panel.
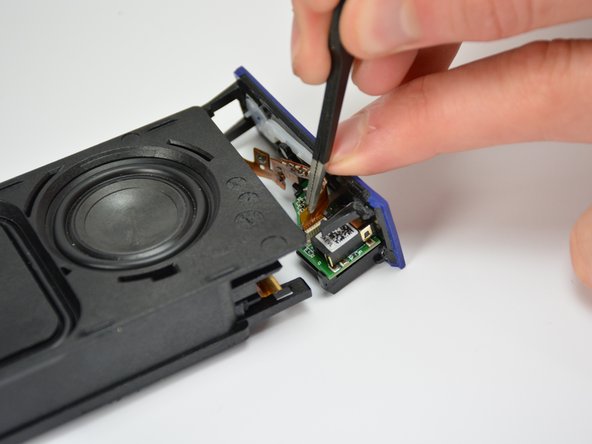
    • It should come off after prying up the first tab.

    Vraag FixBot

    Voeg opmerking toe

  8. USB/Auxiliary Port: stap 8, afbeelding 1 van 3 USB/Auxiliary Port: stap 8, afbeelding 2 van 3 USB/Auxiliary Port: stap 8, afbeelding 3 van 3
    Gereedschap gebruikt in deze stap:
    Tweezers
    $4.99
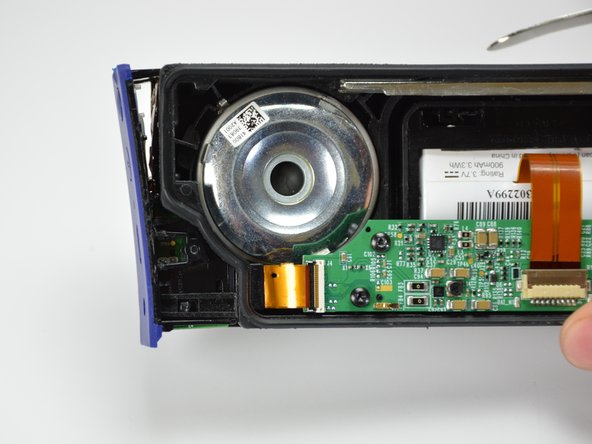
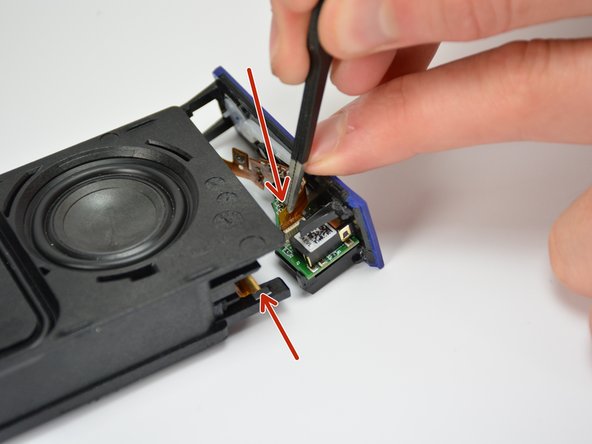
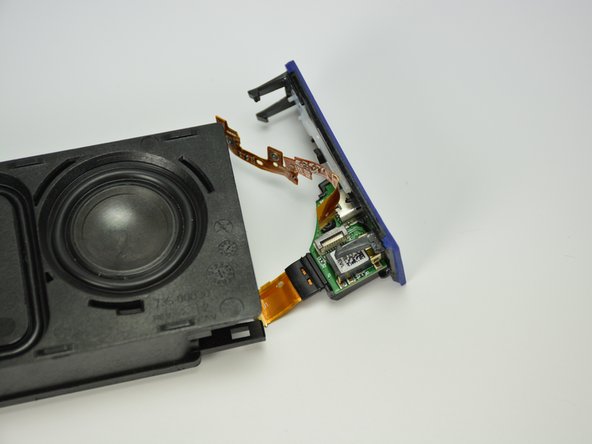
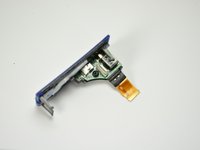
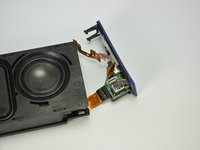
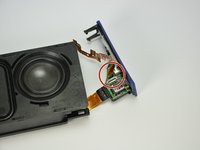
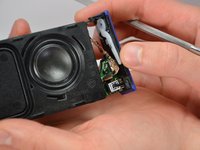
    • Carefully lift out the end panel.

    • Unplug both the connection ribbon and the ZIF ribbon using tweezers or your hands.

    • There is a bit of glue to hold the connection ribbon down.

    Vraag FixBot

    Voeg opmerking toe

  9. USB/Auxiliary Port: stap 9, afbeelding 1 van 1
    • Remove the 5mm T6 screw holding the port assembly onto the end cap.

    • Unlike the flat top screw holding the metal housing, these screws are roundtop.

    Vraag FixBot

    Voeg opmerking toe

  10. USB/Auxiliary Port: stap 10, afbeelding 1 van 1
    • Remove the old port assembly from the end cap.

    • Alternate Reassembly required, read on.

    Vraag FixBot

    Voeg opmerking toe

  11. USB/Auxiliary Port: stap 11, afbeelding 1 van 1
    • Disconnect the Motherboard connection ribbon from the motherboard.

    • The ribbon should no longer be connected at either end.

    Vraag FixBot

    Voeg opmerking toe

  12. USB/Auxiliary Port: stap 12, afbeelding 1 van 1
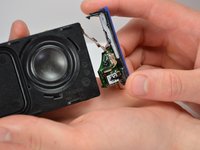
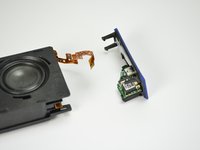
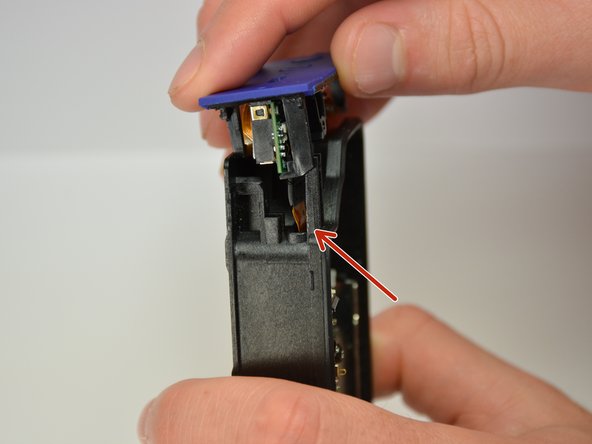
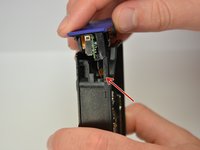
    • Very carefully pull the motherboard connection ribbon through the plastic casing, removing it from the plastic casing.

    Vraag FixBot

    Voeg opmerking toe

  13. USB/Auxiliary Port: stap 13, afbeelding 1 van 1
    • Insert the connection ribbon into its ZIF connection port on the bottom of the new port assembly

    • ZIF connectors are delicate and often give beginners trouble, search for ZIF connector tips on the web.

    Vraag FixBot

    Voeg opmerking toe

  14. USB/Auxiliary Port: stap 14, afbeelding 1 van 2 USB/Auxiliary Port: stap 14, afbeelding 2 van 2
    • Position the new port assembly on the end cap and reinsert the 5mm T6 screw.

    • The rubber insulation around the motherboard connector should help hold the ZIF connector in place after the screw has been reinserted.

    Vraag FixBot

    Voeg opmerking toe

  15. USB/Auxiliary Port: stap 15, afbeelding 1 van 2 USB/Auxiliary Port: stap 15, afbeelding 2 van 2
    • Reconnect the button ribbon connector on the top of the port assembly.

    Vraag FixBot

    Voeg opmerking toe

  16. USB/Auxiliary Port: stap 16, afbeelding 1 van 2 USB/Auxiliary Port: stap 16, afbeelding 2 van 2
    • Reconnect the endcap to the plastic housing.

    • While you reconnect the endcap to the plastic housing, carefully position the ribbon slide through the ribbon slit and into the plastic casing.

    Vraag FixBot

    Voeg opmerking toe

  17. USB/Auxiliary Port: stap 17, afbeelding 1 van 1
    • Snap the end cap back onto the inner plastic casing and reconnect the ZIF ribbon to the motherboard.

    • Finish reassembling in descending order starting at step 5.

    Vraag FixBot

    Voeg opmerking toe

Conclusie

To reassemble your device, follow steps 1 through 5 in reverse order.

Annuleren: ik heb deze handleiding niet afgemaakt.

5 andere personen hebben deze handleiding voltooid.

Noah Sadler

Lid sinds: 04/01/15

548 Reputatie

2 handleidingen geschreven

Team

Cal Poly, Team 12-1, Lancaster Spring 2015 Lid van Cal Poly, Team 12-1, Lancaster Spring 2015

CPSU-LANCASTER-S15S12G1

5 Leden

11 handleidingen geschreven

1Gids Commentaar

Can anyone at all tell us where we can definitely purchase the USB/Auxiliary Port and its Motherboard to Aux Port ZIF Ribbon?

Thanks in advance.

barrysum - Antwoord Deel

Voeg opmerking toe

Weergavestatistieken:

Afgelopen 24 uren: 2

Afgelopen 7 dagen: 18

Afgelopen 30 dagen: 80

Altijd: 15,855