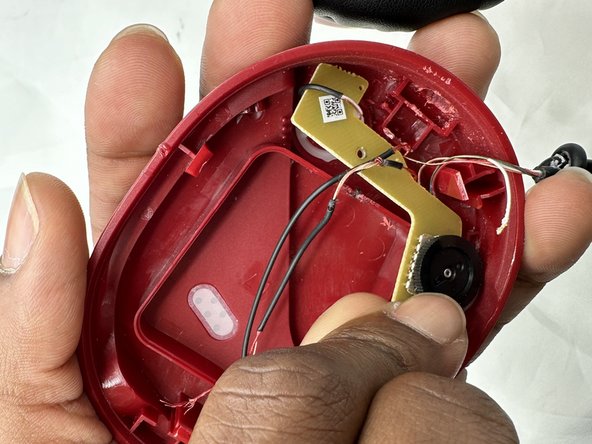
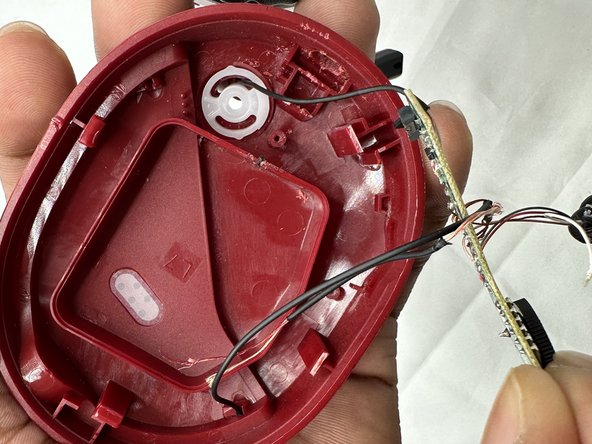
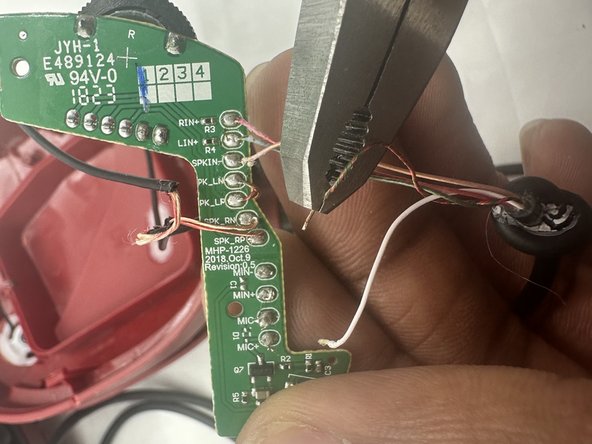
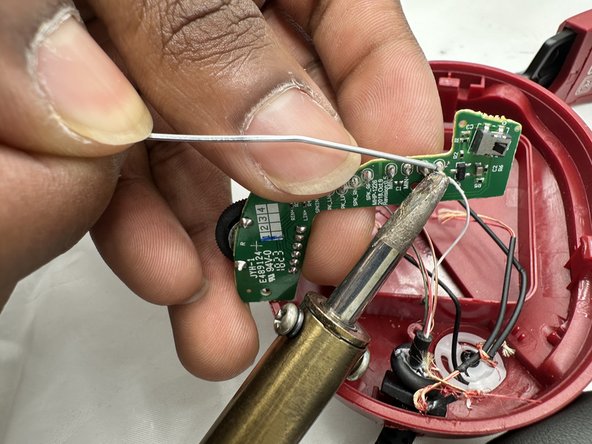
Ga door naar hoofdinhoud

Turtle Beach Recon 70P Motherboard Replacement

Wat je nodig hebt

  1. Turtle Beach Recon 70P Motherboard Replacement, Motherboard: stap 1, afbeelding 1 van 3 Turtle Beach Recon 70P Motherboard Replacement, Motherboard: stap 1, afbeelding 2 van 3 Turtle Beach Recon 70P Motherboard Replacement, Motherboard: stap 1, afbeelding 3 van 3
    • Remove the left ear pad by following the steps from the ear pad replacement guide.

    • Use a spudger to pry up and remove the black plastic cover.

  2. Turtle Beach Recon 70P Motherboard Replacement: stap 2, afbeelding 1 van 3 Turtle Beach Recon 70P Motherboard Replacement: stap 2, afbeelding 2 van 3 Turtle Beach Recon 70P Motherboard Replacement: stap 2, afbeelding 3 van 3
    • Use a Phillips screwdriver to remove the two 5 mm screws that secure the motherboard.

  3. Turtle Beach Recon 70P Motherboard Replacement: stap 3, afbeelding 1 van 3 Turtle Beach Recon 70P Motherboard Replacement: stap 3, afbeelding 2 van 3 Turtle Beach Recon 70P Motherboard Replacement: stap 3, afbeelding 3 van 3
    • You may need to move the speaker so it does not block the path of the motherboard.

    • Remove the motherboard from the headset by up and away from the volume wheel.

    • Take care not to strain the connections.

  4. Turtle Beach Recon 70P Motherboard Replacement: stap 4, afbeelding 1 van 2 Turtle Beach Recon 70P Motherboard Replacement: stap 4, afbeelding 2 van 2
    • Before replacing the motherboard, use flush cutters to cut each wire connected to the motherboard.

    • Cut the wires as close as possible to their connections.

    • Take note of how each component connects to the motherboard.

  5. Turtle Beach Recon 70P Motherboard Replacement: stap 5, afbeelding 1 van 2 Turtle Beach Recon 70P Motherboard Replacement: stap 5, afbeelding 2 van 2
    • Prepare your replacement motherboard before continuing.

    • Solder each wire of the new motherboard in the same spots they were originally found.

    • Soldering irons can cause burns, fires and device damage. Always solder in a well-ventilated area.

Conclusie

To reassemble your device, follow these instructions in reverse order.

Austin Hance

Lid sinds: 02/05/24

531 Reputatie

4 handleidingen geschreven

0 opmerkingen

Voeg opmerking toe

Weergavestatistieken:

Afgelopen 24 uren: 0

Afgelopen 7 dagen: 2

Afgelopen 30 dagen: 16

Altijd: 52