Inleiding
This guide outlines the steps to replace the thumb sticks on your REACT-R controller, Worn or drifting thumb sticks can greatly affect your gaming experience, making replacements necessary to maintain accuracy and responsiveness.
For this procedure, you will need a Phillips #00 screwdriver. Follow this guide carefully to replace the thumb sticks to your REACT-R controller.
Wat je nodig hebt
-
-
Place the controller face down.
-
Use a Phillips #00 screwdriver to remove the seven 9.2 mm Phillips screws that secure the rear case.
-
Use both hands to lift the backplate away from the controller.
 Vraag FixBot
-
-
-
-
Use a Phillips #00 to remove the four 9.2 mm screws that secure the motherboard.
-
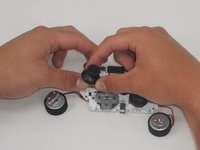
Gently lift the motherboard up and out of the chassis.
-
-
-
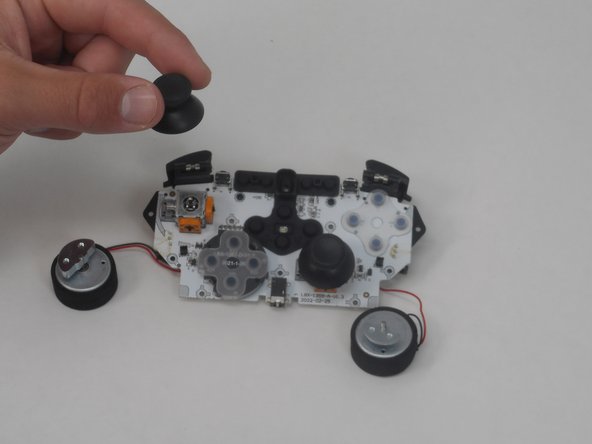
Gently twist off each thumb stick, using one hand to secure the base, and the other to twist off the thumb stick.
-


To reassemble your device, follow these instructions in reverse order.
Annuleren: ik heb deze handleiding niet afgemaakt.
4 andere personen hebben deze handleiding voltooid.
Team

University of Memphis, Team 1-5, Sneed Spring 2024 Lid van University of Memphis, Team 1-5, Sneed Spring 2024
UM-SNEED-S24S1G5
4 Leden
6 handleidingen geschreven